


Ableton templates and FL Studio templates are my favorite workflow hack.
With a well-designed template, you can automate as many utility tasks as you want.
And as a bonus, you’ll feel inspired as soon as you open up your DAW. So what should you look out for? What should you include in a template, and how do you build one? That’s what we’ll cover in this guide!
Together, we’ll look at:
- What a DAW template is
- Why you should start every project with a template
- How to create one in FL Studio and Ableton Live
- Why you should create several templates 🧐
- What to include (or not) in your template 🔥
Let’s dive in 👇
Table of contents
- What is are FL Studio Templates and Ableton Templates…? 🤔
- Ableton Templates And FL Studio Templates: Pros and Cons ⚖️
- Trick #1: Think About The Purpose of Your Template 🎯
- Trick #2: Choose Your Preferred Project Settings ⚙️
- Trick #3: Set Your Default Channels/Tracks in Your FL Studio Templates 📂
- Trick #4: Color-Code your Channels 🎨
- Trick #5: Group Tracks Together 🔗
- Trick #6: Pre-Load Plugins 🔄
- Trick #7: Save Effect Racks 🎛️
- Trick #8: Create Bus, Sends, and Return Tracks 🚌
- Trick #9: Create 1 to 3 Inspiring Starting Points 💡
- That’s It For FL Studio Templates and Ableton Templates! 🙏
What is are FL Studio Templates and Ableton Templates…? 🤔
A template is simply what you see when you open up your DAW. You can create as many different templates as you want. You can then choose which one opens up by default.
For example, FL Studio templates look like this:

You simply have a limiter on the master, and that’s it.
In Ableton Live, the default view is called “Default Set”. Any other Ableton templates you save are located in the “Templates” folder:

However, Ableton templates and FL Studio templates are fully customizable!
That’s the beauty of templates. You can make them fit your exact needs.
For example, my Drum and Bass template looks a bit like this:

You can see that tracks are named and colored. Some are grouped together. The BPM is set to 174. But more on all of that later.
To create a template, all you have to do is start a session. Organize it as you want and save it:

In Ableton Live, you can save a session as your Default Set or as a template.
In FL Studio, make sure you save your template in the default templates folder:

That way, your templates will show up in the templates section. You can then choose the one you want as a default:

Ableton Templates And FL Studio Templates: Pros and Cons ⚖️
The goal of a template is essentially to speed up your workflow.
You want to automate as many tasks as possible. The idea is to translate your ideas from brain to DAW as fast as possible. And you want to feel inspired when you open your DAW!
With a perfectly-crafted template, you can:
- save time naming tracks
- save time loading up plugins
- write and finish songs faster
- feel inspired when you open up your DAW
- and much more 🤩
However, there is also a downside.
Templates can stifle your creativity. With a heavy template, you might not leave room for spontaneity. And there will be less chance for “happy accidents”!

Your DAW will also load up slower the heavier your template.
So before diving further, remember that these are just ideas to try out.
Try to strike the right balance between automation and creativity.
Don’t feel like you need to implement everything! Pick and choose what works for you.
Trick #1: Think About The Purpose of Your Template 🎯
Before building your template, think about its purpose.
Are you going to use this template for a specific genre? Or for sketching ideas?
Depending on the objective, your template will look drastically different. For example, this is what my mastering template looks like:

As you can see, it’s pretty straightforward. I have my track and a reference track slot. I then have a few EQs on the mix bus to isolate regions.
Here are some ideas for different types of Ableton templates and FL Studio templates:
- By genre. You might want a dedicated template for each if you produce in different genres. For example, a drum and bass template will look quite different from a trap template.
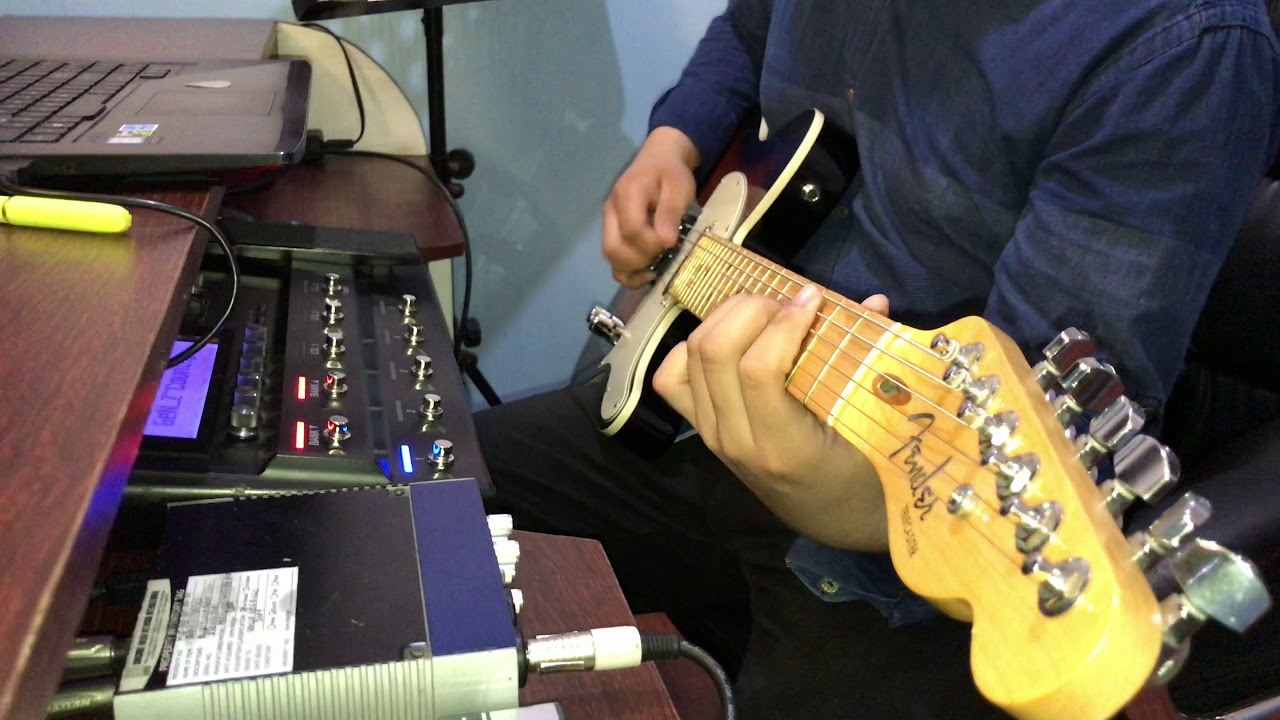
- Sketching. I start most of my tracks on electric guitar. So I have a template for that purpose. All I need to do is plug in my guitar, and all my amp and effects settings are ready. If you start your tracks with samples, you can design a template around that process.
- Collabs. If you do a lot of collaborations, it might be worth designing a dedicated template. For example, the template can be optimized for working with stems.
- Sound design sessions. Here at EDMProd, we’re big advocates of designing your own sounds. You should even dedicate entire production sessions towards sound design (imo). Here, a dedicated template with your favorite synth is helpful. You can also set up tracks to easily record and re-sample your sounds.
Interested in different types of templates? We explore this more in detail in this video:
Trick #2: Choose Your Preferred Project Settings ⚙️
So, you’ve decided the purpose of your template. Now let’s dive into the meat of the article. FL Studio templates and Ableton templates can include any number of settings.
Typically, these will be specific to the genre you produce.
Here are some pointers to get you started:
- BPM. Self-explanatory really 😅 Just set your preferred default BPM:

- Time Markers. I like to use default time markers to structure my tracks. The length and number of markers are highly dependent on your genre. For me, it looks something like this:

- Dummy Tracks. If you need something more visual, you can use dummy tracks. These are simply empty tracks that structure your song:

- Buffer length. This depends on if you’re working with samples or recording audio. Typically, you will need a lower buffer length when recording live instruments or vocals:

- Display, Auto-save, and more. Check your general project settings and make sure they suit you. This includes the window resolution, auto-save settings, and more:

- Make sure your have your favorite shortcuts activated. We have full dedicated guides on FL Studio shortcuts and Ableton Live shortcuts if you’re interested 😉
Trick #3: Set Your Default Channels/Tracks in Your FL Studio Templates 📂
Next, let’s look at Channel and Mixer Tracks. These will have different names and locations based on your DAW. But the idea is the same.
Basically, you want to structure your project so that your workflow is intuitive.
My tracks are broken down into 5 main groups:
- Drums
- Bass
- Synths (leads)
- Pads
- Vocals
- Others
- FX
This means my playlist looks something like this:

And my mixer tracks look something like this:

If you always use the same elements, you can already name them.
For example, I will always have a kick, snare, hi-hat etc. So it makes sense to already name those tracks. For more general-purpose tracks like synths, I leave a default name and rename them along the way.
Trick #4: Color-Code your Channels 🎨
For me, this one is an absolute must. But I’ve seen other producers not use colors in their projects. So it’s really up to you.
Personally, colors help me navigate my project faster. I can immediately access certain tracks because I know my drums are green, leads are yellow, bass is red etc.
Trick #5: Group Tracks Together 🔗
Grouping tracks together is a way to keep your project clean.
In FL Studio, simply right click on a playlist track and select “Group with above track”:

This way, you can easily expand or collapse entire sections. For Ableton templates, select the tracks you want to group with CTRL. Then, right-click and select “Group Tracks”:

Trick #6: Pre-Load Plugins 🔄
Next, let’s look at plugins. This is where things get a bit more… controversial.
If you want, you can load up your FL Studio templates or Ableton templates with plugins. One example is to have an EQ already inserted as your first effect on certain tracks.
Chances are you will need to EQ most sounds. So why not have the EQ already loaded? You could even go one step further and set your EQ to a high-pass:

Now, it can be tempting to load up an EQ and a compressor on every single track. But keep in mind two things:
- The more plugins you put in your template, the longer it will take to load
- The more constraints you add by adding plugins, the less room you have for creativity
This is why you need to find the right balance. Personally, I only load up EQ plugins on a select number of tracks. I also have a utility plugin on my master which lets me easily switch to mono.
Note that you can also save default presets for plugins.
This way, whenever you open a plugin, you’ll have specific settings loaded up. For example, you can set an EQ with a low-cut and a high-shelf, and save it as default:

Next time you open Channel EQ, the same settings will load.
Trick #7: Save Effect Racks 🎛️
For Ableton templates, you can also save effect racks.
Technically, this isn’t part of a template. But it can be a huge time saver.
First, load up an Audio Effect Rack:

Then, drag all the effects you want into it. This could include EQ, compression, reverb, delay, and more. Finally, click save, and name your effect rack:

If you want, you can pre-load bus tracks with specific effect racks. But more on that in the next point 😉
Trick #8: Create Bus, Sends, and Return Tracks 🚌
Bus tracks are a way to group and process tracks together. Usually, you will route all your drum sounds into one bus track. This lets you add EQ, compression, and more to all your drum sounds. Resulting in a more cohesive and “glued-together” sound.
Do you find yourself constantly setting up the same bus tracks? Why not set them up in your template?

For example, all my drums are already routed to a bus. I can then pre-load EQ, compression, and saturation on my drum bus.
The same goes for sends and returns.
If you don’t know what sends and returns are, check out our latest mixing mistakes article.
I usually have both reverb and delay return tracks set up. I have my favorite reverb and delay plugins loaded up, with some EQ following. That way, I can easily apply those effects to any sound in just a few clicks.
Trick #9: Create 1 to 3 Inspiring Starting Points 💡
Finally, Ableton templates and FL Studio templates need to inspire you.
That’s why it’s good to set up a few “inspiration” starting points. These are ways you like to start your songs.
In my case, I usually start songs on guitar or piano. That’s why my FL Studio templates have:
- 1 channel for a guitar input + recording set up
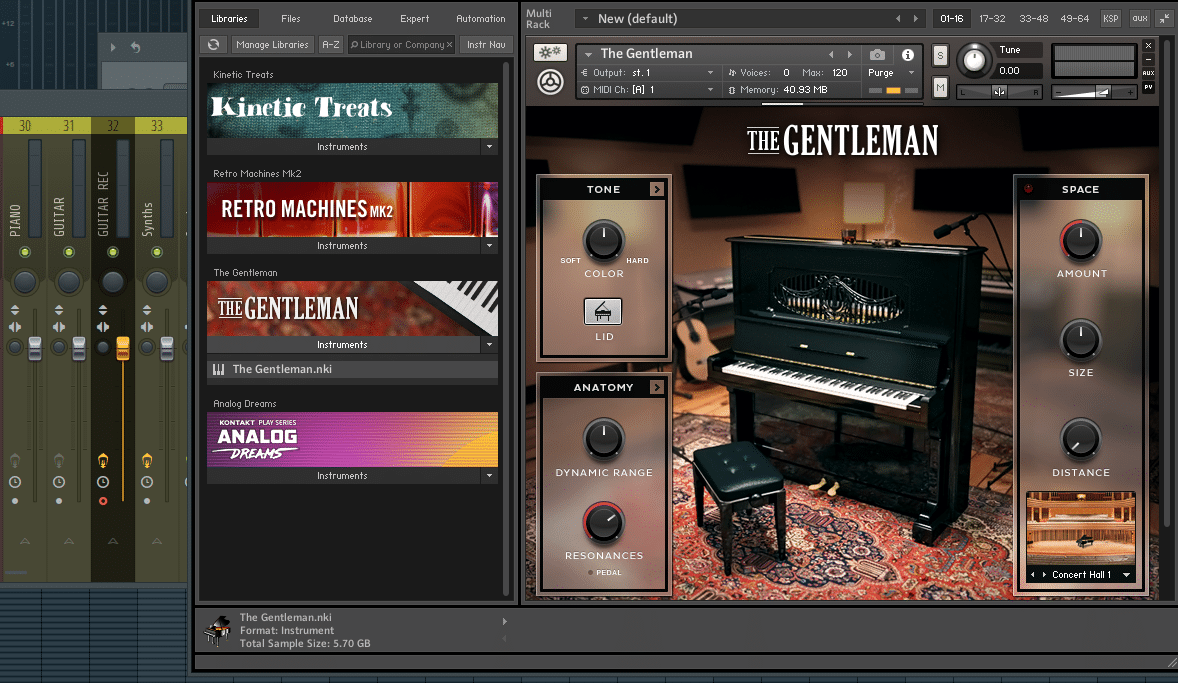
- 1 channel with Kontakt and The Gentleman (piano plugin) loaded
That way, I can directly jam and demo ideas:
In your case, this might be a sampler or a drum rack. Whatever the case may be, it’s good to be able to lay down ideas quickly.
Along the same lines, you can also pre-load certain beats.
Let’s say you produce mostly 4-on-the-floor House music. It might make sense for you to have Ableton templates loaded with a beat. That way, you already have a “Kick + Snare + Hats” beat playing when you open Ableton. You can then directly focus on chords or melody.
That’s It For FL Studio Templates and Ableton Templates! 🙏
That’s it for this guide! Hopefully, I’ve convinced you of the utility of a template 😊
As a last word of advice, make sure to update your template. As your skills improve, adapt and change your templates. Likewise, if a template doesn’t inspire you anymore, change things up!
Did I miss out on anything? What are your favorite template features? Let me know over at [email protected]
