


Want to learn everything you need to know about mixing from experienced producers? Check out Mixing For Producers.
What is mixing?
Is it an art form?
Is it a science?
There’s no consensus, but people will generally agree it’s a combination of both.
Mixerman in his book Zen and the Art of Mixing defines a mix as:
“The final 2 track (left and right) presentation of a production (which contains the performance of an arrangement of a song).”
Mixerman (Zen and the Art of Mixing)
As you can see, mixing (or a mixdown) is a very broad and multi-faceted process – it’s not something you can just pick up overnight. There’s a reason memes like this exist in the world:

That being said, we will aim to cover the whole process in this article, so you’ll be better equipped when it comes to your own tracks.
Doesn’t matter whether you use FL Studio, Ableton Live, Logic Pro X or any DAW – this knowledge is universal.
This is a big article, so feel free to bookmark it and read it over a few days. The best part is that you’ll be much more equipped for mixing once you finish.
Let’s take a look.
Note: there’s a lot of studio jargon throughout this article, so if anything confuses you, check out our handy glossary of terms.
Before we get into the article, make sure to grab our FREE EQ cheat sheet.
Electronic Dance Music is Different
If you’ve done a Google search on ‘mixing’ or ‘mixdown’, you’ll come across a lot of great resources which will help you understand the art form from a practical perspective.
The only downside? A lot of it isn’t tailored towards electronic music, which is often created in a different environment. Here are a few general differences before we get into the meat of this topic.
There is More Sonic Control Earlier in the Process
Recording a traditional band can be a difficult and lengthy process. There are many factors:
- The studio/recording environment
- Mic placement
- Mic choice
- Pre-amps & input gain
- Direct or indirect recording
- Quality of recording take
Unless you are recording your own instruments, vocals and/or sounds, these things aren’t relevant. You’re usually working with synths or samples that are already recorded well – that’s why a kick drum sample sounds so good.
Additionally, these sounds are typically already processed to sound even, loud and balanced. And if they aren’t, you can chuck an EQ or some processing on to sort it out, with minimal fuss.
That’s something you can’t do if you’re in a band that’s recording themselves – at least not to the same level.
Synthesized Sounds
As we just mentioned, electronic musicians and producers work with synthesized sounds a lot. These sounds have constant waveforms and volume envelope control, meaning you can shape the exact dynamics of the sound before you’re even thinking about mixing.
This is even truer when working with digital sounds, as opposed to analogue ones – they are crisp, tight and exact.
Compression and EQ aren’t always necessities for these types of sounds – you can technically roll with what’s coming out of the synth if it sounds good.
Louder Sounds & More Compression
Most EDM and electronic music in 2019 has a much louder average volume in comparison to other genres. There are some exceptions (like ambient music) but apart from those, this holds true.
Squashing the living daylight out of a snare in a country tune might sound really bad, but in a riddim tune, it’s no big deal.
So advice like ‘don’t use a ratio higher than 4:1’ or similar cautionary nuggets of apparent wisdom should be taken with a grain of salt when it comes to electronic music.
Not sure what ‘ratio’ means? Stay tuned.
Fewer Errors to Fix
Because we as producers use MIDI and quantization to get everything ‘on the grid’, we don’t have to do as much surgical audio processing or manipulation to get things to sound better.
In fact, it’s usually the opposite. Producers and engineers are actively trying to add more of a ‘human feel’ by purposefully offsetting quantized notes and rhythms when they sound too cold and stale. Or trying to warm up a digital sound with subtle distortion.
So corrective processing isn’t as much of an issue when it comes to EDM.
You Work With More Tracks
Unlimited options usually mean many producers will have 50-100 tracks in one session. This is very different to 8 tracks of drums, a bass track, 2 stereo guitar tracks and a couple of production FX.
What’s more confusing is that some of the sounds aren’t ‘standard’, meaning there are no best practices for working with them.
A DIY Mentality
You’ll be hard-pressed finding a band that records, produces and engineers their own records (unless your name is Kevin Parker).
What do I mean?
I mean electronic music producers typically take care of every step in the process, from writing the initial idea, to the arrangement, to production, to sound design, and finally to mixing and mastering. Not everybody is outsourcing an engineer, and if they do, it’s usually for mastering only.
This comes back to the concept of control. Overseeing all aspects of the music, much like a movie director, means you can easily go back in and fix something at an earlier stage.
At the same time, being in charge of all aspects naturally dilutes the quality of skills you develop in each area. Most producers aren’t looking to be the best mix engineer in the world, they just want their tracks to sound good.
With these differences in mind, let’s look at the studio and how to optimize it for mixing.
The Monitoring Environment
Before we even jump into the DAW, we need to talk about the environment you mix in.
In my early days, this is something I underestimated, partially due to bad advice and arrogance.
The truth is, there’s a very simple way to go about it that isn’t talked about, especially if you are on a budget.
Headphones vs. Studio Monitors
You’ve likely heard it before – you need good studio monitors to get a good mix. Is it true?
Yes and no.

Credit: Amazon
What do I mean? Well, unless you can afford or source good quality nearfield monitors, a good sound card, a good room, sound absorption and treatment, correct monitor placement and isolating monitor stands, you might as well just use headphones. Even just neglecting one of the above can drastically affect your monitoring environment.
Why headphones instead?
They are isolated, they aren’t affected by the room you’re in, and you can get a good pair at a cheaper price point. Many professional electronic music producers have written entire tracks just on headphones.
Of course, it’s good to be aware of what you’re working with. If you know your monitors are hyped at 55Hz or your headphones have a high shelf at 10-20kHz, then take that into account when producing and mixing.
While headphones aren’t 100% ideal, if you’re using reference tracks (more on that later), then it doesn’t really matter too much, especially as a beginner. Even more so if you pair it with a good sound card (internal or external interface).
Regardless, if you are prepared to splash on a monitor setup, then read on. Otherwise, skip straight to the section on soundcards and audio interfaces.
How to Set Up Studio Monitors
As mentioned, there are a number of things to think about when setting up studio monitors in your space. Here they are again, in no particular order:
- Choice of nearfield monitors
- Room acoustics
- Treatment
- Monitor stands
- Monitor placement
Choice of Nearfield Monitors
The most important factor in buying monitors is picking ones that sound good to you.
No pair is ever truly ‘flat’ no matter which company will try to have you believe it, so rock up to your local music store and give some a listen, even if you’re buying online.
Try to grab ‘active monitors’, meaning ones that have power and amplifiers built-in. 90% of monitors are these days, but it’s always good to check.
Some people are against ‘ported monitors’ – speakers which have a hole at the back or front that amplify the low end. At the end of the day, as long as you know how your monitors sound then you can work with what you have.

Credit: Amazon
Room Acoustics
You can spend any amount of money on monitors, but if the room reflects the sound in obscure ways, then you’re severely diminishing the quality you’ll get from your monitors.
High ceilings, non-rectangular room shape, resonating walls, poor material choice, lack of furniture and flooring are just some of the factors that contribute to the overall sound.

Of course, most beginner producers don’t have the luxury of creating an ideal room, so choosing the best possible option is usually one you’ve got in your house.
Aim for something square or rectangular, with limited reflective surfaces (try to eliminate windows with curtains).
Generally speaking, filling the room up with as many sound dampening materials and objects is the most efficient way to eliminate poor reflections. I’m talking couches, rugs, pillows, curtains, certain types of wall art and more.
If you’ve ever moved house, you’ll notice the obvious echo of an empty room when you first walk in.
Treatment

Credit: Amazon
If you want to go one step further, setting up treatment in your space is ideal for eliminating natural spill from your monitors. This comes in the form of acoustic treatment foam and bass traps.
Acoustic foam is pictured as above and is normally placed on walls that have a build-up on sound on them. This might be behind you, to the sides of you or even above you on the roof.
Bass traps are used in corners, where bass frequencies tend to build-up and amplify themselves, creating an over-hyped low-end in comparison to reality.

Credit: Sweetwater
People will argue you also need diffusers, but they aren’t necessary for a small room.
One key thing to remember here is – the thicker the foam, the better the absorption. That’s why you’ll see thicker foam in bass traps – lower frequencies require thicker material to be absorbed properly.
For a full guide on acoustic treatment, check out this guide from E-Home Recording Studio. Or, if you need guidance on setting up your studio in general, check out our home recording studio guide.
Monitor Stands
If your monitors are resting on your desk, on a piece of furniture or just about anything, you run into two issues:
- Incorrect height
- Vibrations and reflections
Both of these are avoided by using monitor stands. They also happen to be one of the cheaper solutions in this list, compared to acoustic foam and room adjustments.

Not only do they allow you to set the correct height, but they also isolate your monitors from vibrating your desk, bookshelves or any other resonant surfaces.
A worthy investment if you’re going to go down the ‘monitors route’.
Monitor Placement
Monitors should be placed roughly at head level for the best possible response. If they are too low, the high frequencies will reach your ears first and skew the response, or if they are too high, mids and low mids will overpower.
The great thing about stands is that they are usually height-adjustable, so you can get it at exactly the height you need.

Beyond the height, you should angle your monitors 30° towards your head (from facing straight out), creating an equilateral triangle with your head position. This means that all audio coming to you will arrive at the same time with minimal phase issues.
Also, try to avoid placing monitors on the side. Although you can get a similar response, you have to be in a very specific point to get an accurate representation of what you’re working on.
Sonarworks
If your room is just terrible, or you want to get as flat of a response as possible, then there is a new solution out there – Sonarworks Reference 4.
Essentially, it calibrates your room’s frequency response in order to adjust the output on your soundcard for any unpleasant resonances and peaks.
If you’re curious, check out this video detailing how it works.
Soundcard Audio Quality
It doesn’t matter whether you’re using headphones or monitors – you still need a good quality sound card.
Fortunately, some laptops and desktops have them built-in, while other’s don’t. If you’re on a Mac setup, then the built-in audio cards and CoreAudio drivers are ready to go for real-time audio.

Credit: Softpedia
If you’re on Windows, it can be a mixed bag. Most modern Windows setups from major manufacturers will have a decent sound card, although the drivers aren’t quite there yet.
You may find yourself needing to use ASIO4ALL in order to cope with real-time audio processing demands, something that the default WDM drivers don’t always work well with.
Sometimes, the sound card is just not good, whether it be poor amplification, unreliability or lack of recording options. This is where the audio interface comes in.

If you’re on studio monitors, an audio interface isn’t an option – simply because they usually require a 1/4″ jack or XLR connection, which no built-in soundcard has.
Headphones are a bit more flexible since they rely on the 1/8″ jack that comes with most computers, but it’s not always the best quality.
Most external audio interfaces support up to a 96kHz sample rate, which is way more than the necessary 44.1kHz (or 48kHz) standard for audio.
Before the Mixdown
Now that we’ve got the environment out of the way, we can start to look inside the DAW at the mixdown.
But it’s important to note that there are pre-mixing factors in a track that will determine the effectiveness of a mixdown, so bear with me while we take a look at each one. Your mixes will thank you later.
Composition & Arrangement
The above rings true – mixing is the second last step in the production process and if you have crap at that point, it’s going to remain crap.
A lot of new producers think their mixes are bad when in reality their tracks are bad.
This comes down to poor chord and note choices, incompatible layering, wrong note ranges, the number of sounds going on at once (a lot of producers overload their tracks, thinking more = better) and just bad songwriting in general.
A simple track will be simple to mix, will sound louder, clearer and better. So it’s worth asking – is the mix bad, or is the track bad?
Sound & Instrument Selection
Beyond the notes being played, the sound and instruments being played are an equally important factor. For example, having 50 layers of overdriven guitar could start to muddy up the mix quite heavily.
Designing a bass with an overly saturated low end is going to sound crap.
Using a high-end synth to add creative ‘air’ to a sound might make it too harsh.
It’s important to listen to the timbre and frequencies in each sound, think about what else you’ve got going on and how it will fit in with that.
This relates back to the previous point – the sounds, notes and instruments that are going on will determine how the mix sounds.
Creative Processing & Gain Staging
Because we’re talking about electronic music, lots of processing and FX can be applied to a sound, not for mixing purposes, but for purely creative purposes. Sometimes these can add or take dynamics away from a sound and can increase or decrease the overall volume.
This might result in sounds having increased amounts of noise, resonant frequencies that are painful to eliminate or distortion introduced somewhere in the effect chain.
It’s important to go through these things and identify what might eventuate into a problem when you get to the mix stage, and knowing how to fix them.
The Elements of the Mixdown
Now we get into the main stuff – the mixdown process.
If you’ve tried mixing down a track before, you’ll know there are endless possibilities to tweak, adjust and fix different things. Without any sort of guidance, you can start to feel lost.
To make it easier to follow, we’ve created a process to follow, starting with the most important to the least important – volume, panning/stereo image, EQ, compression and FX.
Volume
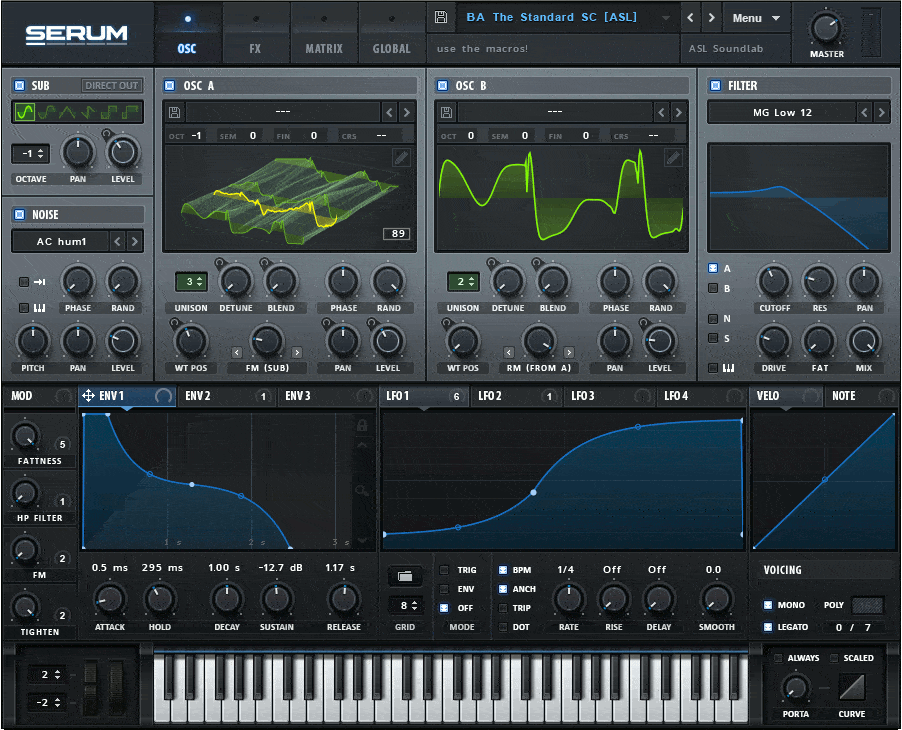
In a Pyramind Elite Coaching session, Steve Duda, creator of Xfer Serum, once said that he could do a better mix than the students just by using faders.
That’s why we’re big advocates of the fader-only mixdown here at EDMProd.
If there’s one thing you leave with you after reading this article, it’s this – focus first on the volume of each track.
No amount of EQ, compression or FX will fix poorly balanced tracks. Yes, it sounds boring and uninteresting, but listen to these two examples:
The only difference between these is volumes. No panning, no EQ or compression, but sonically they come across as potentially two different songs.
If you’re new to mixing, start with bigger fader movements. Get things sitting in the right place, and then make smaller 1-3dB adjustments. The most important thing is to get in there and start moving things around.
Some pro-tips:
- Make sure none of the tracks are clipping (going over 0dB), while Ableton Live and many other DAWs have code in place to avoid distortion when exporting the song you can get nasty artefacts
- Don’t worry about absolute volume too much – try to get the relative volume right. You can always increase or decrease the overall volume later in the mix. Not all kick drums will sound equal in volume from the start, so you can’t expect to do the same thing every time.
- Use arrow keys to adjust volume, rather than your mouse pointer. While the latter isn’t bad, you can make finer and more deliberate movements with your arrow keys. On Live, this is set up by default in arrangement view, but you can set it up in other DAWs if it’s not already a feature.
Panning & Stereo Image
This is often overlooked in electronic music production, perhaps because of advice like ‘mix in mono’ (which we’ll get into later).

Ignoring that, panning can be a powerful way to move instruments around the stereo field, especially if they occupy similar ranges of frequencies.
It can also add a 3-dimensional feel to your music, which engages your listeners more than a flat mix.
Most mixers in modern DAW’s have a pan knob. In Ableton Live, it’s the slider with a C (for Center) in the middle.
Some general tips:
- Even subtle movements left or right can make a big difference
- Keep bass and ‘main’ elements like vocals or leads in the center (generally speaking)
- If you have two very similar elements, panning one hard left and one hard right can achieve a nice stereo effect
- On certain sounds, use something like the Haas effect to get things jumping out
Want to learn more? Check out the video below to dive more into the details:
Important: a lot of producers have thrown a technique around that involves inverting the phase of the left or right channel in order to get a wide sound. This sounds cool in headphones and on stereo speakers, but summing the mix to mono will essentially cancel these sounds out to silence.
EQ
EQ stands for equalization, and it’s the process of balancing the frequencies in audio.
Ever seen a bass & treble knob on your home stereo system? That’s a very basic form of EQ.
In the studio, we have a lot more control and we can see a lot more with frequency analyzers. For example, EQ Eight included with Ableton Live is what is known as a Parametric EQ, meaning it had customizable bands, as opposed to fixed bands that you can only move up and down (like on a Graphic EQ).


Credit: Waves
EQ is a massive topic in itself, so we’ll cover just parametric EQs and the main curve types you’ll come across: filters, peaks and shelves.
Remember to grab the free EQ cheat sheet!
Filters
I’ve put filter’s first because they allow you to get rid of unwanted high or low-end information before you dive into balancing the other frequencies.
Got a bassy rumble in your snare? Use a high-pass filter.
Highs too harsh and bright on your FX? Use a low-pass filter.

Peaks
Peaks, or bell curves, are the main type you’ll use on a parametric EQ.

They boost or cut a central frequency, and those around it (determined by the width or Q factor).
There’s a lot of advice on boosting or cutting. Neither is bad, but it’s easier to be subtractive than additive, so err on the side of cutting to avoid creating a sonic mess.
Why is it better to be subtractive? Because you’re aiming for a clean mix, right? If you’re trying to squeeze more in, you’re going to run out of space. If you take out, there’s always room to breathe.
Shelves

Shelves are the third main curve type. They function similar to a bell curve, except they either boost/cut all the frequencies above or below a certain point.
This is similar to the ‘bass’ and ‘treble’ knobs we mentioned earlier. They allow for a more drastic overall adjustment to the frequency spectrum, which is great for sounds that have a lack or abundance of highs/lows.
Compression & Dynamics
I don’t want to scare you here, but let me warn you – compression is tough to get your head around. Most people don’t explain it well.
To start off, compression is a sub-section of a broader topic – dynamics, which refers to the volume changes over time of sound.
Dynamics can refer to the punchiness of a snare, the squashed sound of a bass, or the crescendo of a riser.
For now, the main thing to worry about it just compression, which essentially makes the louder parts of a sound, quieter.
Sounds confusing?
To be honest, compression requires an article in itself.
That’s why I’ll get you to watch an older video of mine (where I had a terrible beard), explaining how compression works in 5 minutes.
Key points:
- think of compression as really fast volume automation
- threshold determines when the compressor works
- ratio says how much to turn it down
- attack says how fast to turn on
- release says how fast to turn off
The best way to learn what compression does it to chuck it on a sound (a drum loop is a great example), experiment with the controls and turn it on and off to hear before and after.
FX
FX is the final tip of the iceberg in the mixing world. They are the least important but can help to add the final flare that will make your mix the best it can be.
I’ve broken them down into two kinds of FX: time-based and saturation/distortion.
Time-based
The FX in this group include reverbs, delays, choruses, flangers, phasers and echos, among other things.
They all alter the signal by adding something after the original signal in time.
The most common of these would be reverb and delay.
Reverb is such a dense effect, that in David Gibson’s ‘The Art of Mixing’ video, he treats it like its own element in the mix.
Reverb can be used to make sounds feel ‘real’ and ‘3D’, both of which can be important in the digital environment.
It can also help to ‘glue’ elements together as if they were played in the same room (especially when used with compression).
Delay, on the other hand, is less mysterious. It simply repeats the sound at timed-intervals, giving it an echo-like feel. It’s less messy but less ‘realistic’ than reverb.
On rhythmic elements, it can help to fill out the mix in a creative way.
Both can be used in conjunction to get spacious and full mixes.
Want to dive deep into reverb? Here’s our in-depth video guide:
Saturation & Distortion
Distortion and saturation generate additional harmonics through different types of distortion – like tubes, tapes, soft clipping and waveshaping/wavefolding.
In some ways, these types of FX act as ‘bad compressors’, as they are over-squashing the audio to a point where it distorts.
They can sound great on basses, drums, leads, and even softer FX and pad sounds (when used in moderation).
They add an imperfect sound to audio material, ‘warm up’ stale material and can help to control sounds in the process.
If you’re in Ableton Live, try playing around with the Saturator device. It can ‘heat up’ the sound when you play with the drive.
Measuring the Mix
Now you’ve got a toolset for mixing, but how do you measure what you’re doing? Obviously, you want things to sound good, but you need a way of seeing what you’re doing to get there.
Peak, RMS & LUFS

The peak volume is what you see on the meter on the master channel, measured in decibels (dB). It tells you what the audio level is at a given point in time.
RMS and LUFS are a little more in-depth. They both measure the ‘average or ‘apparent’ loudness, based on how humans actually hear audio.
Our brains aren’t quick enough to decode each individual peak level, therefore we hear at a slower rate.
On Ableton, the RMS level is the lighter green bar underneath the darker peak level. On other DAW’s, the metering may only show peak level, so you’ll need to use something like iZotope Insight or Voxengo Span.
Frequency Spectrum Analyzer

Some EQ’s have this built-in, some don’t. You can tell if it has a graphic behind the EQ curves that look like a bunch of really steep hills moving up and down (pictured above).
This is known as a spectrum analyzer, which tells you what frequencies are in your sound/mix.
Why should you know this? Well, you can see how loud your bass, mids and highs are in relation to each other, you can keep an eye on any resonant frequencies, and use it to compare your track to a reference track.
Correlation & Sound Field

Something very simple to understand, that is not being paid attention to by many producers.
The correlation meter is the simplest way to tell whether your mix will sound good on a mono system.
If it’s on the left, it’s a correlation of -1, meaning your left and right channels are opposites.
If it’s in the middle, the left and right channels are unrelated (0 correlation).
If it’s on the right, you’re left and right channels are the same (1 correlation).
Now you’re probably wondering – ‘what should I be aiming for’? We’ll be getting into mixing in mono shortly, but generally speaking, it’s best to have somewhere around 0 to 1, especially if you’re making club music.
It’s ok to go into the left side occasionally, but if it’s constant, you may have a problem.
Mastering
This article is specifically on mixing, but mastering is still important to consider, given that electronic music production tends to blur the lines.
First of all, if mastering confuses you, just get somebody else to do it. It’s relatively cheap and there are many engineers around who can do it.
If you do want to take mastering into your own hands, here are a few considerations:
- have your mix peaking at approx. -6dB before starting the mastering process
- mastering will only sound good if your mix is good – if there are any issues, go back and fix the mix first
- if you want to run with a ‘test master’ while producing, use a limiter with around 6-9dB of gain (or however much sounds good) – make sure to turn it on and off to compare throughout
- use a reference track, as you would in a mix
- the purpose of mastering is to standardise your track for release
- most tracks are released digitally-only and most streaming services have automatic loudness adjustments, so watch your RMS/LUFS level
If you want a full guide on mastering, check out the guest post from Nicholas Di Lorenzo of Panorama Mastering.
Extra Tips
Now that we’ve covered the bulk of mixing, let’s dive into a few extra tips that will help you understand and smooth out the process.
Note: if you want more mixing tips, check out 50 mixing tips article.
Parallel Processing
Parallel processing is when you blend an affected signal with an unprocessed signal.

This sounds especially great on compression, where the sound can become very squashed. Parallel processing adds some original dynamic back into the sound.
Sends & Returns
Return tracks allow you to use an effect on multiple tracks – for example, the same reverb sound on drums, piano and FX.
This saves CPU power and helps to achieve a more cohesive sound in your mixes.
You should use an effect on 100% on a return, otherwise sending tracks there will also increase the volume of the dry signal.
Bussing and Group Processing

Grouping together tracks and processing them can help to tie sets of sounds together, for example, compression and saturation on drums, or a high-pass filter on all synths.
These groups are typically called ‘busses’ (yes, with two ‘s’).
Note that this is different to sends and returns, wherein this case all sounds will be processed by the group at the same level, whereas with sends/returns the amount can be customised.
Recommended: What Is A Mix Bus: Creating A Killer Processing Chain
Volume Automation
Who says that the faders have to be static?
Volume automation can be a great way to add dynamic interest to the mix and can be a great way to add impact to certain sections like a drop.
Subpac
Not all of us can afford to have a big sub in the studio, whether it be space, volume or money restrictions.
For those of us who use headphones, we might get the bass coming through, but we can’t feel it as if it were on a big sound system.
This is where the Subpac comes into play. It’s a wearable device designed to help you feel the bass frequencies as if you had a subwoofer in the room, with none of the loudness.

Credit: Amazon
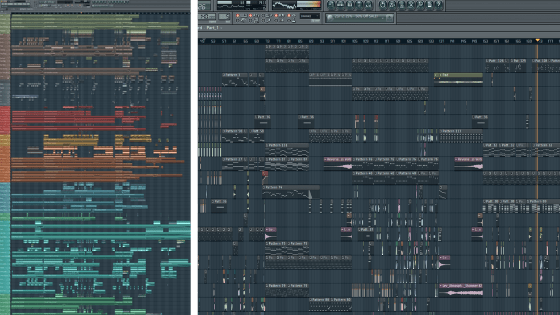
Staying Organised

What do you notice about this session?
If you answered one of the following:
- color coding
- time markers
- naming
- grouping
Then you’d be right.
What’s the point though? Well, if you ever need to find a certain sound, you know exactly where it will be.
If you come back to the session on a different day, you know where to look.
If you don’t know where you’re listening to in the track, you’ll be able to tell.
This one is fairly obvious, but under practised. Stay organized.
Mono Mixing
You might have heard the following phrase – “make sure your mix sounds good in mono.”
What does it actually mean?
Well, it refers to the stereo image of your track. You can check how your mix would sound if it were to be played on a mono system, where both of the stereo tracks are converted to one track.
What happens here? Something called ‘phase cancellation’, where differences in the sounds will cause a ‘thinning’ sound or quieter mixes.
The idea behind this technique it to keep the majority of your sounds in the centre of the stereo field, meaning to have them sound the same from both the left and right channels.
How is this done? By using mono sources (mono samples, mono synths) and minimising the amount of stereo FX (stereo delay and reverb, chorus, widening FX).
To check how your mix sounds in mono, you can use a plugin or device included in your DAW. For example, in Ableton Live, you can use the ‘Utility’ device with the ‘Mono’ button enabled on the master channel. Switching it on and off will let you know how it sounds in mono and stereo.
Signal Flow
The last tip here is all about signal flow, which refers to the order in which you add processing.
EQ before compression and EQ after compression can give two different results. So make sure the order of FX and processing logically makes sense.
For example – if I’m boosting the highs of the snare with an EQ, but compressing it again afterwards, isn’t that going to reduce the loudness of the highs? Maybe you should add it after the compressor.
Or do I want my distortion to affect the reverb tail, or should I add the reverb after the distortion to get a more controlled sound?
Something to consider in the midst of adding multiple devices and plugins.
The Final Word
Well, you made it to the end.
I hope you feel more confident about approaching the mixdown process.
If not, that okay. Bookmark it and read it a couple more times.
If you forgot, make sure to grab our FREE EQ Cheat Sheet to help you understand!
If anything wasn’t clear or confused you, send me an email at [email protected] and I’ll fix it or answer your question.
