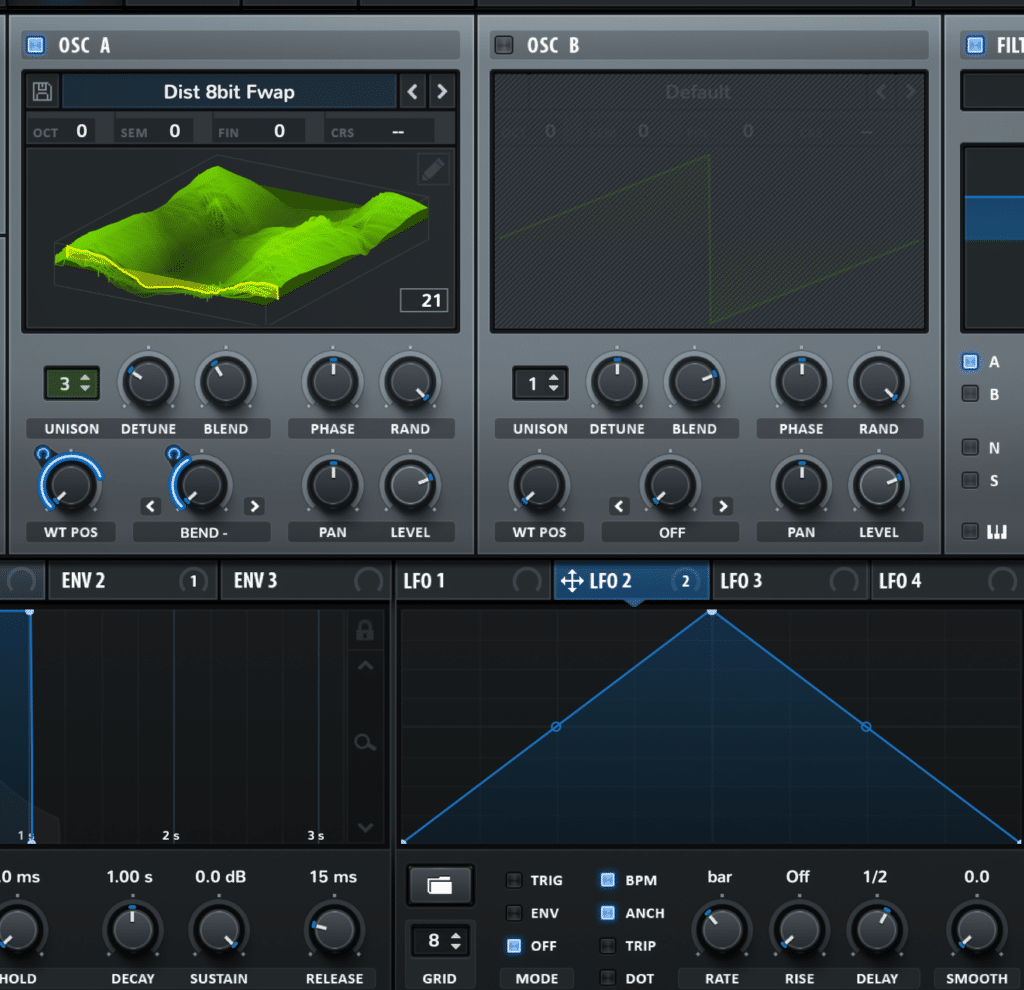
Wavetable synthesis is the key to modern sound design.
But it’s seriously confusing. All those moving waves, modulators and FX can be overwhelming.
That’s why we made this guide. You’ll learn:
- How wavetable synthesis actually works (and why it’s different)
- Some basic principles that will help you make quality sounds
- A few good options for a wavetable synth plugin (free and paid)
- Getting started with creating your own wavetables
- Creative tips & tricks for taking your sounds to the next level
Let’s do this! 👇
Get the headstart you need in music production with our EDM Starter Kit 🎛️
Get our collection of high-quality presets, samples and PDF guides – suitable for all genres of electronic music 👇
What is the Definition of Wavetable Synthesis?
Wavetable synthesis is a modern sound design technique which uses morphing oscillator waves to create sounds.
Thanks to digital technology, wavetables can store a number of different frames, allowing you to scroll through from one wave to the next, creating a new level of movement in your sound design.

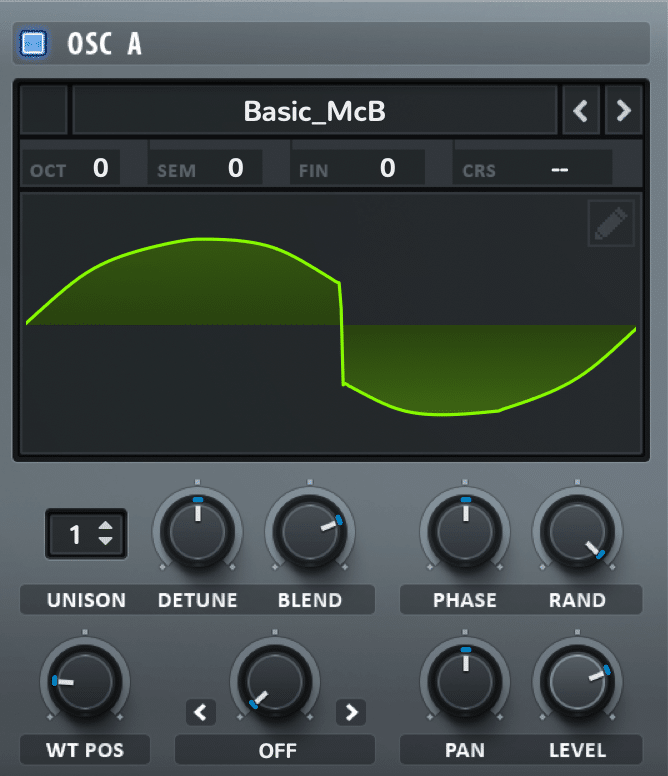

Think of it as a stop motion film. Each frame is slightly different from the last, but when hundreds of different changes are stacked up together, you get the illusion of movement.
In analog technology, this wasn’t possible as signals were generated by physical hardware, and all you could chance was the loudness and the speed (pitch).
Because we can capture one cycle (frame) of any sound, wavetable synthesis can be used to create millions of different sounds. From basses, to leads, and even to vocal sounds.
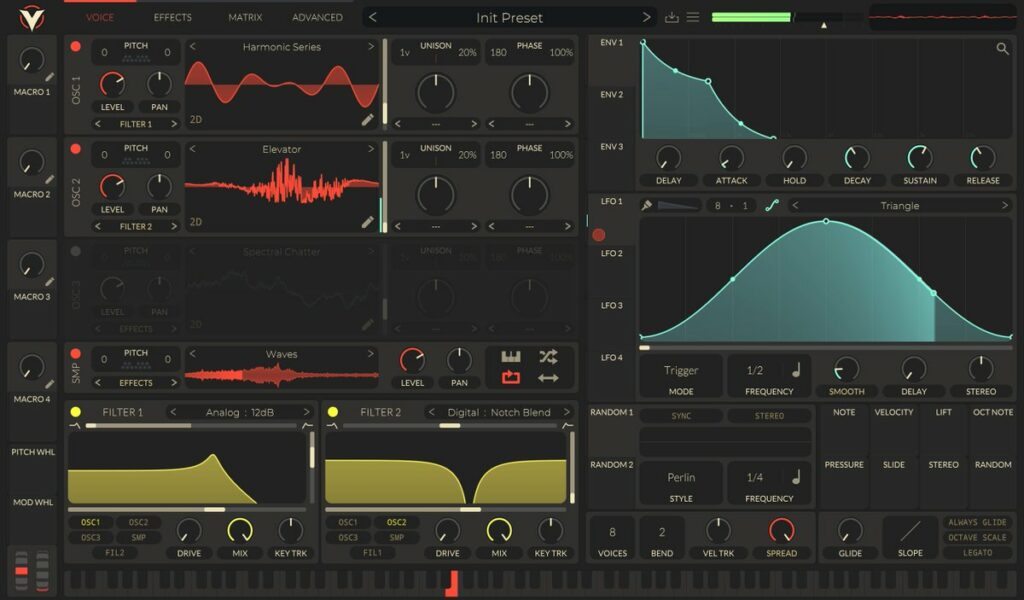
As you can see, wavetable synthesis is flexible. This is why synths like Vital and Serum have become popular over the years – they allow you to create so many sounds.
But how do you actually dive in and start using it? Let’s take a look using Xfer Serum.
Not sure how synthesis and sound design works in general? Nail the basics with Breakthrough Sound Design.
The Basics of Wavetable Synthesis
Before we dive into the crazy stuff, or you go off watching a million YouTube tutorials on how to make a Skrillex bass, it’s important that you grasp a concrete understanding of the fundamentals.
Choosing The Right Wavetable
I’ll be honest – besides the wavetable functionality, most synths in this category function very similarly to a normal subtractive synth, with similar features. So if you understand basic sound design, you shouldn’t find it too hard.
A lot of your sound will still come through filtering, modulating, and effects processing. So don’t neglect this side of the equation.
With that in mind, choosing the right wavetable is still key in getting the sound you’re after. Most wavetable synths will come pre-loaded with a number of wavetable presets.
Instead of the basic sine, square, saw & triangle waves, you can hundreds of different options.
Each will sound different from the last, so choose a table that aligns with the sound you’re going for. Thankfully, many plugins organize their wavetables into different categories for clarity.
Here are my dimensions for choosing a wavetable:
- Spectrum: is the overall wavetable bright or mellow? Is it both at different points? Do I like the harmonic profile and the way it sounds?
- Variation: how much movement is there in the wavetable? Is it fast or slow? Does the movement achieve the sound I’m after?
- Context: does the wavetable suit what I’m trying to achieve? Will it sound better with modulation and processing? Am I using this for FM or is it going to be heard directly?
Once you know these three things, you can make an informed decision.
Because I believe in learning while doing, let’s create a basic electric piano key sound as an example. I’ll be using Xfer Serum to demonstrate.
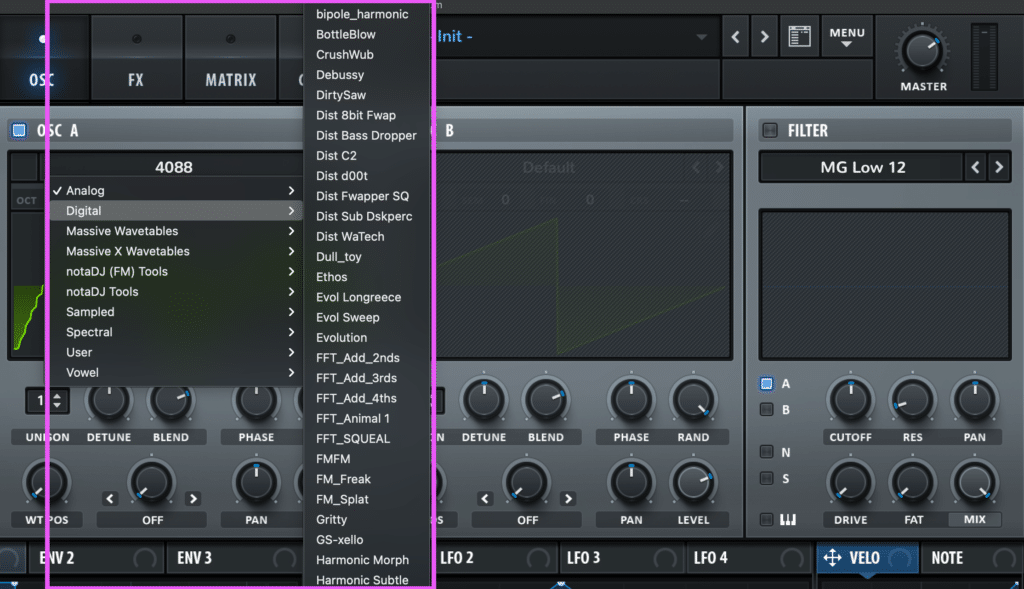
In this example, I’m going to choose Serum’s ‘GS-xello’ wavetable from the ‘Digital’ section.
After spending 1-2 minutes auditioning the wavetables in Serum, I settled on this one. It’s not too harsh but has enough movement to it to make it interesting.
Tweaking The Wavetable Position
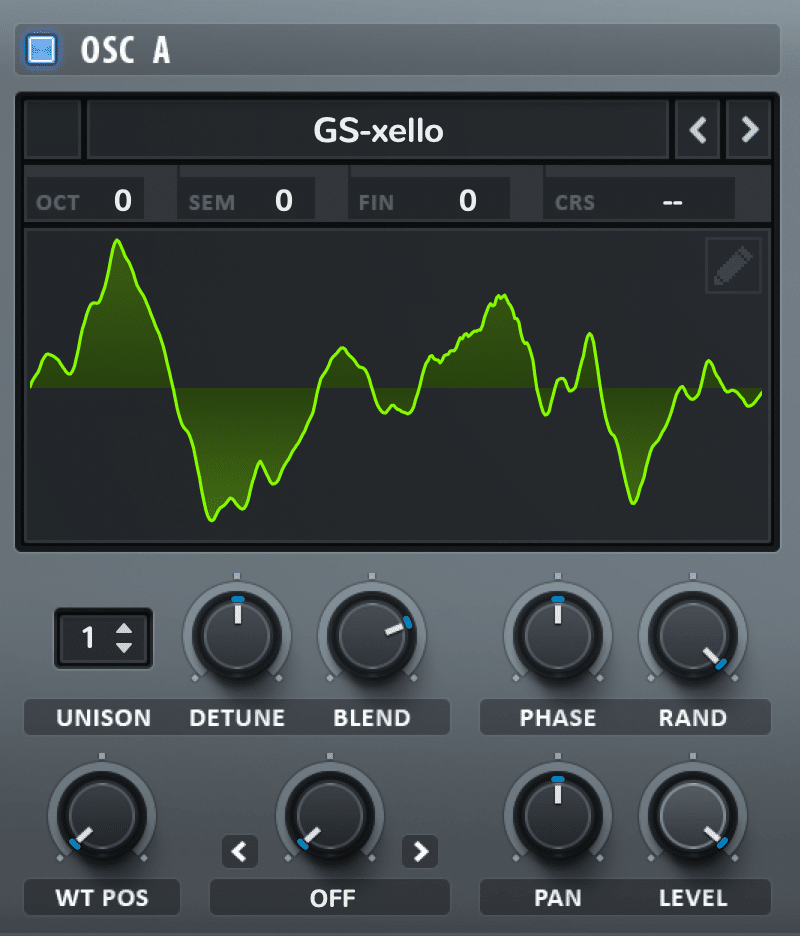
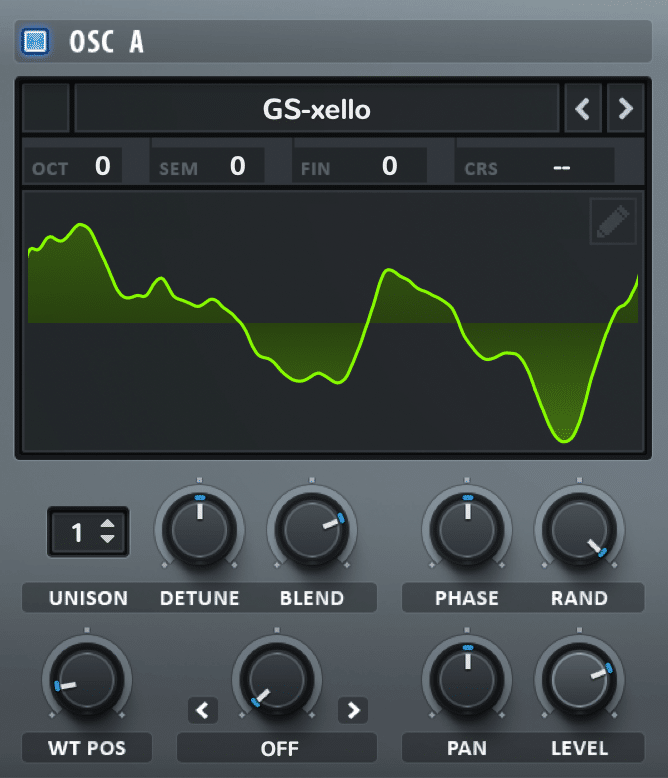
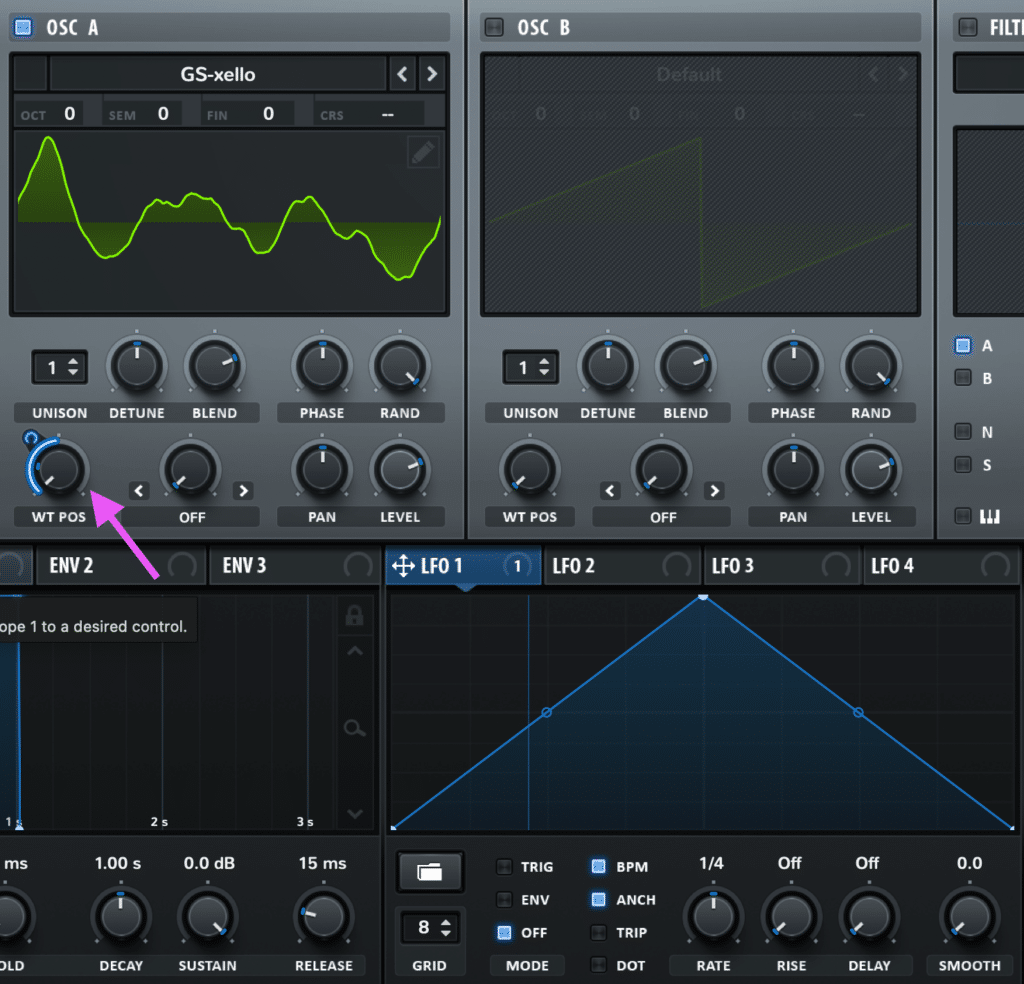
As we turn the ‘WT POS’ knob (short for wavetable position), you’ll notice the waveform starts to visually change. You can hear this reflected when you play a note.
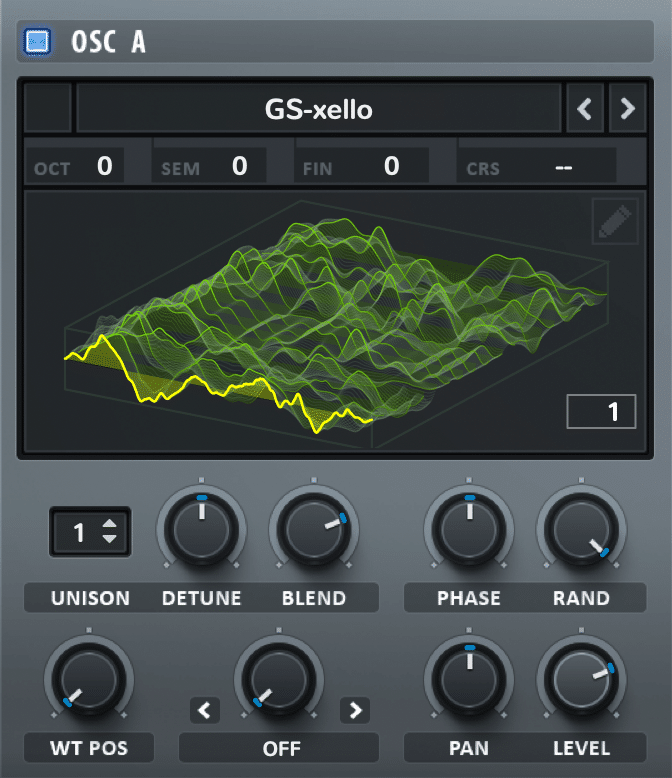
(Pro-tip: click on the waveform display to enable 3D mode. This can help visualize the movement better).
I can hear the wavetable sort of ‘mellows out’ as I move it, so I can use this to create the pluck at the start of my key sound. However, due to the motion of this wavetable, it sounds kind of trippy, which I quite like.
Warp Modes (For Extra Movement)
Thanks to the way wavetables work, we can add another dimension of movement through warping them.
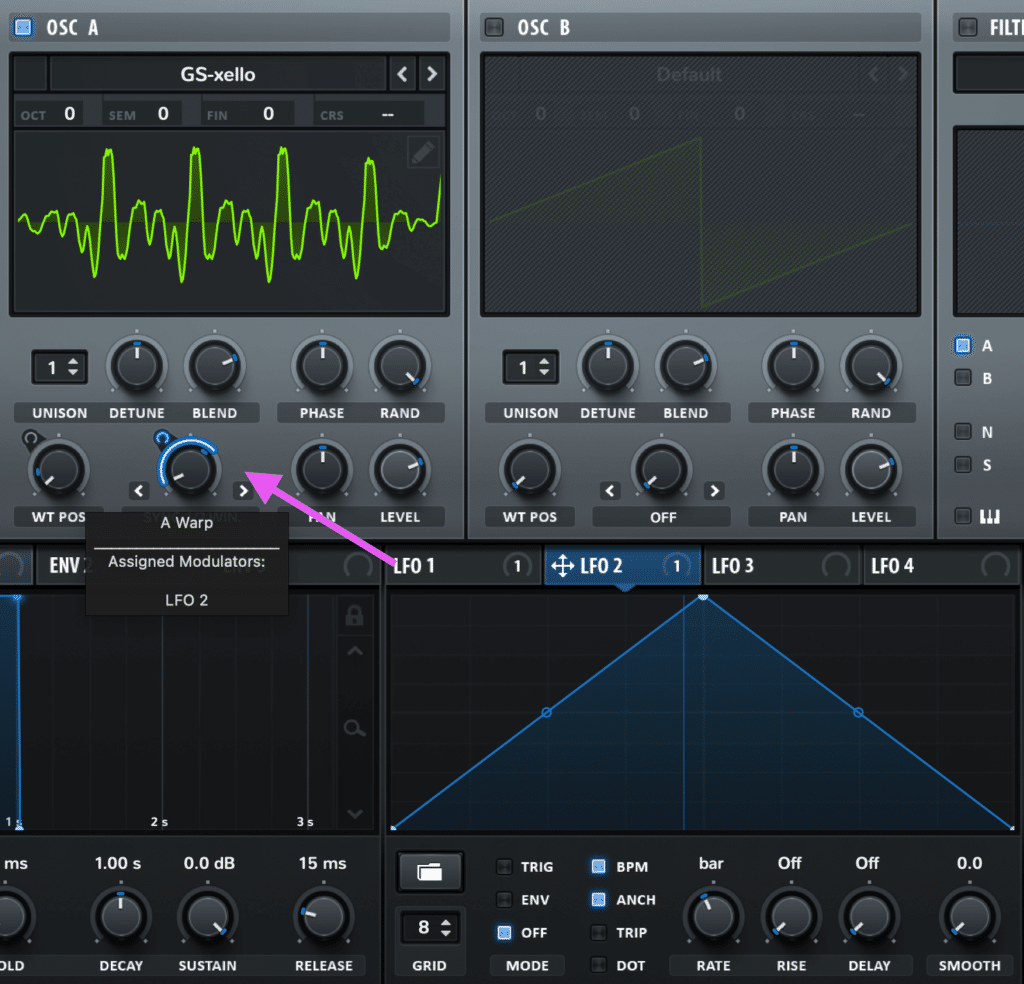
If you’re using Serum, click left or right of the ‘Off’ knob to switch on a warping mode. Then move the knob to get the desired effect.
Some personal favourites of mine are Bend +/-, Sync (1/2 Window) and Mirror. For now, ignore the FM, AM and RM options at the bottom.
Wavetable Modulation
The key with wavetable synthesis isn’t to just pick one nice wavetable cycle. It’s all about the motion.
The simplest way to add motion is to use an LFO. Click and drag LFO 1 onto the WT POS and play a note. You’ll now hear some changes over time.
At this point, you’ll likely want to fine-tune both the amount of modulation, and the rate in the LFO settings.
Additionally, drag the same (or a secondary) LFO to your warp mode of choice. Fine-tune the settings again to taste.
This is a great starting point. Of course, many wavetable synths still have the FX, modulation, and mixing capabilities of ‘standard’ subtractive synths, so you can go nuts beyond this.
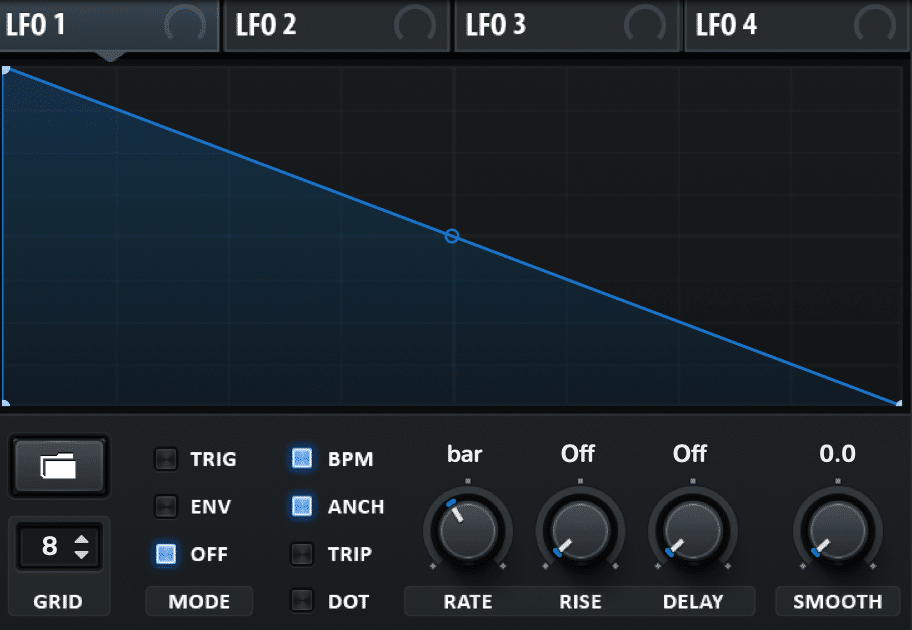
I’m going to use just a little bit of slow movement to create that pluck sound. I’ll also adjust the LFO so it looks more like a Ramp Down shape:
And we’re already off to making a great-sounding patch using wavetable synthesis. Now we can combine these basic principles with other processing and modulation techniques.
Recommended: 100 Next-Level Sound Design Tips
Using Wavetable Synthesis to Create Quality Patches
Now that we have an understanding of how to use wavetable synthesis, we can start create a variety of different sounds.
Creating A Bass
Basses are probably one of the most fun ways to use wavetable synthesis. The harmonic movement created is usually quite unique and hard to replicate with other sound design techniques.
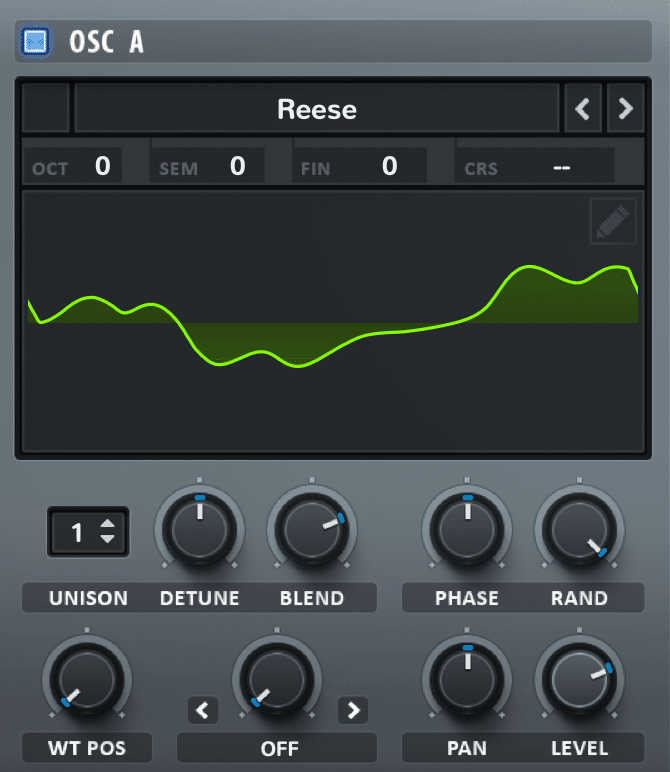
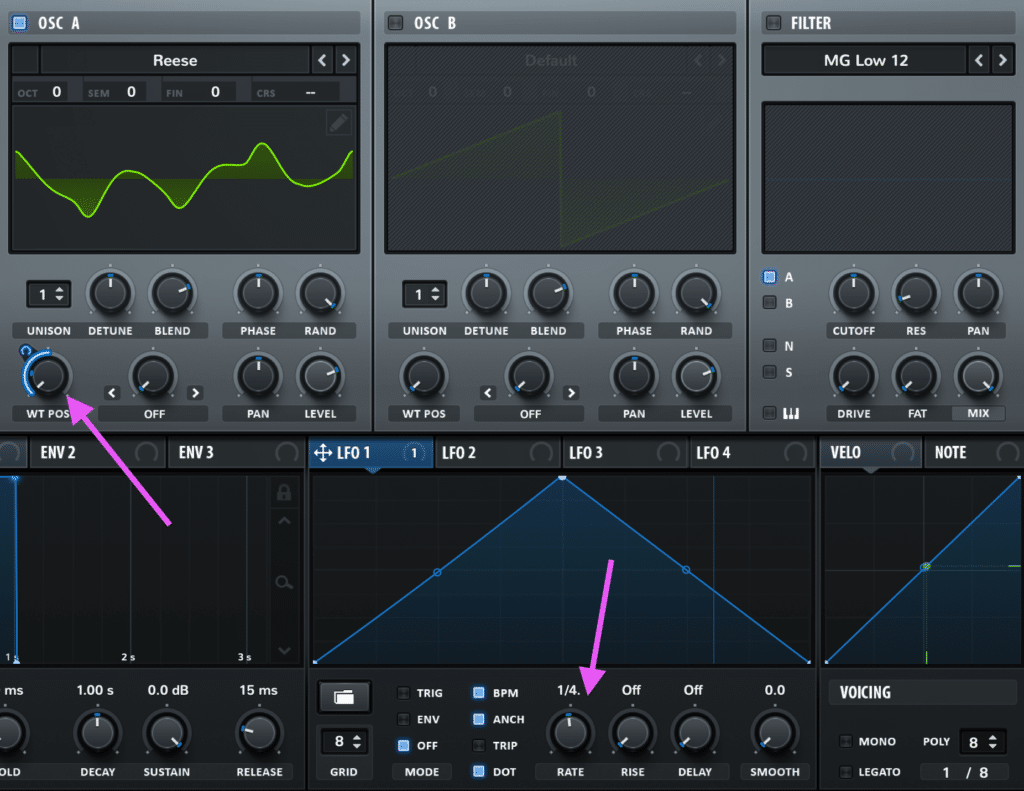
Let’s start out by selecting a wavetable – I’m going to choose ‘Reese’ under the digital options:
After scrolling through the wavetable, you’ll hear some nice motion to the sound. Next, grab LFO 1 and modulate it a bit. My DAW is set to 120BPM currently, and I have a 1/4. rate chosen. Tweak the amount of modulation to taste.
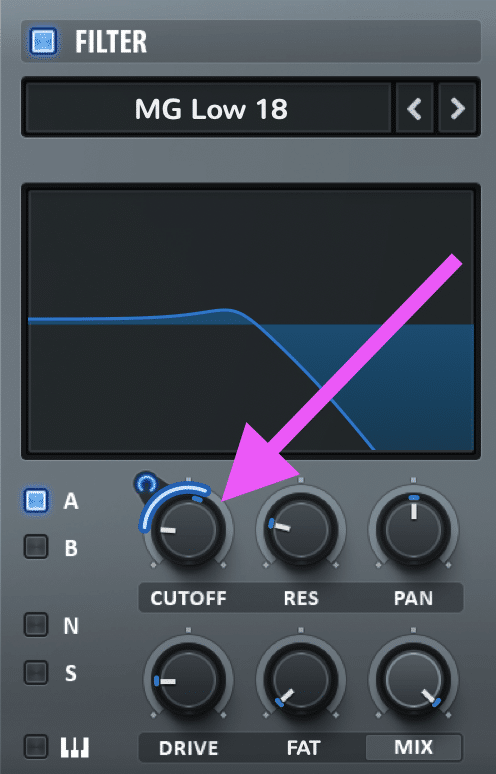
I’m going to enable the filter to give us a bit more movement, so I’ll use LFO 1 on that too…
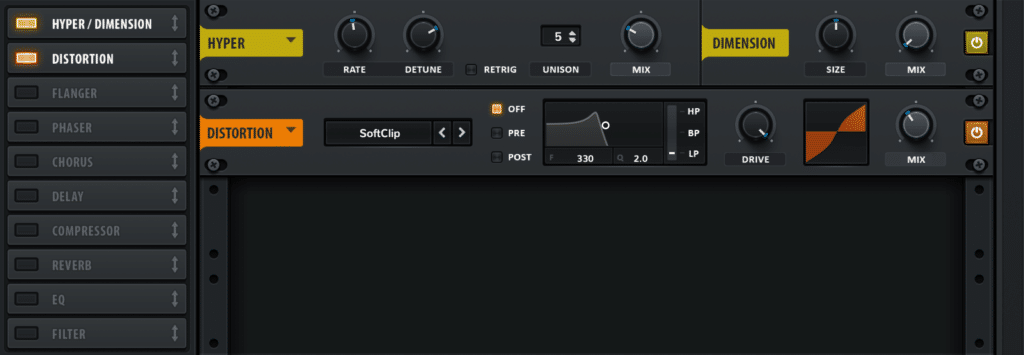
…add some Hyper and Distortion on the FX pane (to widen and fatten the sound up)…
And here’s the final result.
Creating A Lead
Once again, you can get a lot of unique leads that are quite tonally different to the standard saw/square options out there.
Let’s pick a nice wavetable to start with on OSC A – ‘Monster 2 [SL]’:
I have chosen this one because of its rich harmonic profile, but without it sounding too cheesy or harsh. The movement of the wavetable brings the high-end of this wavetable in and out, with some other interesting movement.
There is also some unison and detune to thicken up the patch – 6 voices with moderate detune worked in this scenario.
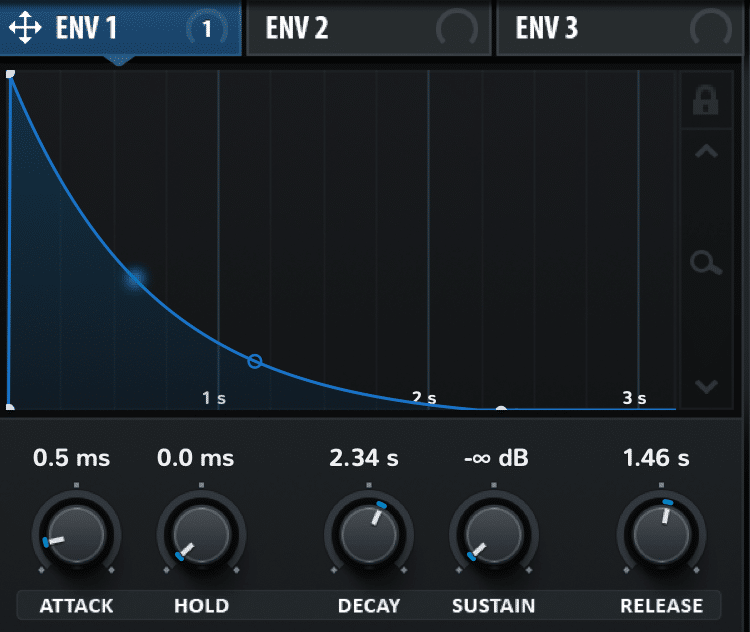
I have mapped the WT POS to ENV 1 instead of an LFO this time, lengthening out the decay (2.34s) and release (1.46s) to give it a longer feel. Some leads benefit from this more drawn-out effect, as opposed to a short stabby envelope:
Lastly, I’ve touched the sound up with 3 FX units. I’ve used some chorus to furthermore widen and thicken the sound, as well as add some dirtiness to the tonality of it, a filtered delay to let that tail ring out with a nice synced rhythm, and reverb to put the lead sound in a lush hall space.
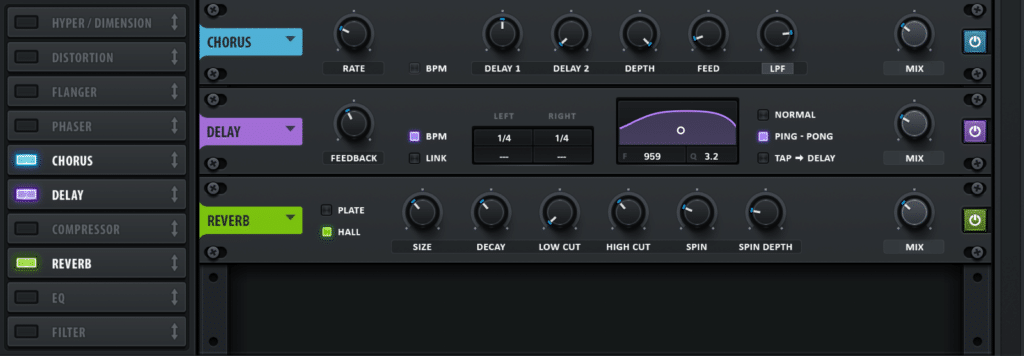
The result? A full-sounding, modern synthwave lead that you can use to make those iconic crystalline melodies.
Creating A Pad
Pads are a joy to create with wavetable synths, as you can add a whole other dimension of slow motion through wavetable modulation.
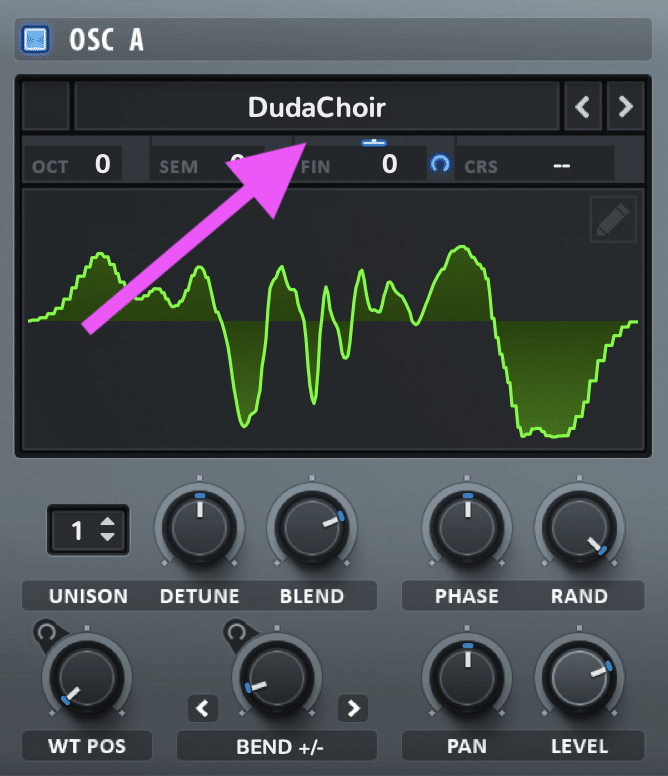
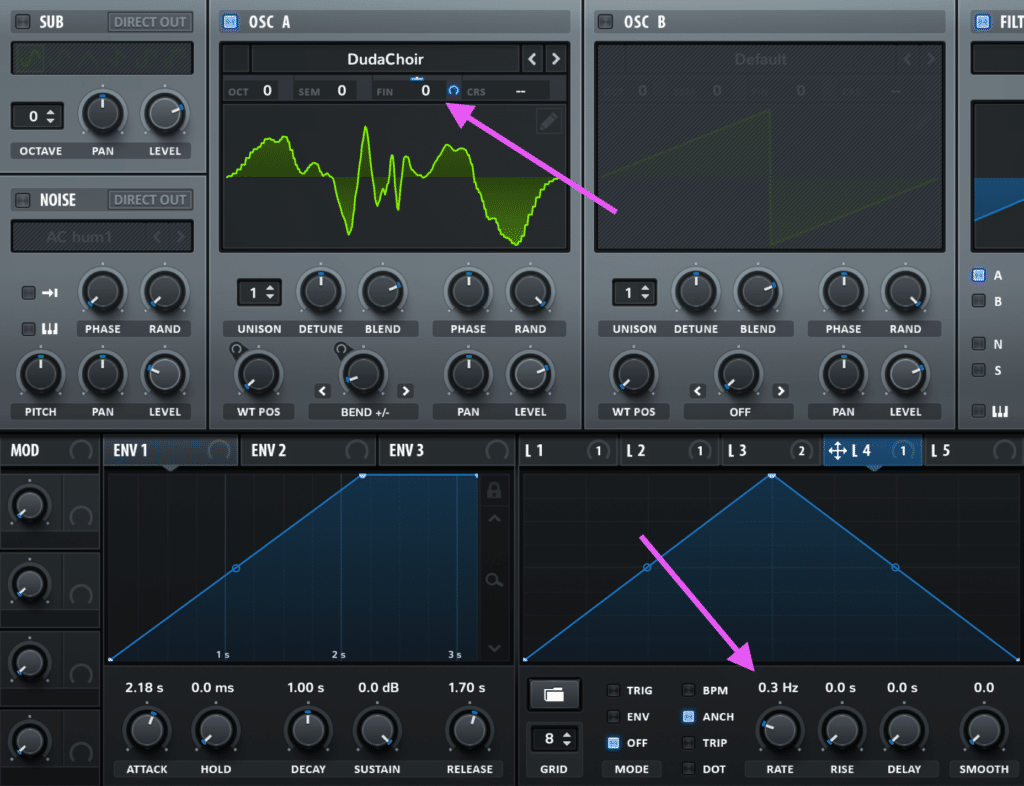
In this example, I’m going to choose the ‘DudaChoir’ wavetable from the ‘Vowel’ options:
Since pads are all about that smooth modulation, I’m going to pick 4 dimension to modulate, each with a different LFO:
- Wavetable position
- Warp mode position (Bend +/-)
- Fine pitch
- Filter cutoff (bandpass)
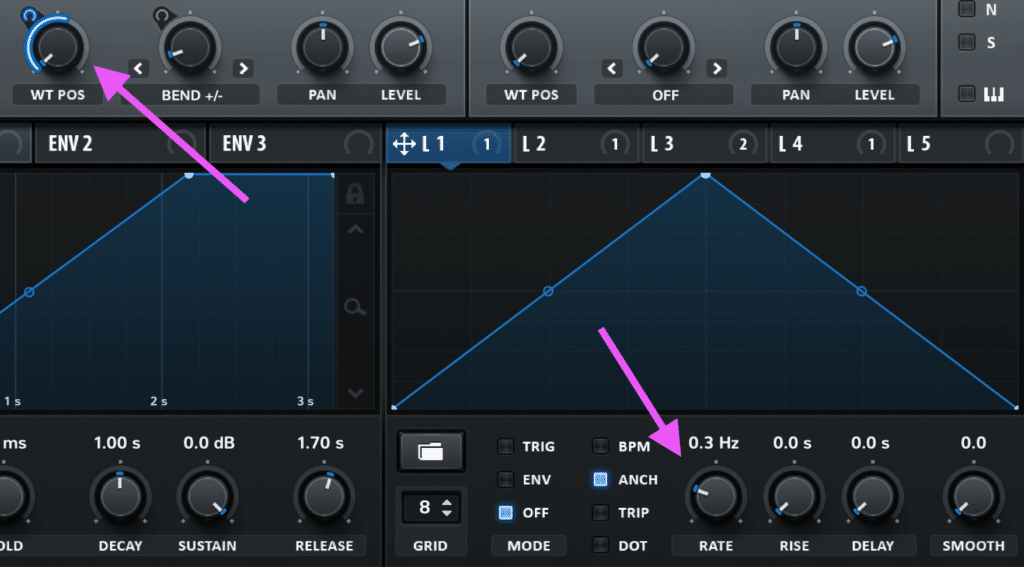
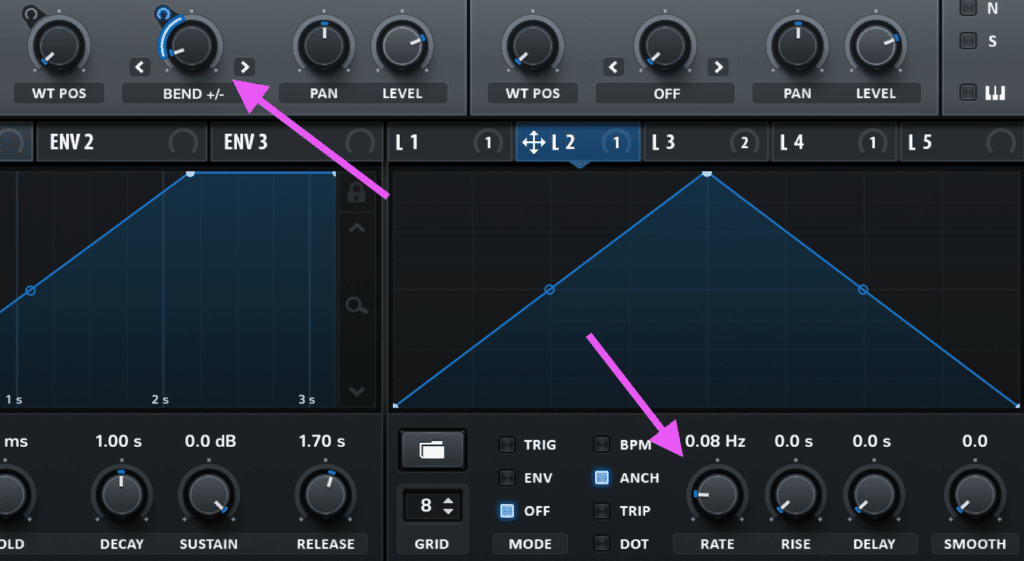
Set LFOs 1 to 4 all to ‘free sync’ (press the BPM button off) and set each of them to a different Hz rate. Under 1Hz works well for these types of sounds. Here’s what I used for all 4:
LFO 1 (WT POS):
LFO 2 (Bend+/- Position):
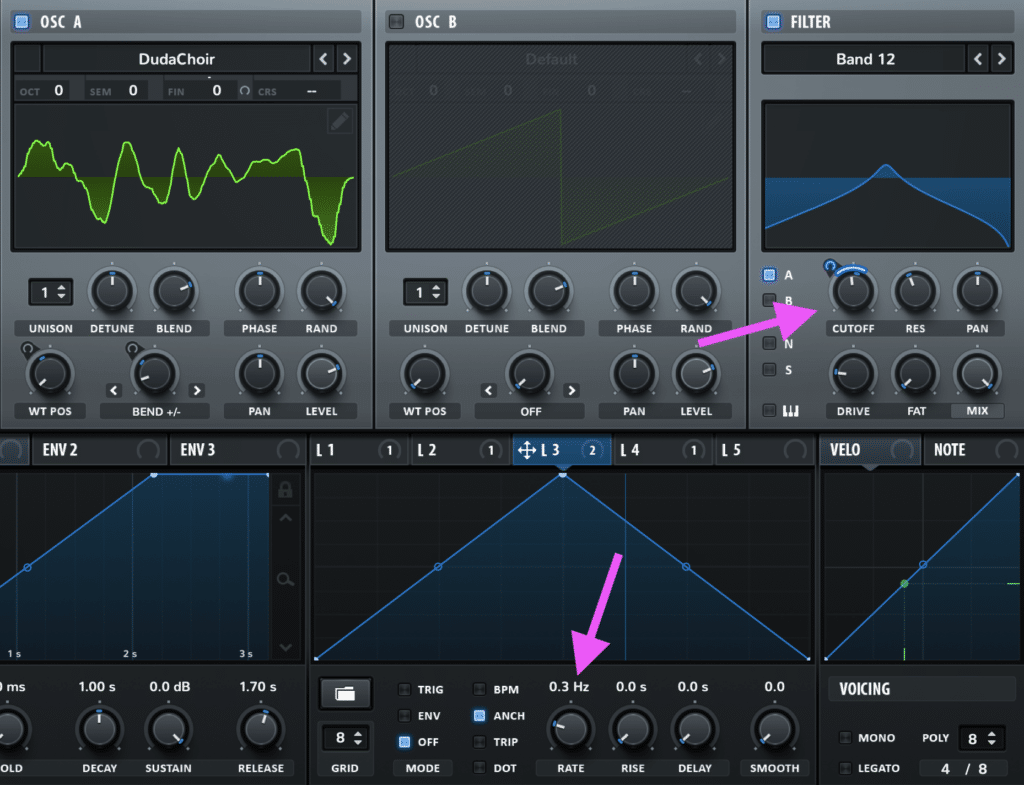
Let’s turn on Serum’s filter and make sure OSC A is running through it.
Set it to ‘Band 12’ and modulate with LFO 3 as follows:
And lastly, LFO 4 (Fine Pitch of OSC A):
(Feel free to change the LFO shapes of all of these, but the triangles work just fine).
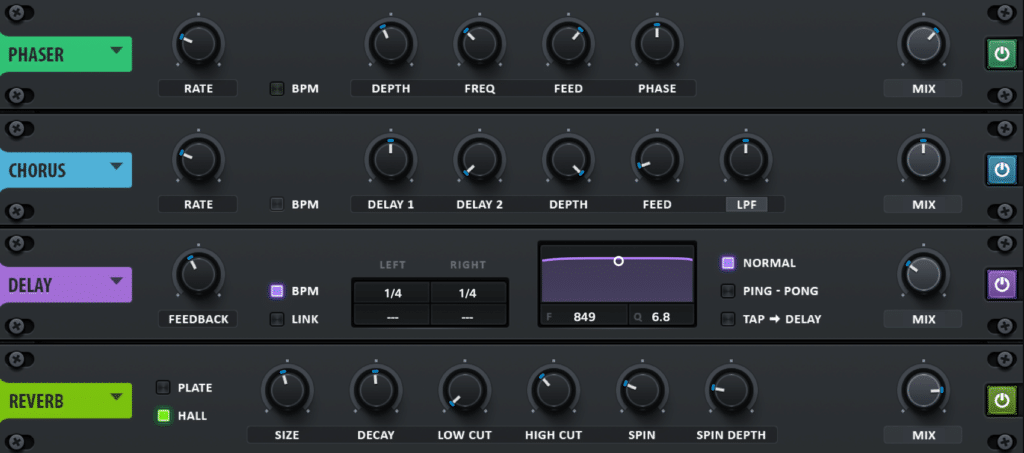
That forms the basic movement of the sound. Now we can add some FX to space the sound out even more – reverb, chorus, phaser – you name it! Here’s what I used:
Here’s the sound of our pad:
Want to find Serum Presets? Check out our massive list here, sorted by genre.
The Best Wavetable Synthesis VST Plugins (Free & Paid)
In the last 10 years, there have been a whole host of wavetable synths pop up that you can use in your DAW. Here are some of the best options, whether you’re looking for a free option, or don’t mind spending a bit.
Stock Tools
The best place to look for a wavetable synth is your own DAW’s stock tools. Most DAWs don’t have fully functional wavetable synths, but there are a couple that do. Namely:
- Ableton Live’s Wavetable
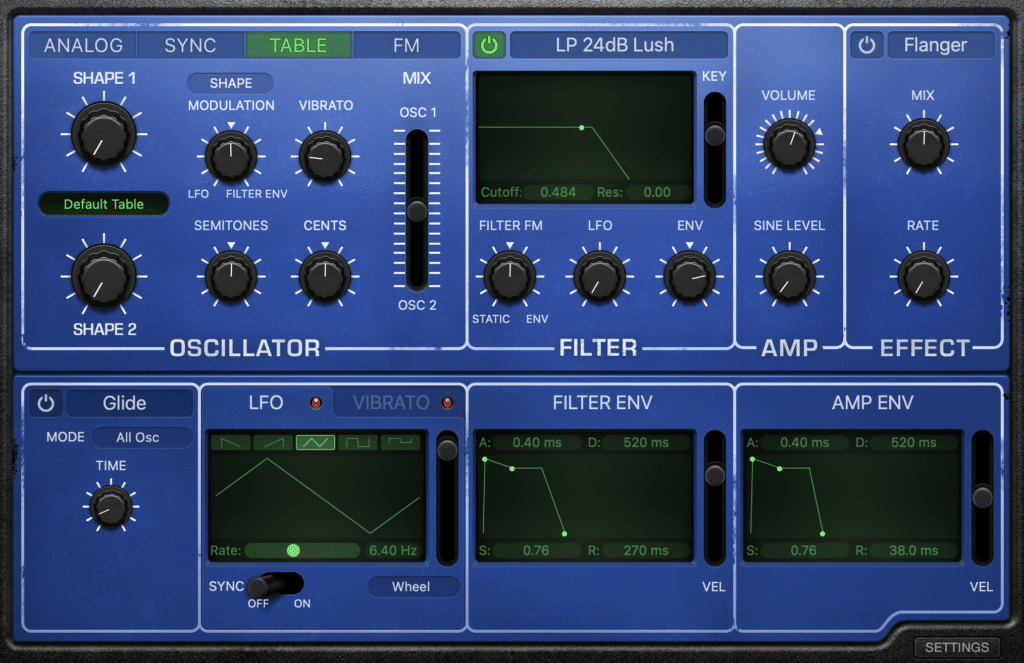
- Logic Pro X’s Retro Synth (Table Mode)
Ableton Live Wavetable
With the release of Ableton Live 10, Ableton included the all-new Wavetable synth, been one of the first DAWs to include a native, fully-fledged wavetable synth.
How does is stack up to the others? Pretty darn well.
While it still lacks the ability to import custom wavetables, it has everything you could ever need. Two oscillators, a sub-oscillator, 2 LFOs, 3 envelopes, and plenty of other cool features (the built-in unison sounds great).
The best part? It integrates perfectly with Live’s workflow, meaning you can easily use all of the audio and MIDI effects without having to open up another window.
Logic Pro Retro Synth
If you’re a Logic Pro user, you may quickly find that Retro Synth’s wavetable feature set is limited, so upgrading still may be on the cards. But if you’re in Ableton Live, you’ll find Wavetable an extremely competent synth.
It comes with a decent number of wavetables and does have the ability to import external ones. However, there are specific requirements as to the types of files you can import – for example, it doesn’t seem to like using Serum’s wavetables.
The other downside is you can only set one wavetable for both oscillators, not different ones for each. It’s definitely limited in comparison to Ableton’s wavetable, but it’s a great introduction into the world of wavetable synthesis.
Otherwise, here are some great third-party wavetable synths.
Xfer Records Serum
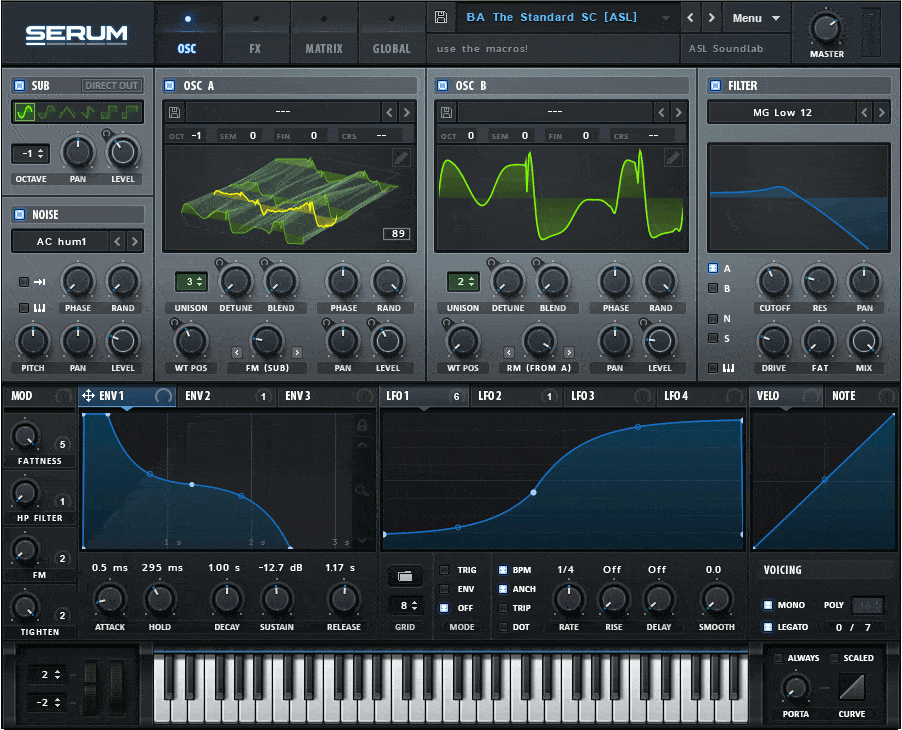
Serum is the flagship wavetable synth for a reason. It might not have been the first, but it was the first to give such great visual feedback, which made it both practical and fun to use.
It features 2 oscillators, a sub-oscillator and a noise oscillator (which can be treated like a sampler). It’s also known for its high-quality FX section, featuring compression, distortion, chorus, reverb, and much more.
Matt Tytel Vital (FREE)
Vital has blown up recently with its release, mainly due to its incredible feature set, great visual feedback, and low price point – free.
Yep, this synth is completely free for the lowest tier, although there are paid options that allow more features (the text-to-wavetable feature is limited in the free edition) and include more wavetables.
That being said, the free version is a legitimate rival to Serum, and it even features 3 full oscillators with new spectral warping modes, instead of Serum’s 2.
If you want to learn more about Vital, check out this huge guide from Simon on our blog here.
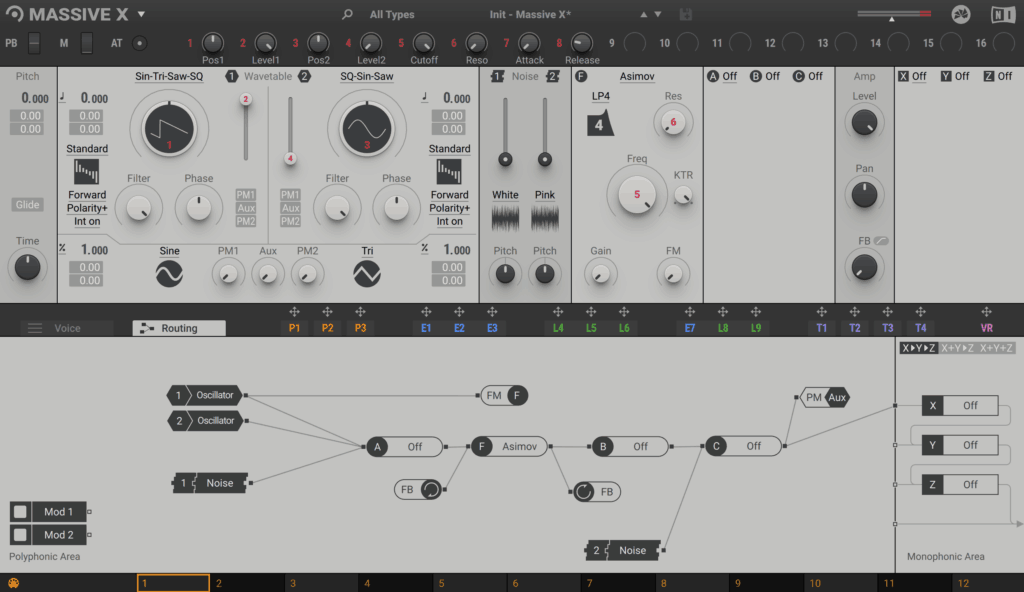
Native Instruments Massive/Massive X
Massive X is the new version of the legendary Massive synth from Native Instruments. Massive was arguably what popularized wavetable synthesis, especially in the electronic music community, even though it eventually had to compete with Serum.
The upgraded version has a redesigned interface with a more modern feel and some great new features. My personal favourite is one of the new voicing modes, which allows you to morph between chords using a knob.
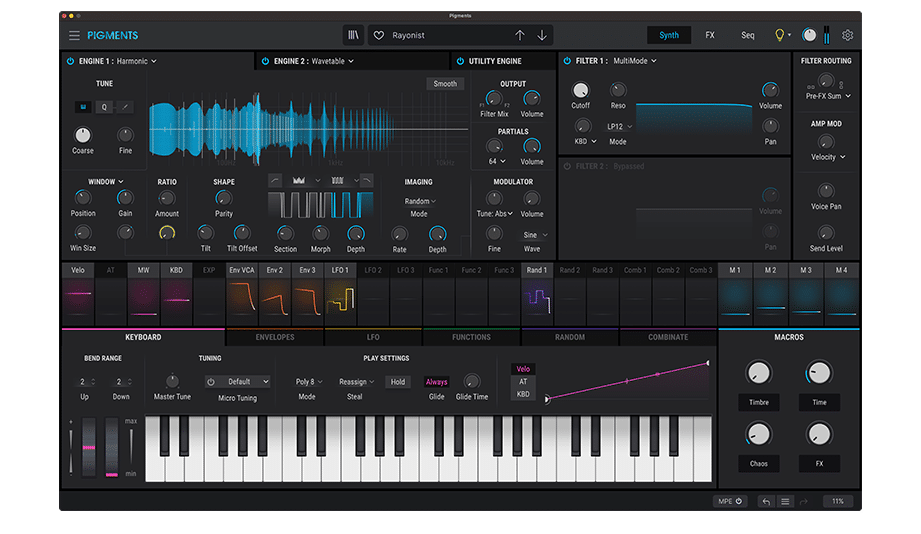
Arturia Pigments 3
Arturia Pigments 3 is a very capable synth, dubbing itself a ‘Polychrome Synthesizer’.
I personally think this one is underrated, as it combines Arturia’s quality analog emulation capabilities with the flexibility of wavetable synthesis. You also have tons of modulation options, all with great visual feedback.
Not to mention it has a great interface to look at and use, which is handy when you’re designing a lot of sounds. Plus, there are some really cool features like the harmonic oscillator, which are just great to play with in general.
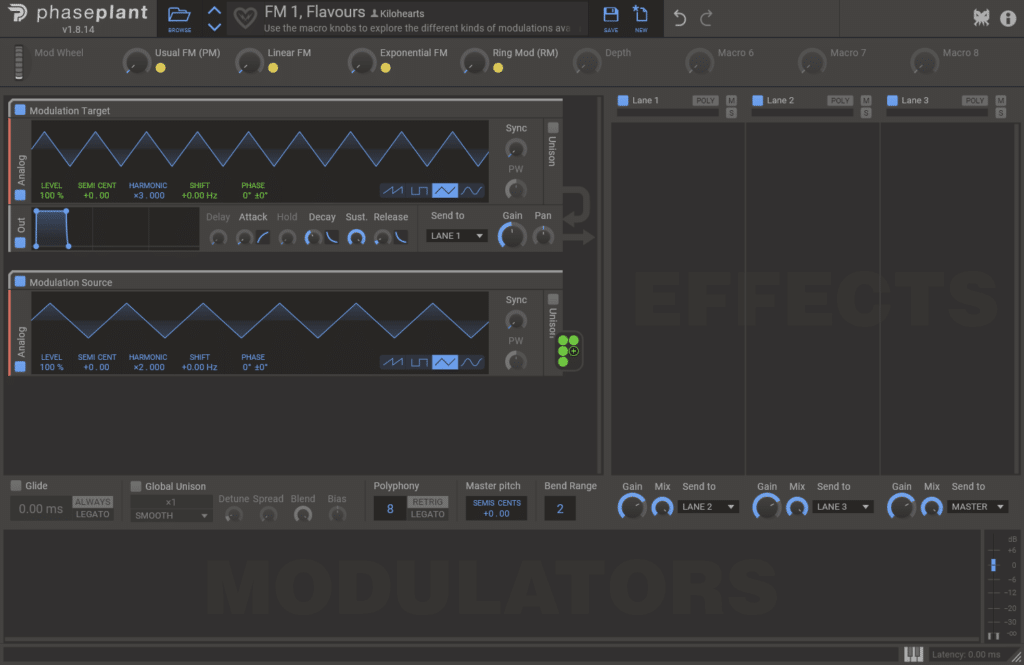
Kilohearts Phase Plant
The reason Phase Plant has garnered so much attention recently is it’s ultra-rich feature set.
Its workflow is designed around generators, effects, and modulators, allowing for any number of possible combinations. Simply bring in a module and you can start routing.
This means you don’t really have to leave Phase Plant to do all the post-processing that you wish to (although you still can).
These modules can be expanded upon with the Kilohearts ecosystem, which includes units that work inside the synth itself or as standalone plugins. This opens up a lot of sound design possibilities.
Tips & Tricks for Wavetable Synthesis
Now let’s get to the fun stuff. Here’s a few things you can try to get the most out of your wavetable synth.
FM different wavetables together
Many of the wavetable synths mentioned earlier have basic FM synthesis capabilities. So it’s a great opportunity to combine the best of both worlds.
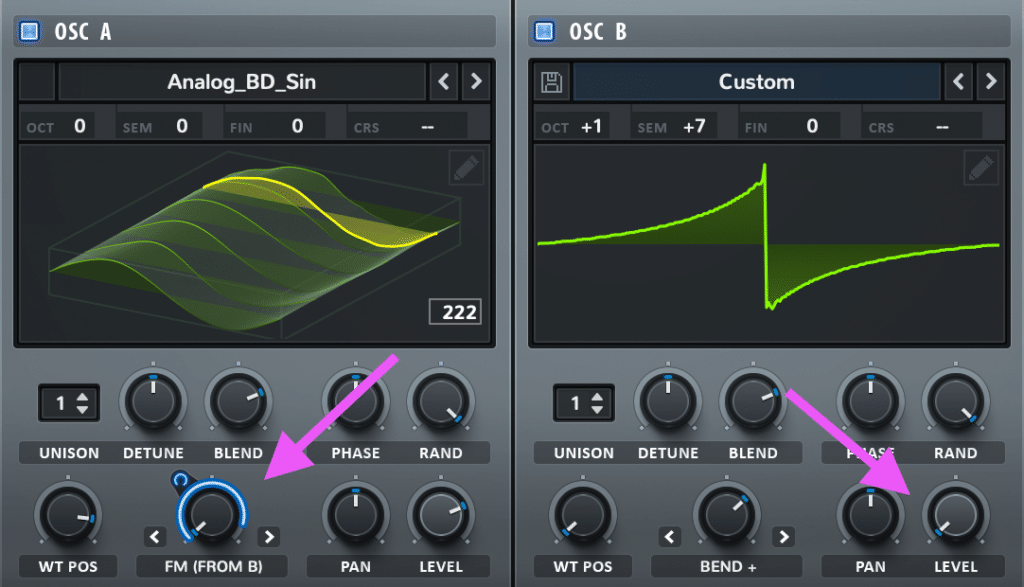
Pick two wavetables – one for the carrier (what you will hear), one for the modulator (creates the FM effect). Pick whatever you want for the carrier, but make sure the modulator isn’t too bright or harmonically-complex.
In this example, I’m modulating a slightly imperfect sine wave with a low-quality saw wave (it has harsh harmonics removed) to create a growl-like texture. Also notice the modulator (the saw) is up 1 octave and 7 semitones, giving the modulation more harmonic texture.
Add modulation and FX to taste and you can get any number of growls this way:
Creating your own wavetables
Some wavetable synths, like Serum and Phase Plant, allow you to create your own wavetables. This allows for unlimited sound design possiblities, as you can control the exact harmonic profile and movements of your patches.
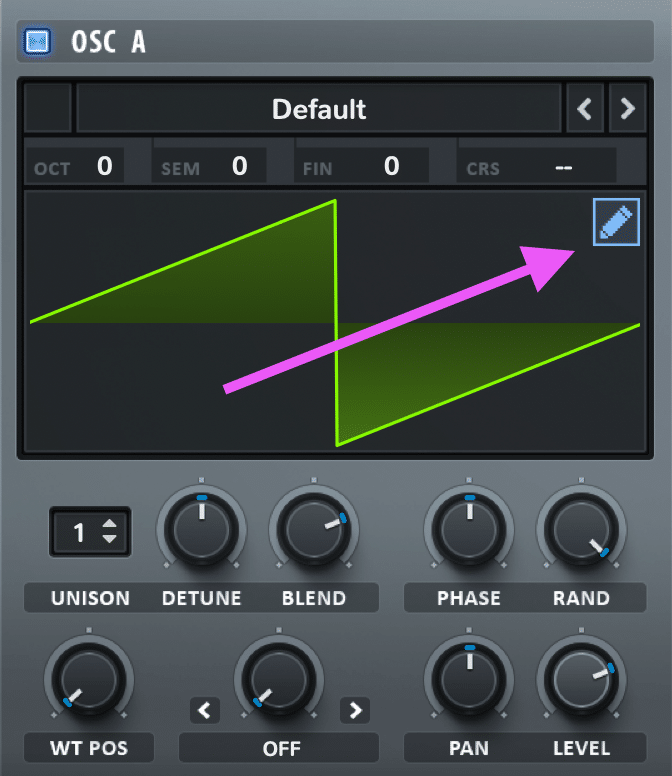
In this example I’ll show you how to do this in Serum.If you click the little pencil icon on the wavetable view:
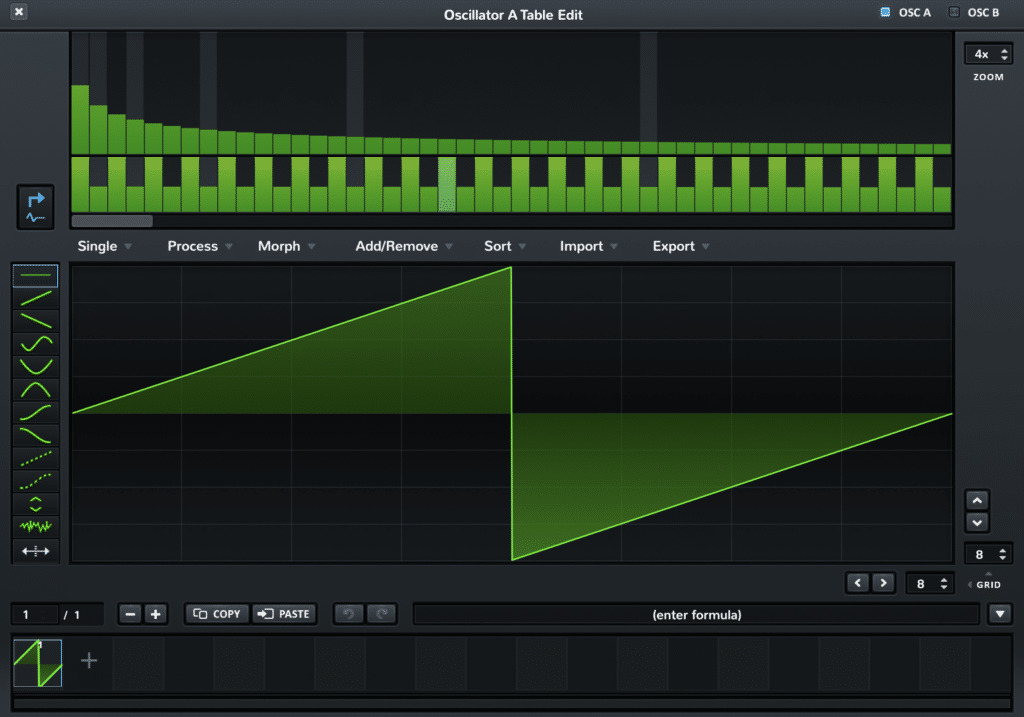
Then you’ll bring up the wavetable editor. This is where you can mangle, transform and create wavetables until your heart’s content.
Although this probably requires a video or article in itself to explain, I’d look at creating new wavetables by simply playing with the ‘Process’ and ‘Morph’ tabs.
Note: We dive into the wavetable editor in our course, Breakthrough Sound Design.
Wavetable resampling
On the topic of creating your own wavetables, you can resample existing sounds into wavetables, often inside the synth itself. I’ll show you how to do this in Serum.
First, create a sound that you like. This can be anything, from a bass to a pad.
Next, pay attention to how it sounds over the course of a bar, as this is the length of time Serum will listen to your sound for.
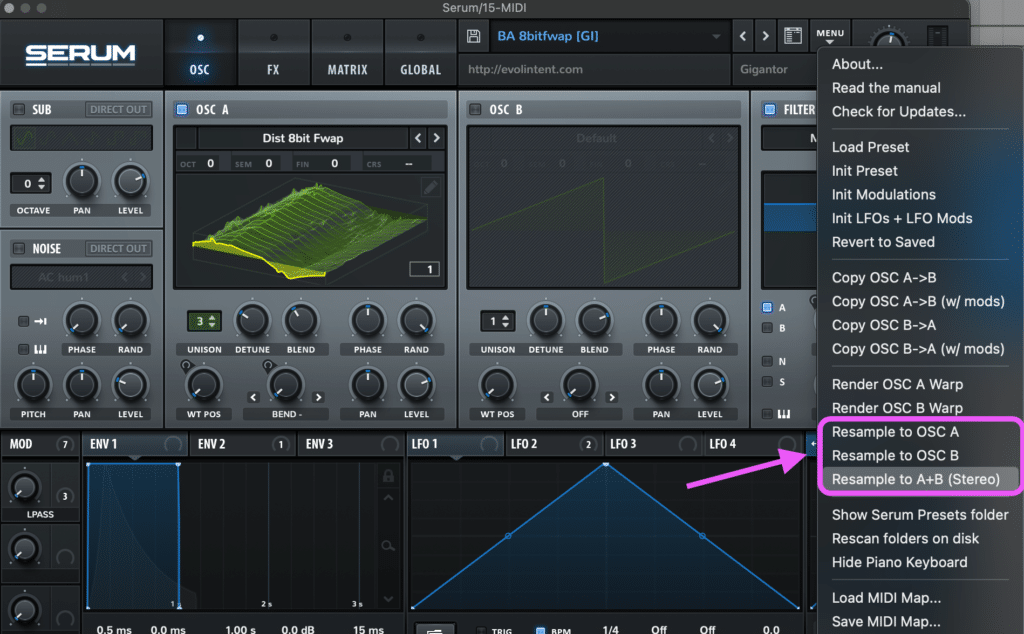
Once you’re happy, head to the menu and select one of the three resampling modes. You can do either mono resampling to OSC A or B, or do stereo resampling to both.
Once you’ve resampled it, note that all of the modulation and processing will now re-apply onto the new sound, so you’re basically getting a second dose of effects. Additionally, the WT POS on your oscillator will scan through the bar of recorded sound, so feel free to assign a spare LFO or ENV to hear the movement.
Now change the FX and modulation. You could even layer it with a new wavetable!
Download wavetables and try them out
Because many wavetable synths support third-party imports, there are great wavetables out there that you can download (free and paid).
And while many producers are hammering the default options (to be fair, there is a lot you can do with just these), sometimes you can stumble upon something out of the ordinary when you go through these packs.
Wrapping Up
I hope this guide has helped you wrap your head around wavetable synthesis. If you have any questions, feel free to email me at [email protected].
Make sure to grab the EDM Starter Kit, including presets for Serum! 👇
Get the headstart you need in music production with our EDM Starter Kit 🎛️
Get our collection of high-quality presets, samples and PDF guides – suitable for all genres of electronic music 👇

