


Resampling audio is potentially the most underrated sound design method out there.
You can rinse and repeat different types of processing on any sound, ending up with millions of creative possibilities.
So why aren’t people using it more? Because it’s confusing, and there are so many ways that you can approach it.
In this guide, we’ll give you some key tips for using resampling in your own music, such as:
- Reverse echos (great for transitions and building tension)
- Chopping your own chord progressions & melodies
- How to truly stand out through iterative resampling
- Processing basses to become huge (without ruining your sounds)
Let’s see what awaits! 👇
Table of contents
- A Quick Disclaimer: What Do I Mean By Resampling?
- Tip #1: Basic Resampling Workflow
- Tip #2: Resampling in Xfer Serum
- Tip #3: Reverse Reverb, Delay & Echo (Sweep)
- Tip #4: Bass Resampling for Crazy Sound Design
- Tip #5: Dreamy Atmospheres Using The Whirlpool Technique
- Tip #6: Master Audio Resampling
- Tip #7: Record Your Speakers/Monitors…
- Beyond Resampling Audio
A Quick Disclaimer: What Do I Mean By Resampling?
When I’m talking about resampling in this guide, I don’t mean the process of sample rate conversion (e.g. converting 44.1kHz to 48khz).
I’m talking about re-bouncing or re-recording audio to use it in different creative ways.
You can learn about the other type of resampling audio in this tutorial from Streaky.
Tip #1: Basic Resampling Workflow
In order to resample, you need to understand how your particular DAW handles audio.
Here’s a rundown of the main 3 DAWs for electronic music: Ableton Live, FL Studio, and Logic Pro X.
Resampling Audio in Ableton Live
There are a few ways to do this in Ableton Live, but the easiest way is to use the ‘Resampling’ input channel on a new audio track.

This will basically sample anything that goes through the master channel. Be aware that you may want to turn off master FX when performing this process.
Hit record and watch the audio come in.

Now you can chop, process, and mangle as much as you like! Ableton Live is a super powerful DAW when it comes to creative sound processing.
Resampling Audio in FL Studio
Although it’s not as straightforward as in other DAWs, resampling in FL Studio is super powerful.
The best way is to load up Edison on the master channel at the point where you want to start recording the audio.
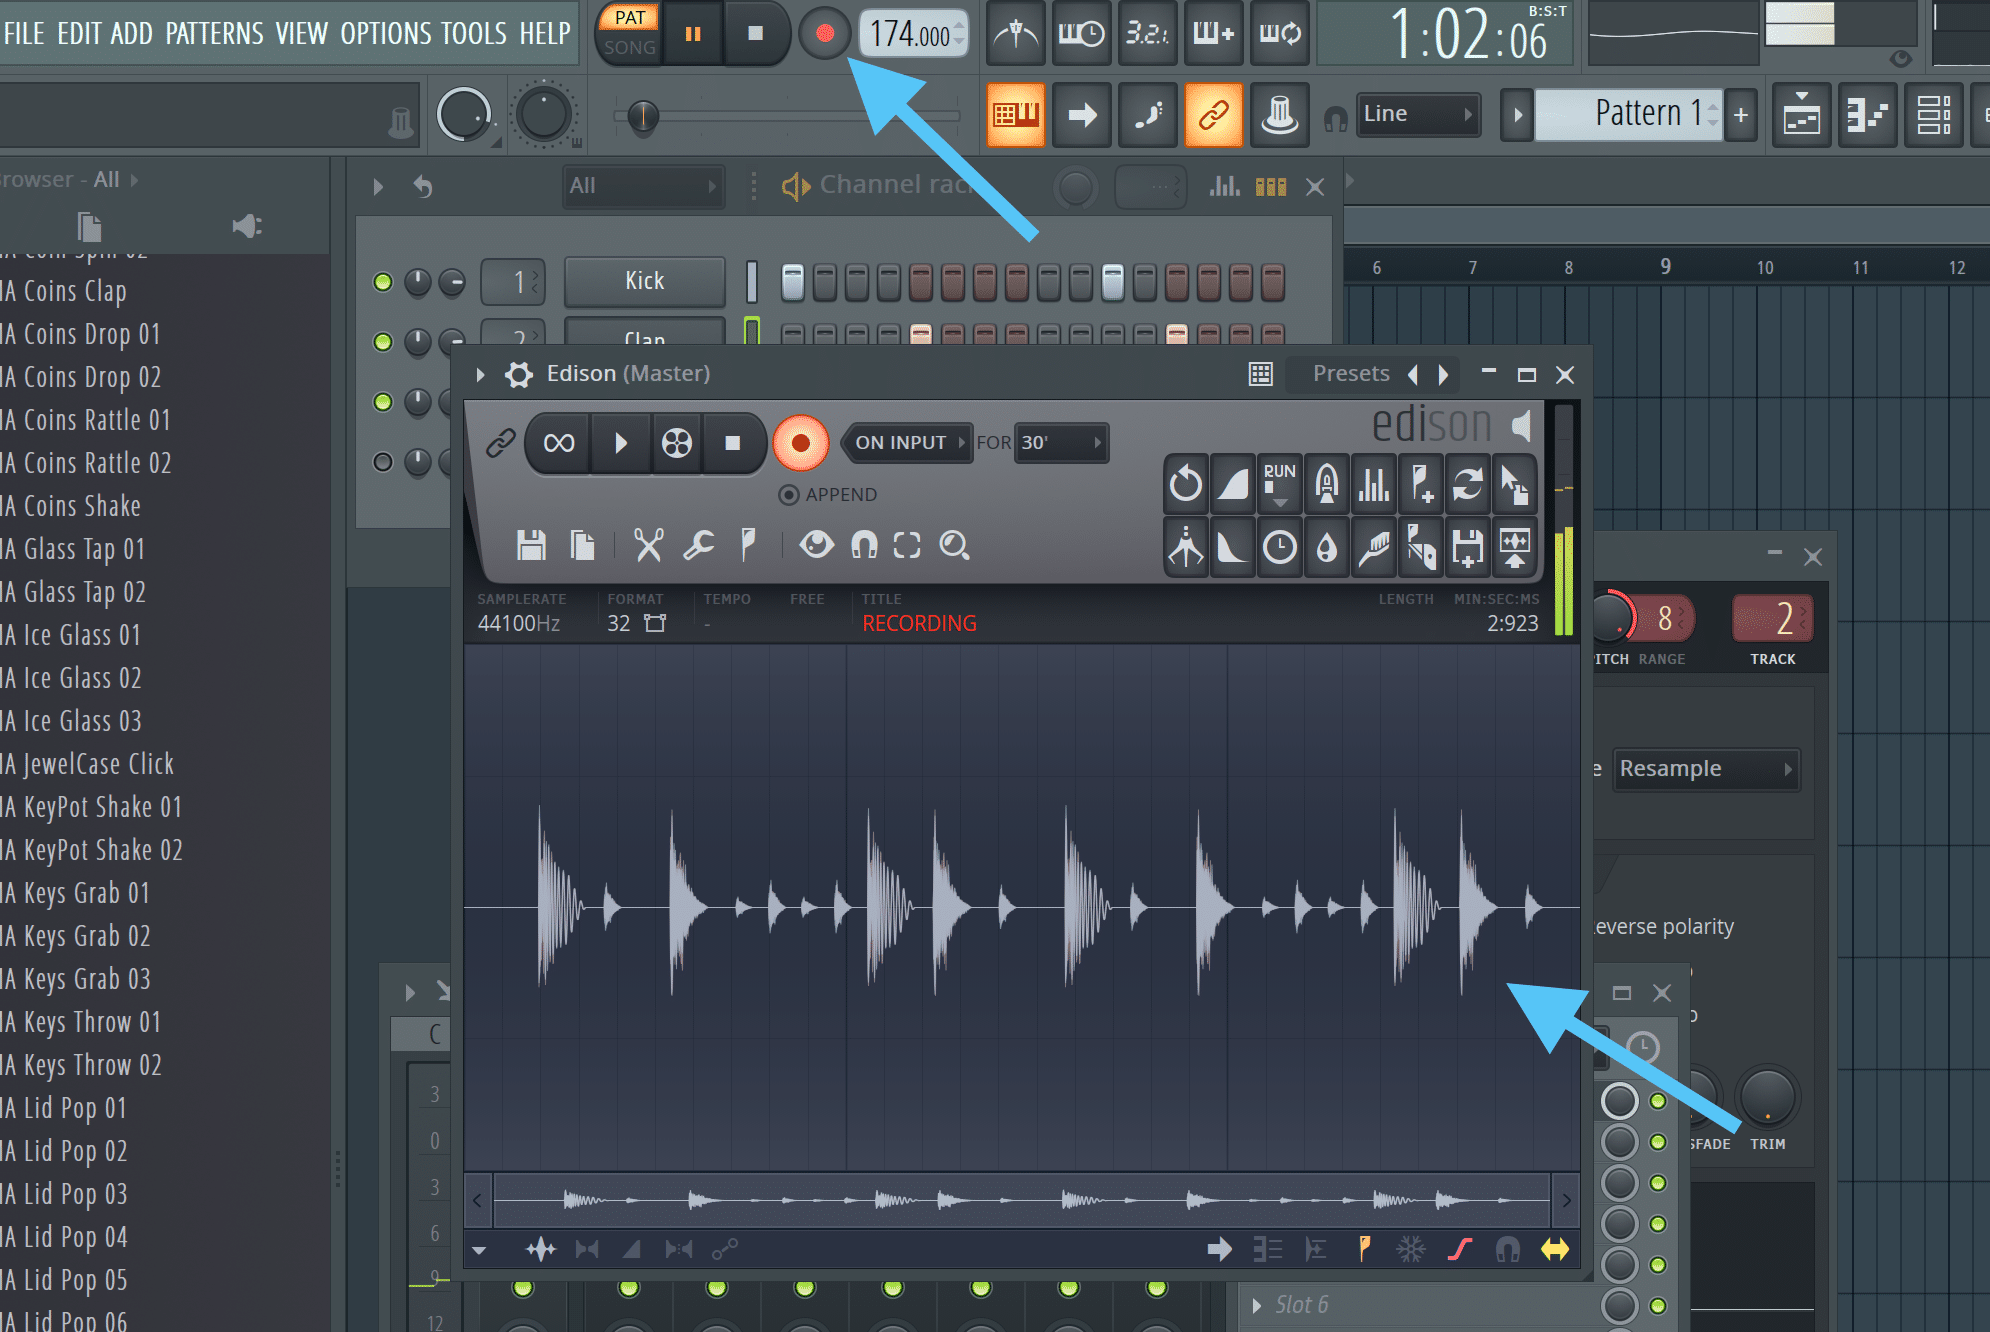
Then you just hit record along with your track playing, and it will record it until you stop.
Once you’ve finished, click and drag the sample icon to anywhere – the playlist or the channel rack.
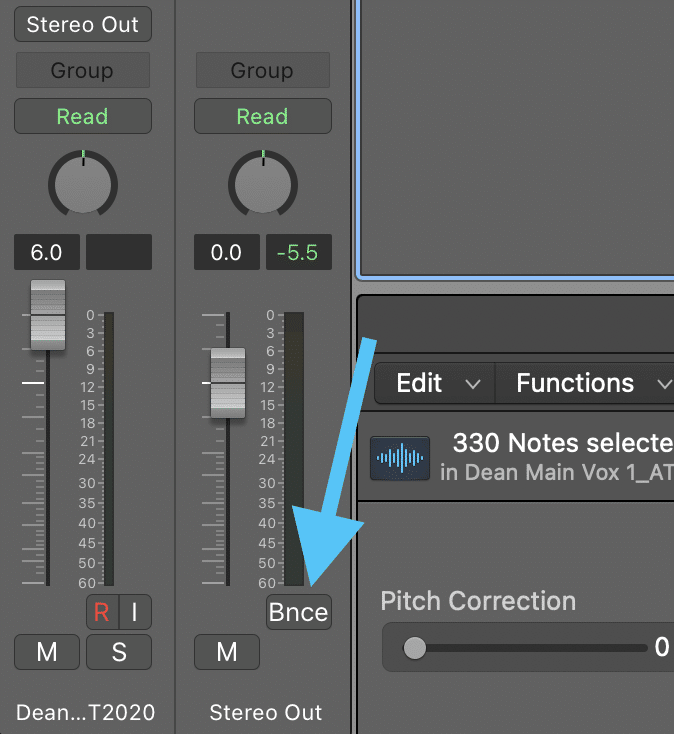
Resampling Audio in Logic Pro X
Like other DAWs, Logic Pro has many different ways you can resample audio. But the easiest by far is to use the ‘Bounce’ feature on the Master channel.
Start by selecting the portion of the track you’d like to resample, and then hit ‘Bounce’ on the master channel in the mixer.
A dialog window with some settings will pop up (check the Start and End so it lines up with your selection).
I’d recommend ticking ‘Add To Project’ so you can access the resample from the browser and drag it in.

Now it will appear in the Project section of your Browser.
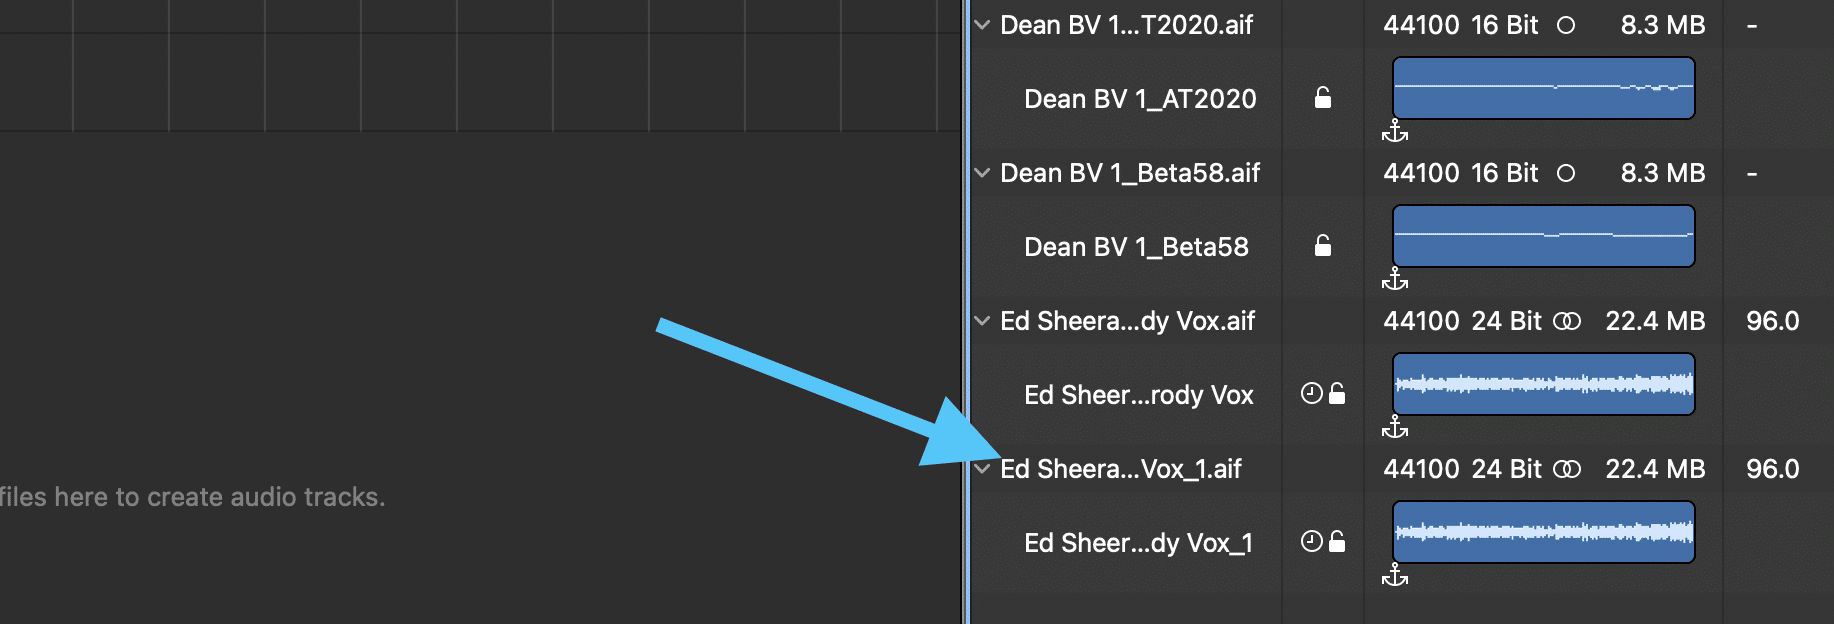
Simply add it to a new audio channel and you’re good to go!
Now, let’s move onto something a bit more fun.
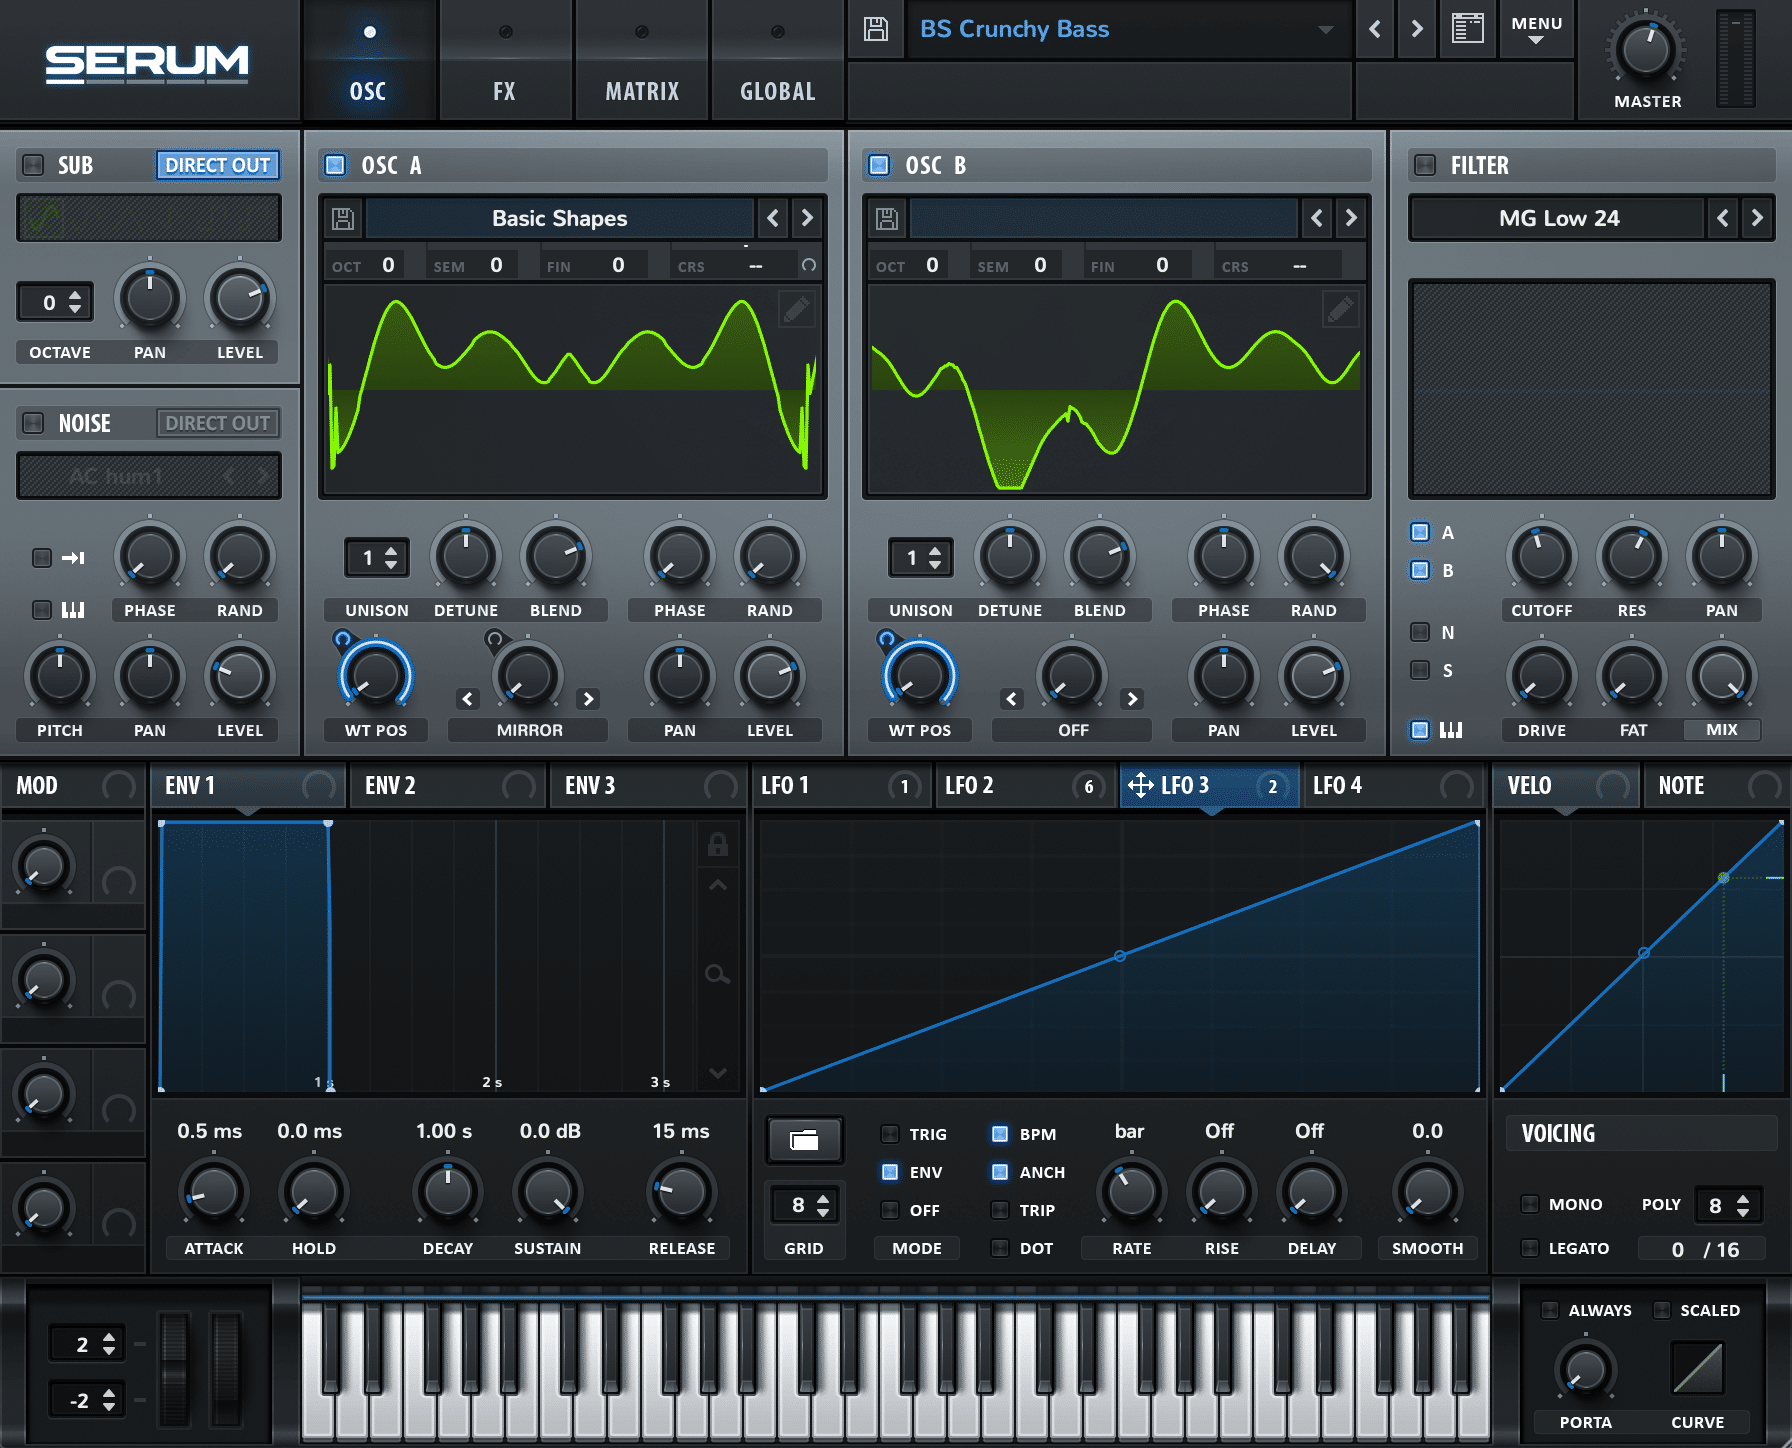
Tip #2: Resampling in Xfer Serum
Did you know you can resample any sound directly in electronic music’s most popular synth?
Once you’ve designed a patch or have loaded up a preset, simply head up to the Serum menu (top-right) and you have a few options:
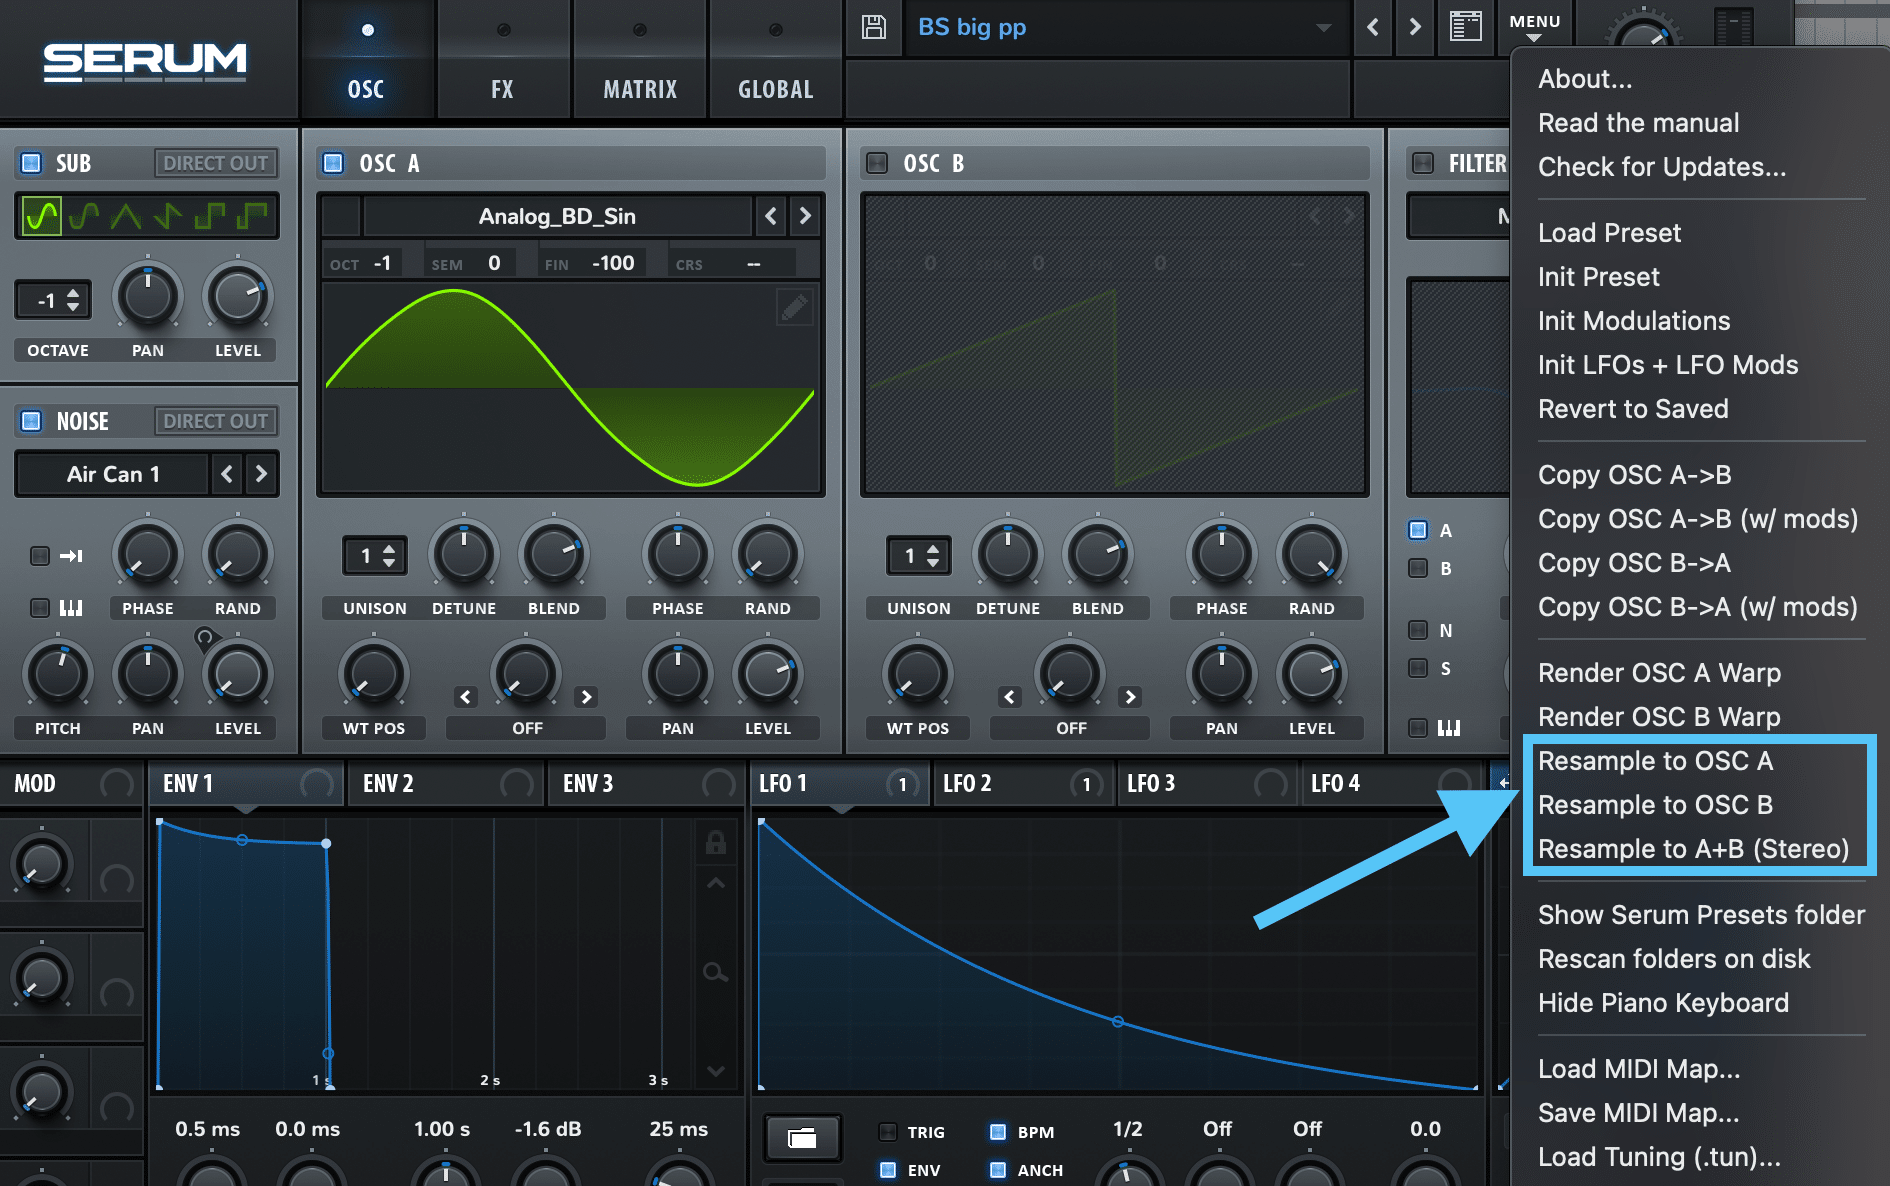
You can resample in mono to either A or B, or in stereo to both.
What this does is records 1 bar of audio to Serum’s memory, and slices that up into wavetables. So the WT POS will scan through that 1 bar of sound.
The best part? All those modulations and FX processors will be applied to the sound – again.
Here’s this sound on a bass I made – note that I’ve used LFO 3 to modulate the WT POS over 1 bar to add the original motion back in.
I did a few tweaks to the resampled version just to make it work, which is often the case:
Before resampling:
After resampling:
I personally love to resample to stereo because of the intricate details you can capture. Just make sure both OSC A and B are turned on and turned up.
You could take this further by:
- doing multiple rounds of resampling
- editing the wavetables after they are re-sampled
- resampling existing presets into something else
You can do all this just inside Serum!
But let’s take it back to the DAW for the next one.
Tip #3: Reverse Reverb, Delay & Echo (Sweep)
One of my favourite all time tracks is Porter Robinson – Fellow Feeling:
From about 2:09 onwards, you’ll notice these cool vocal sweeps that lead into the spoken vocals.
This is a common resampling technique where you create a reverse sweep into any sound or instrument. It’s great for vocals, leads, and pads.
Start with some sort of instrument or sound. I’m going to use a vocal in this case:
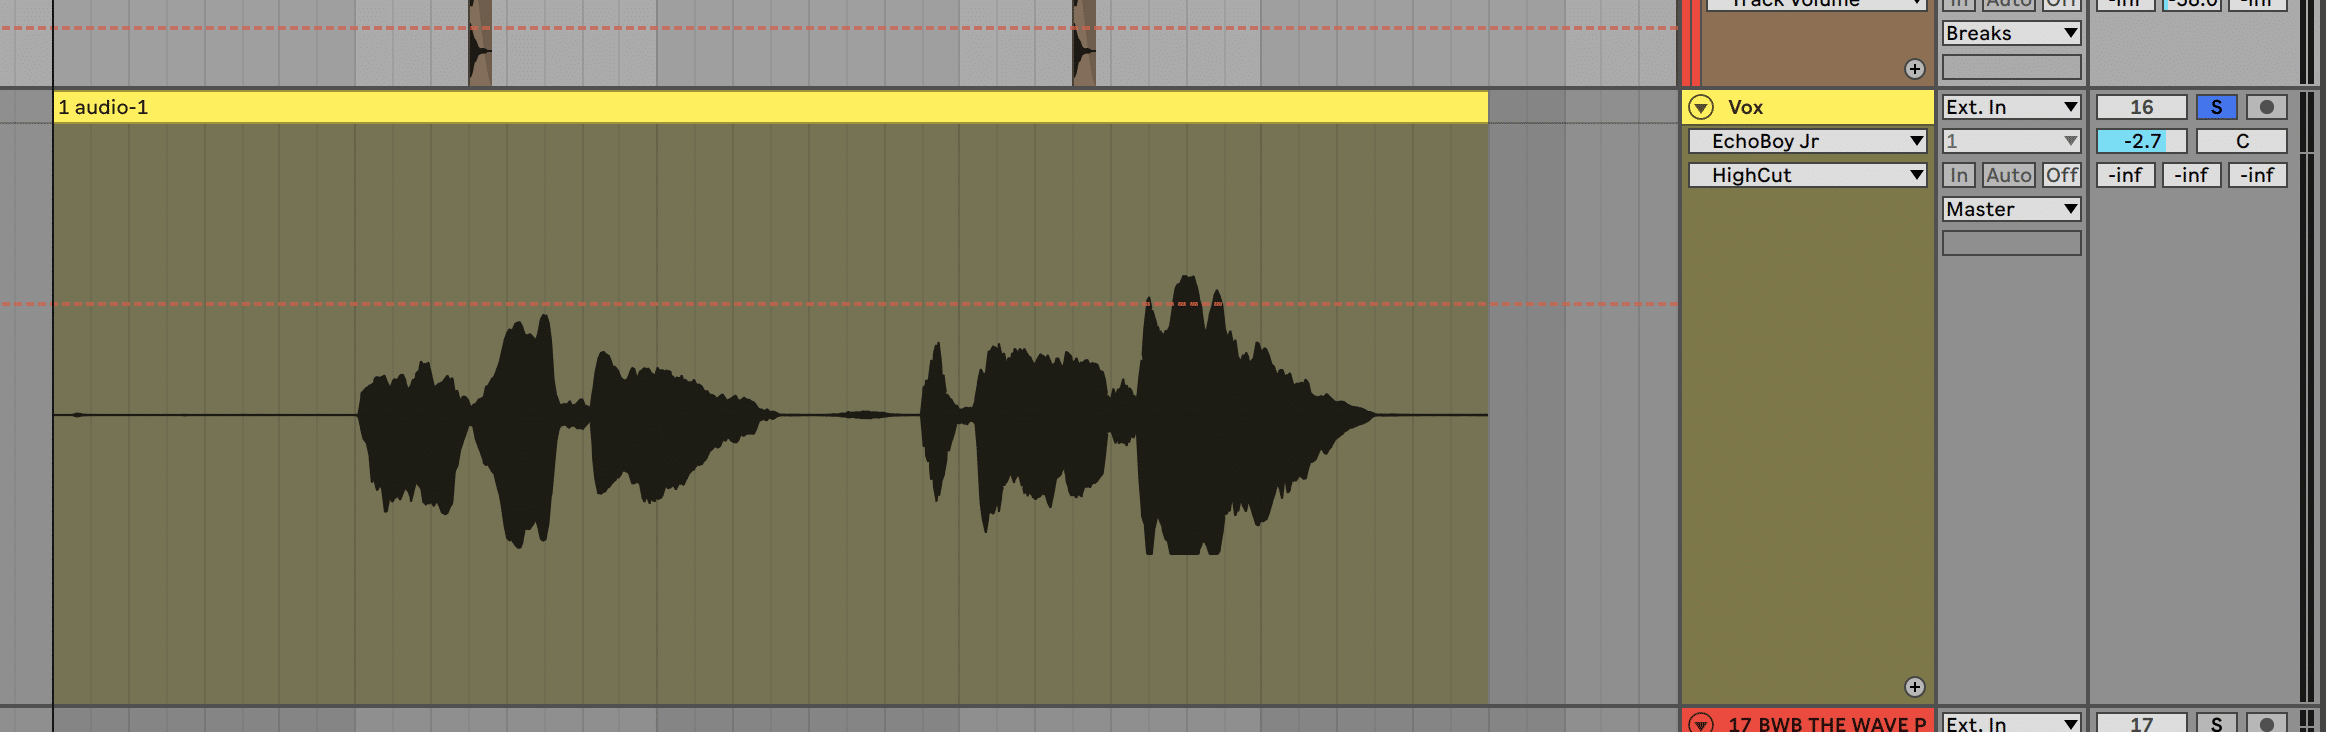
Duplicate the sound and reverse the sound. Chop off everything before the start of the sound.
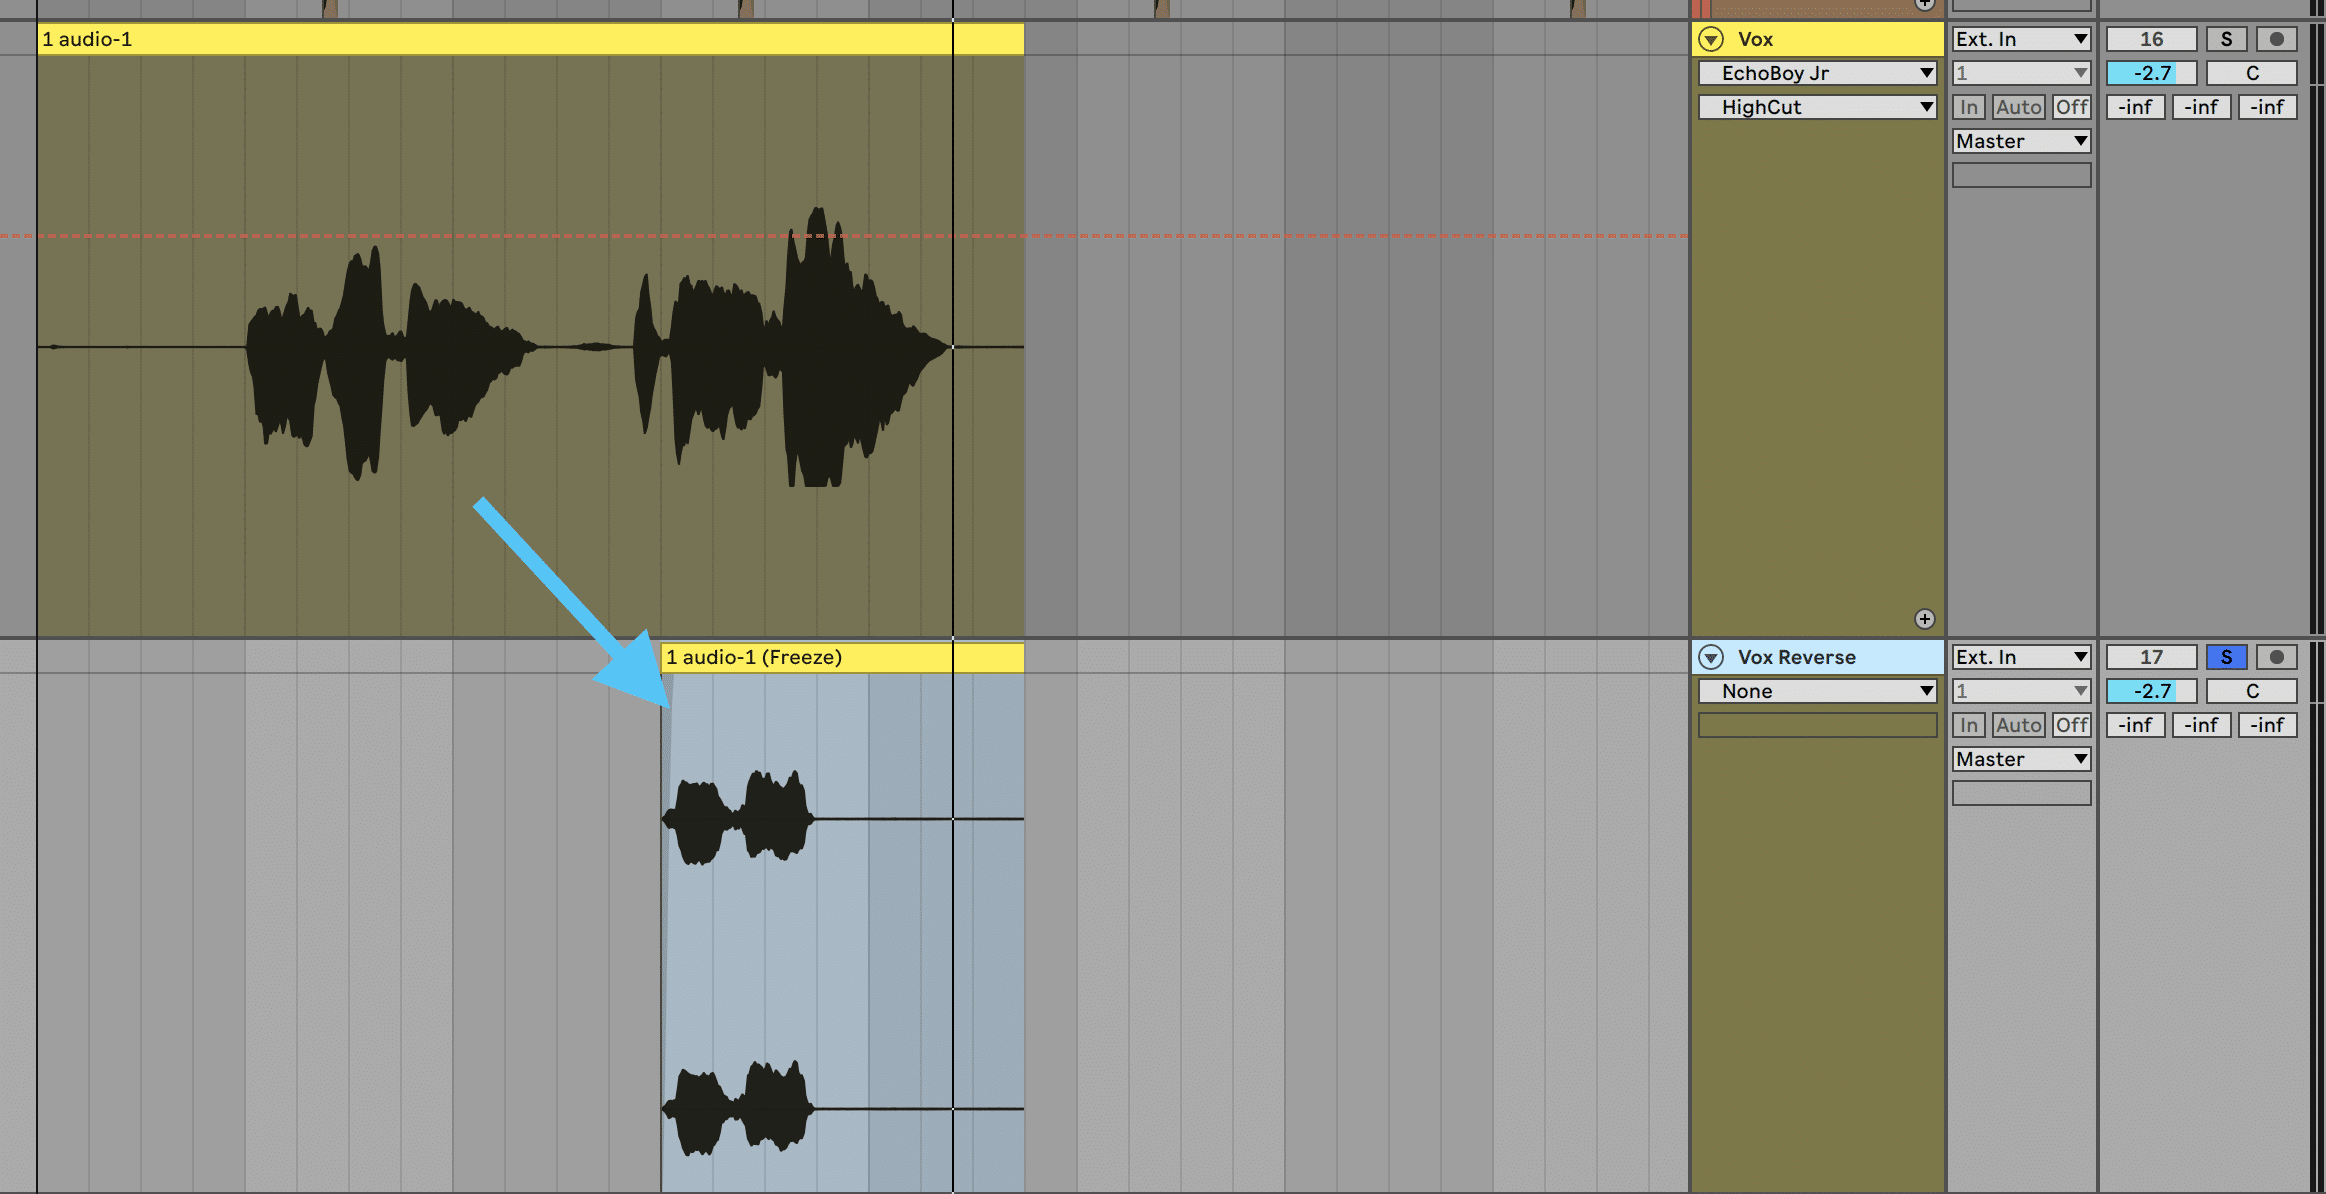
At this point, you can choose to use any sort of time-based effect – reverb, delay, echo, you name it.
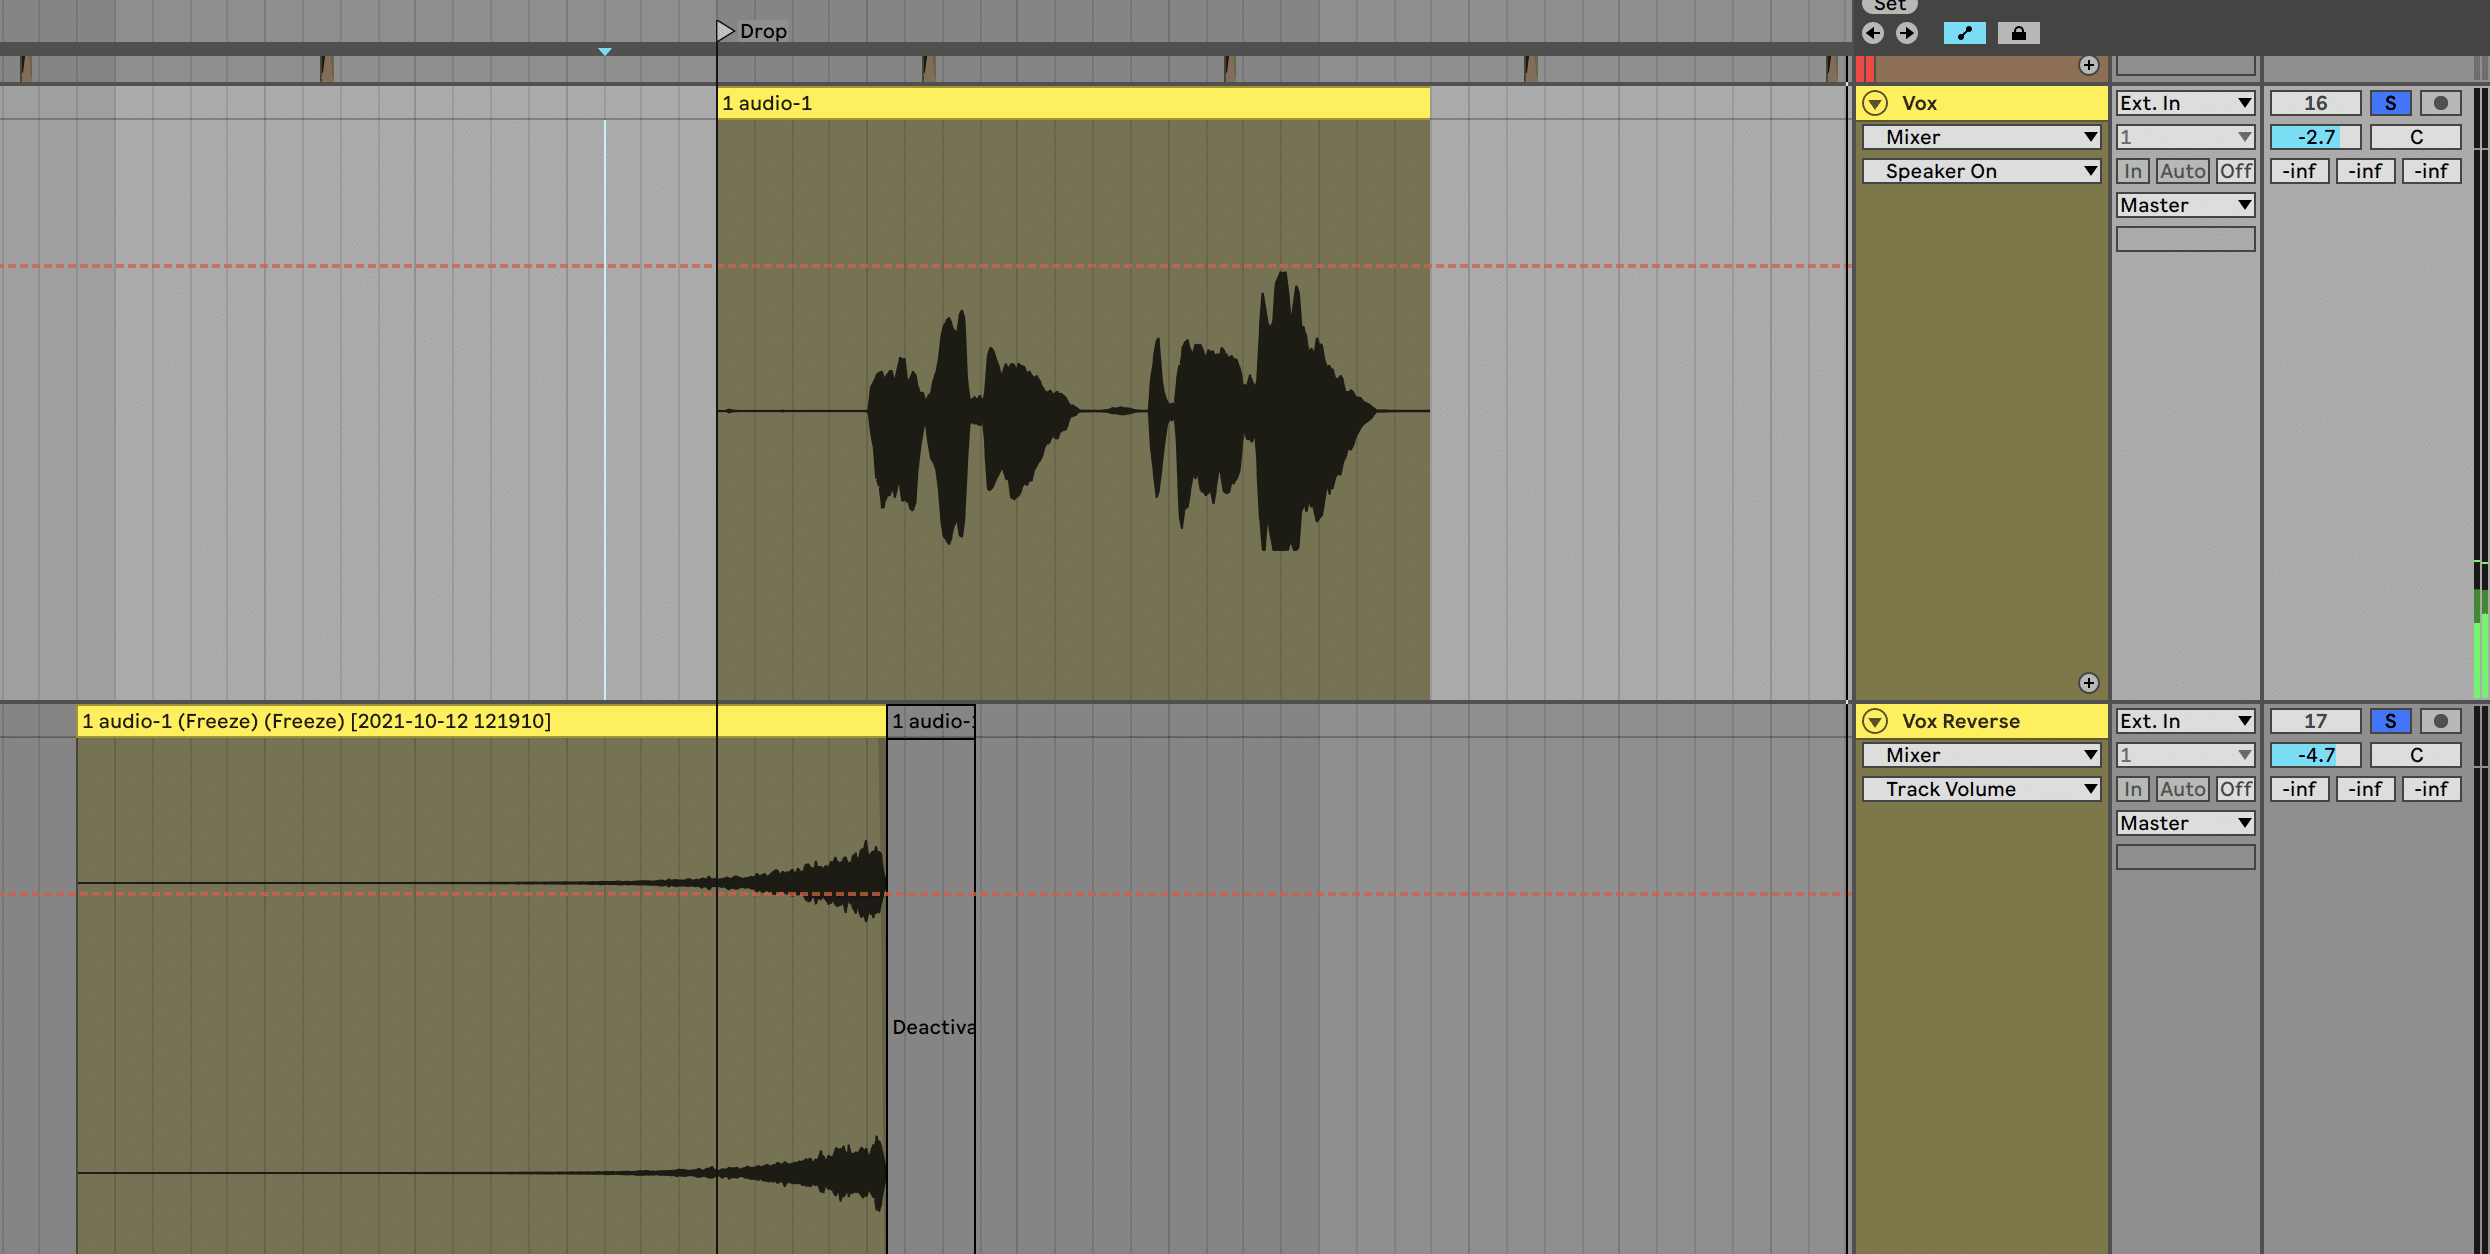
Add it and tweak your settings to taste. Once you’re happy, resample it to audio (make sure nothing else in the track is playing) and then reverse again.
Doubling up on the reversing means we can get a reverse reverb tail, but the original audio is back to its normal direction.
Align the tail to the start of the phrase and blend the volume to taste.
You can do this on any sound, and at any point on the track. But vocals and pads aren’t the only elements that you can resample!
Recommended: Vocal Samples: The Complete List of Packs
Tip #4: Bass Resampling for Crazy Sound Design
If you’re into heavy bass design, resampling is a dream. You can keep resampling and processing until you get any number of results.
In this example, I’m going to use a multi-layer bass with a bit of post-processing:
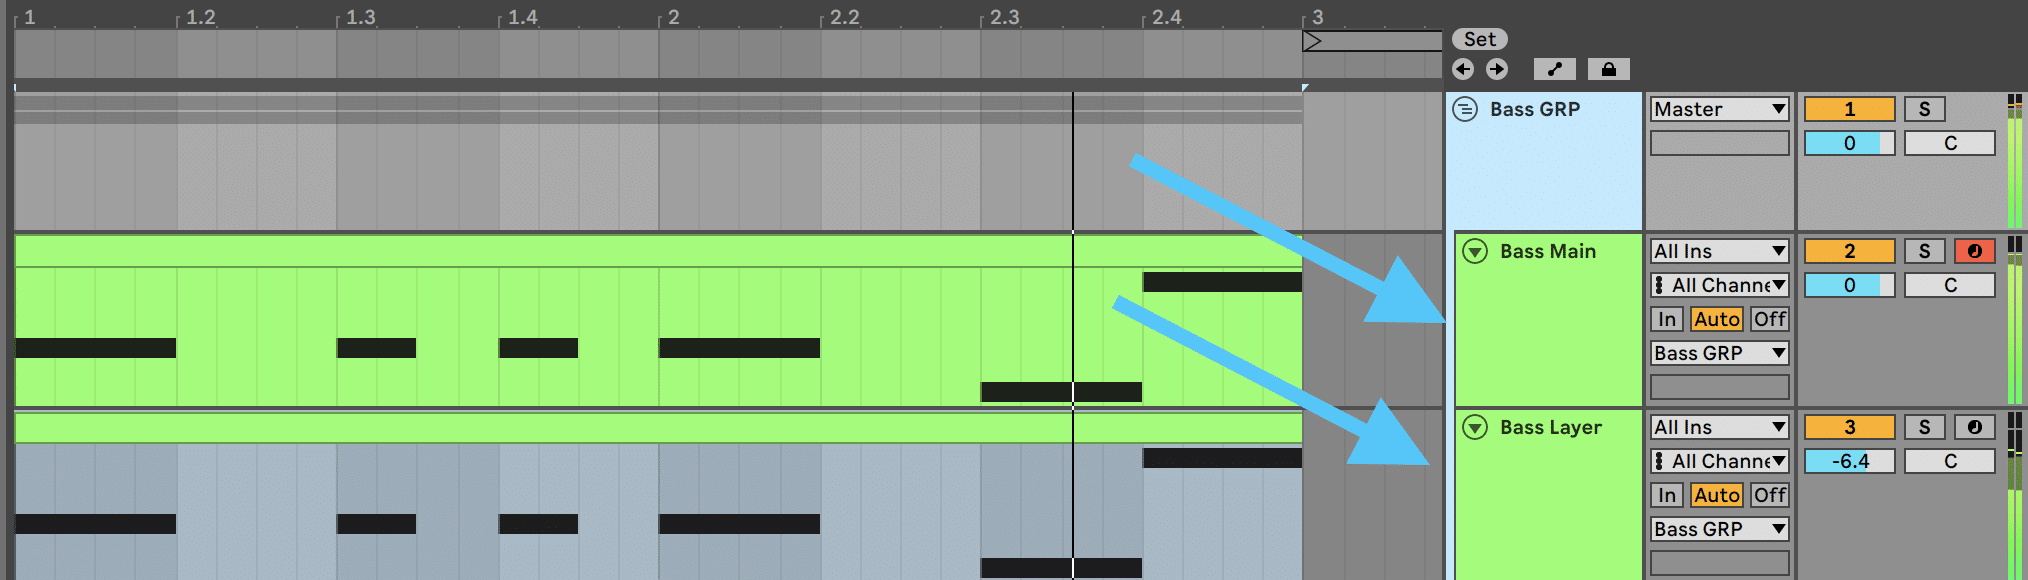
I like the sound of it so far, but we can mangle and transform it even more. So I’m going to resample the group into one audio track:
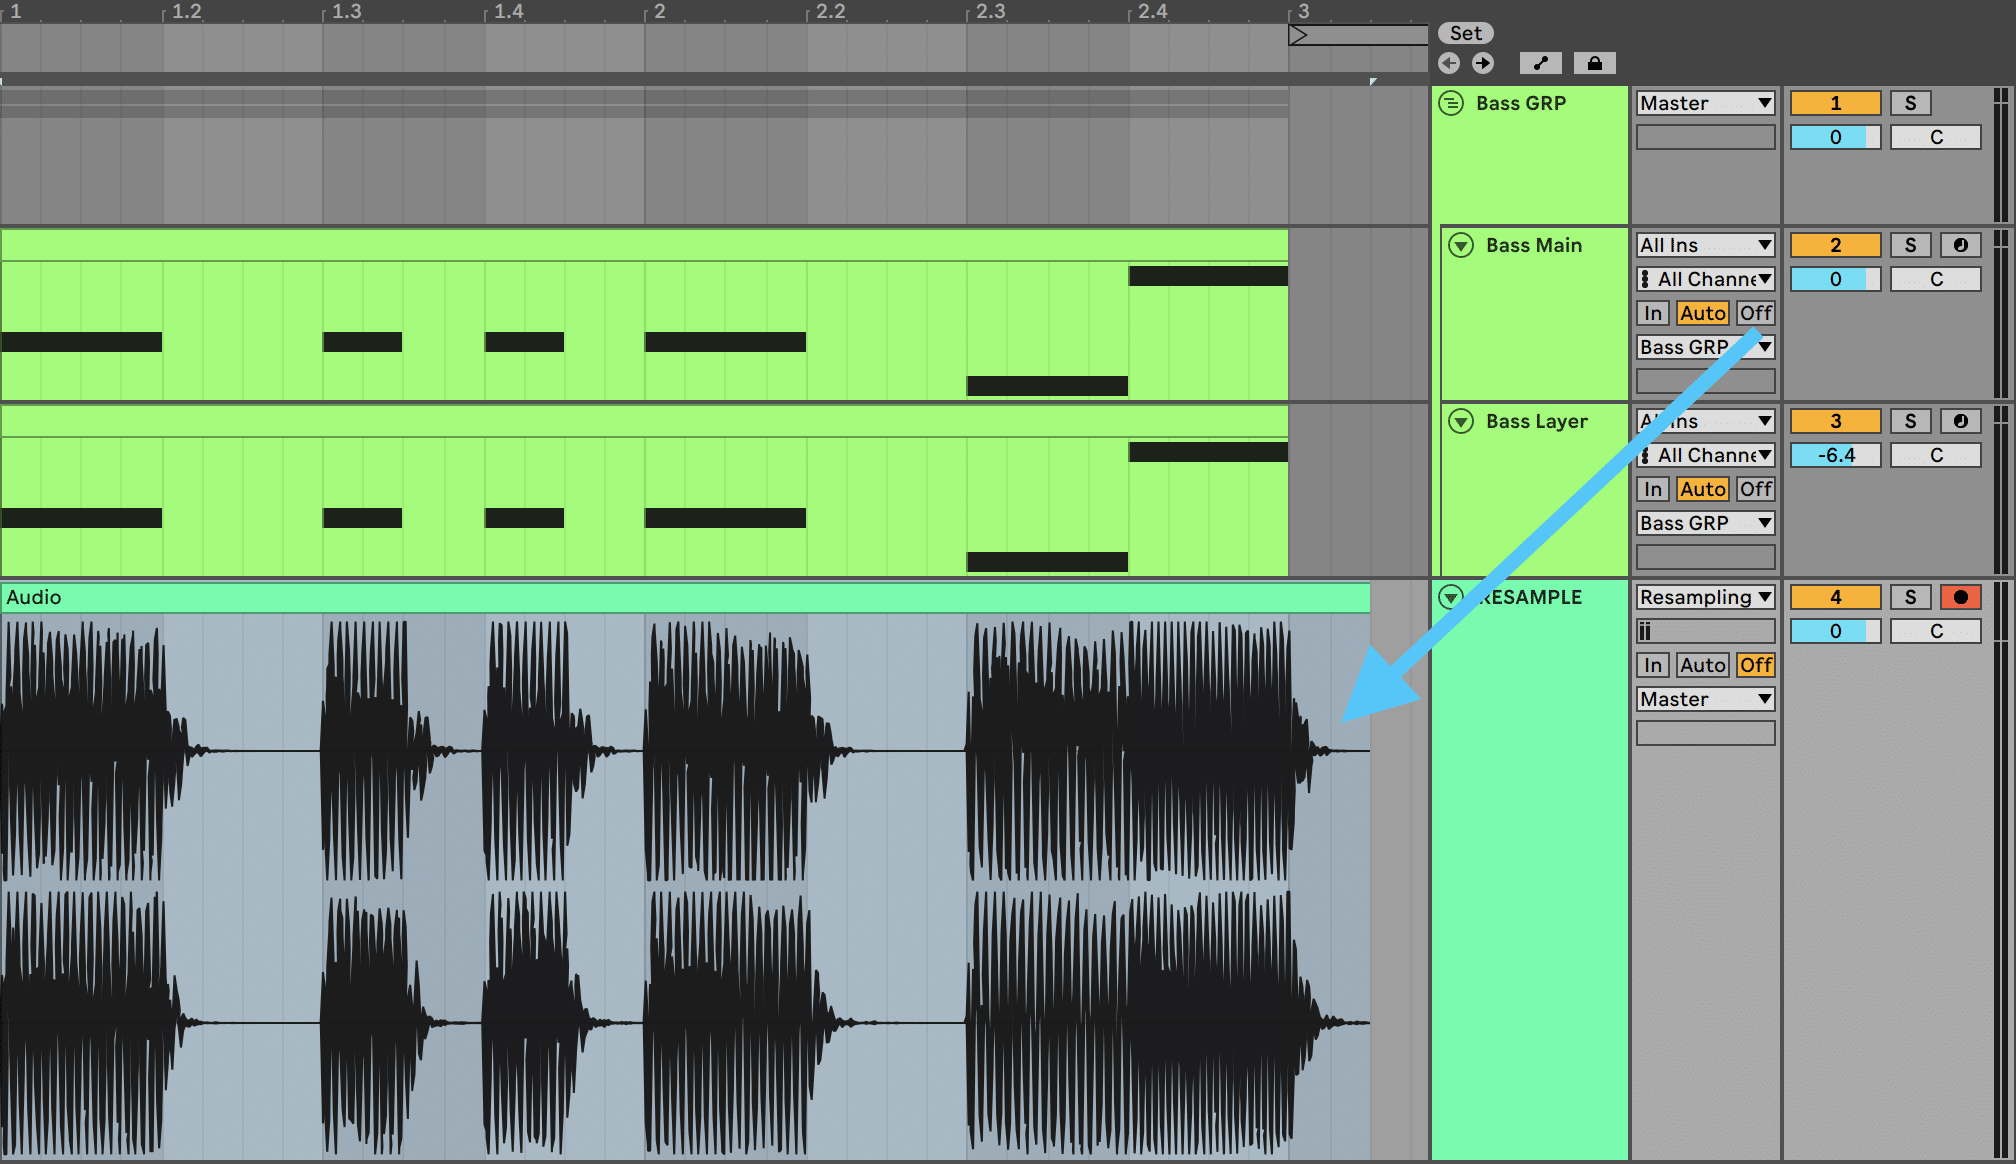
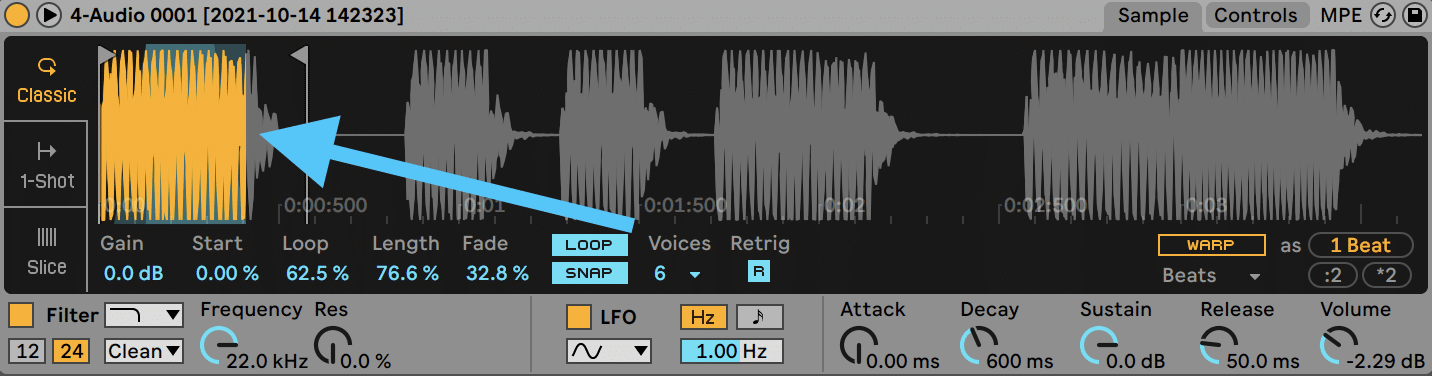
I’m going to drag this sound into a sampler and play it in MIDI. I’ll turn on looping so that the sound repeats indefinitely. Another benefit is that higher notes loop faster, giving each note its own character
This is an effect you hear a lot on bass music, dubstep, and drum & bass.
Lastly, I’m going to add extra layers of distortion and saturation. Overdrive, OTT, and Ableton’s Saturator will do the trick here:

I’m going to stop here, but you don’t have to. Feel free to resample this, chop and screw with the audio, and see what you can come up with.
Note: want to dive into more heavy bass design? Check out our course Breakthrough Sound Design.
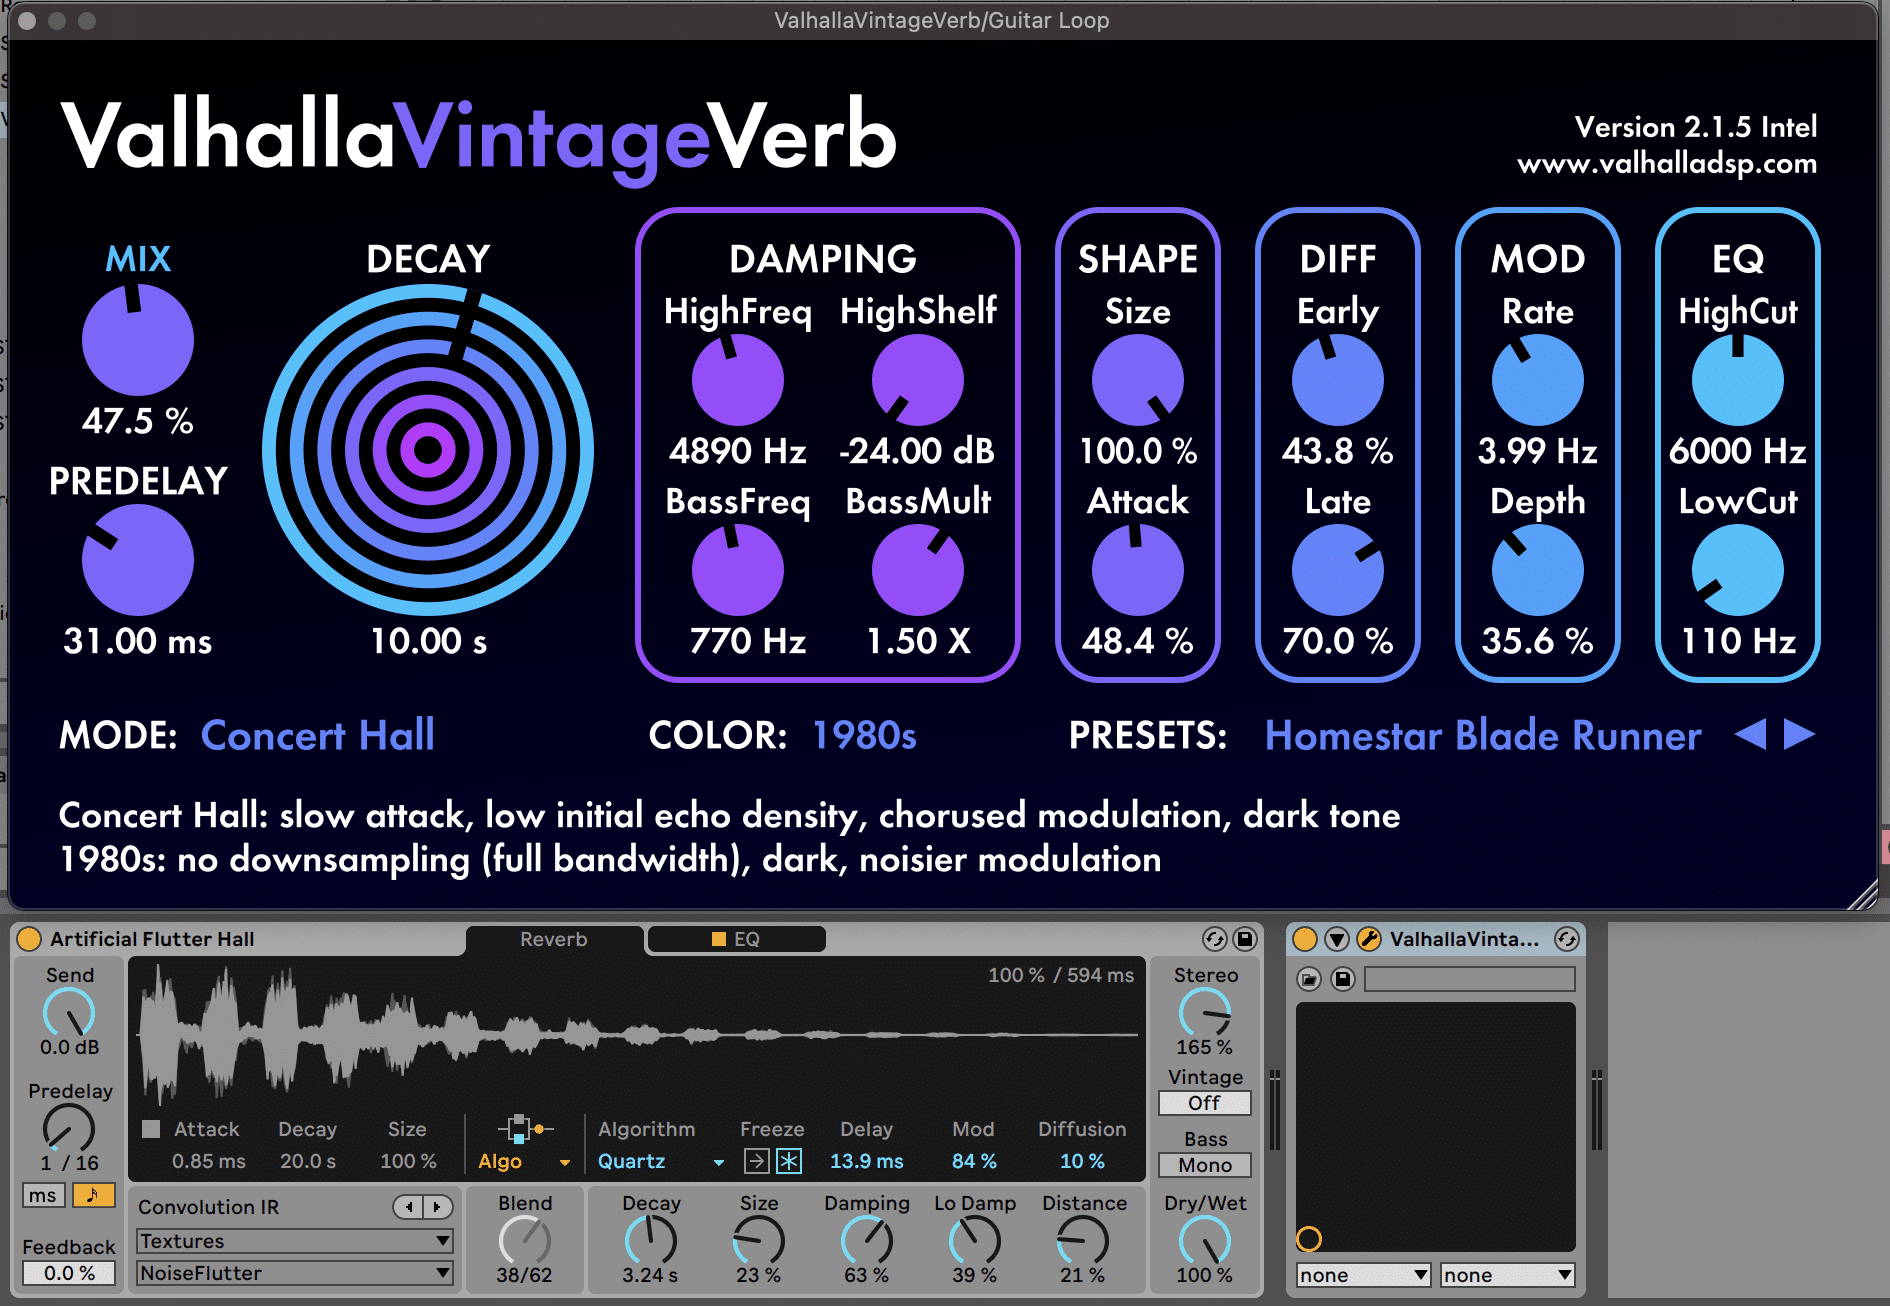
Tip #5: Dreamy Atmospheres Using The Whirlpool Technique
The Whirlpool Technique is something I’ve been using for years to get dreamy, stretched-out goodness. This works well in ambient/chill genres, but you can use it in anything that needs an atmosphere.
First, you’ll want to start with a basic sound that has the core tonality you want. For example, a piano chord will turn into a really nice harmonic drone, or a field recording will turn into a really nice spooky atmosphere.
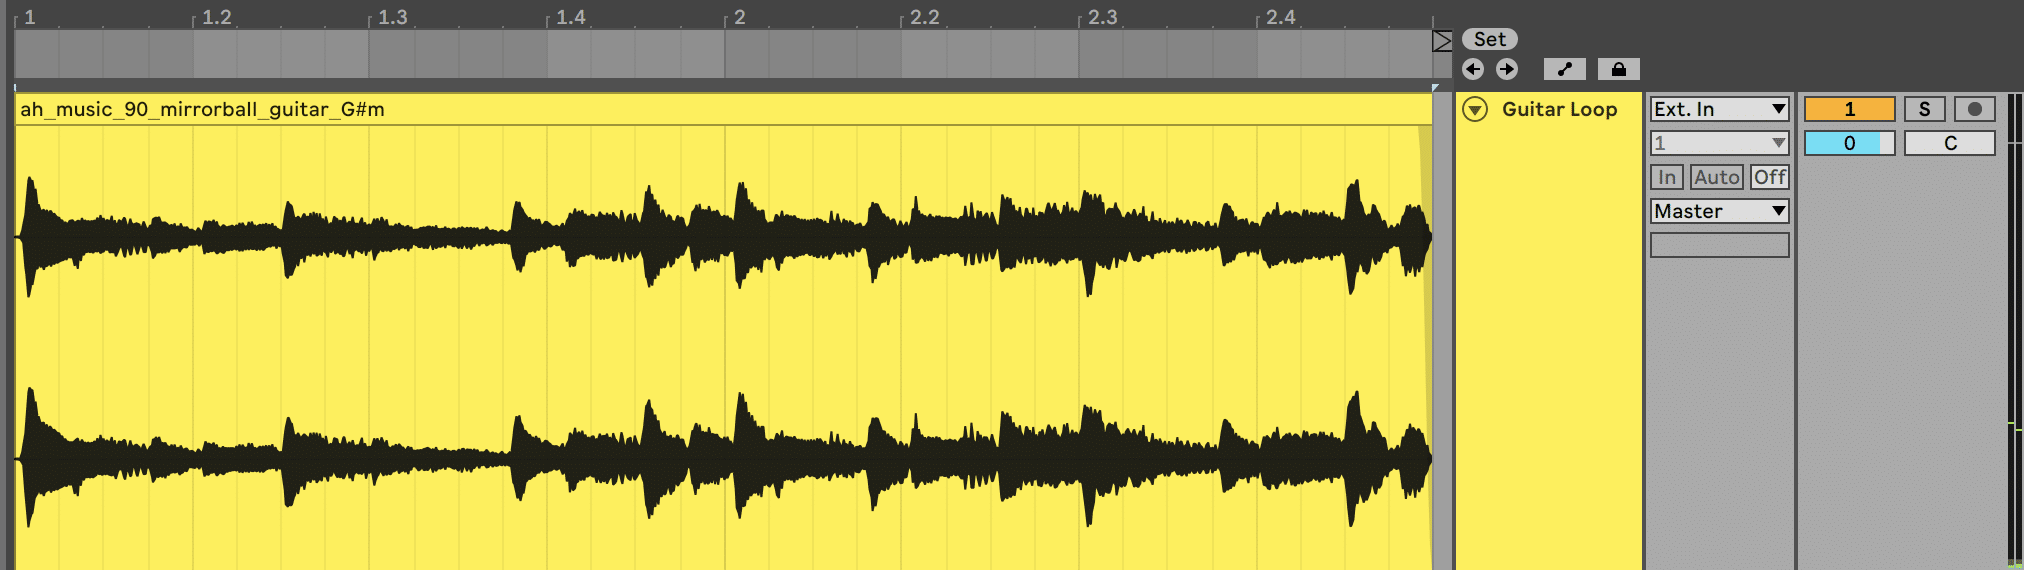
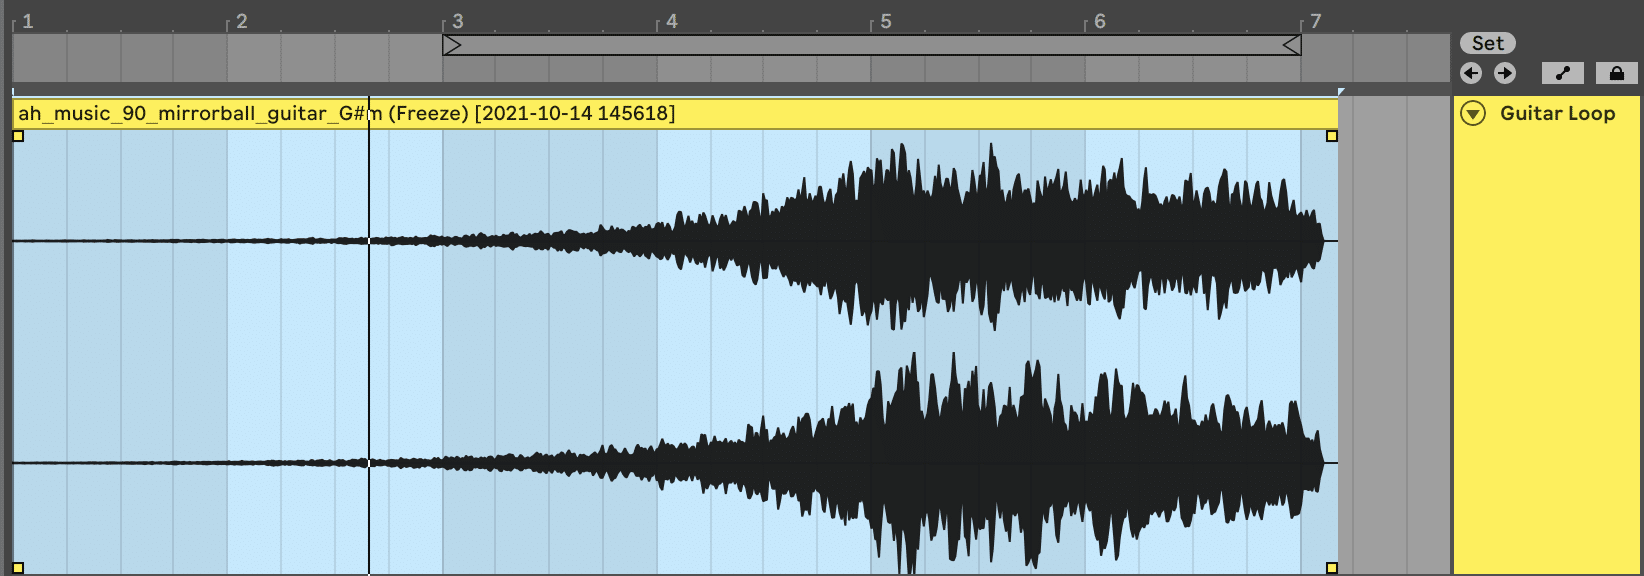
I’m going to use a guitar sample:
Once you’ve found a sound, you want to follow this process:
Process → Resample → Reverse → Repeat
I’m going to use a couple of reverb units to start off with to really blur the sound out.
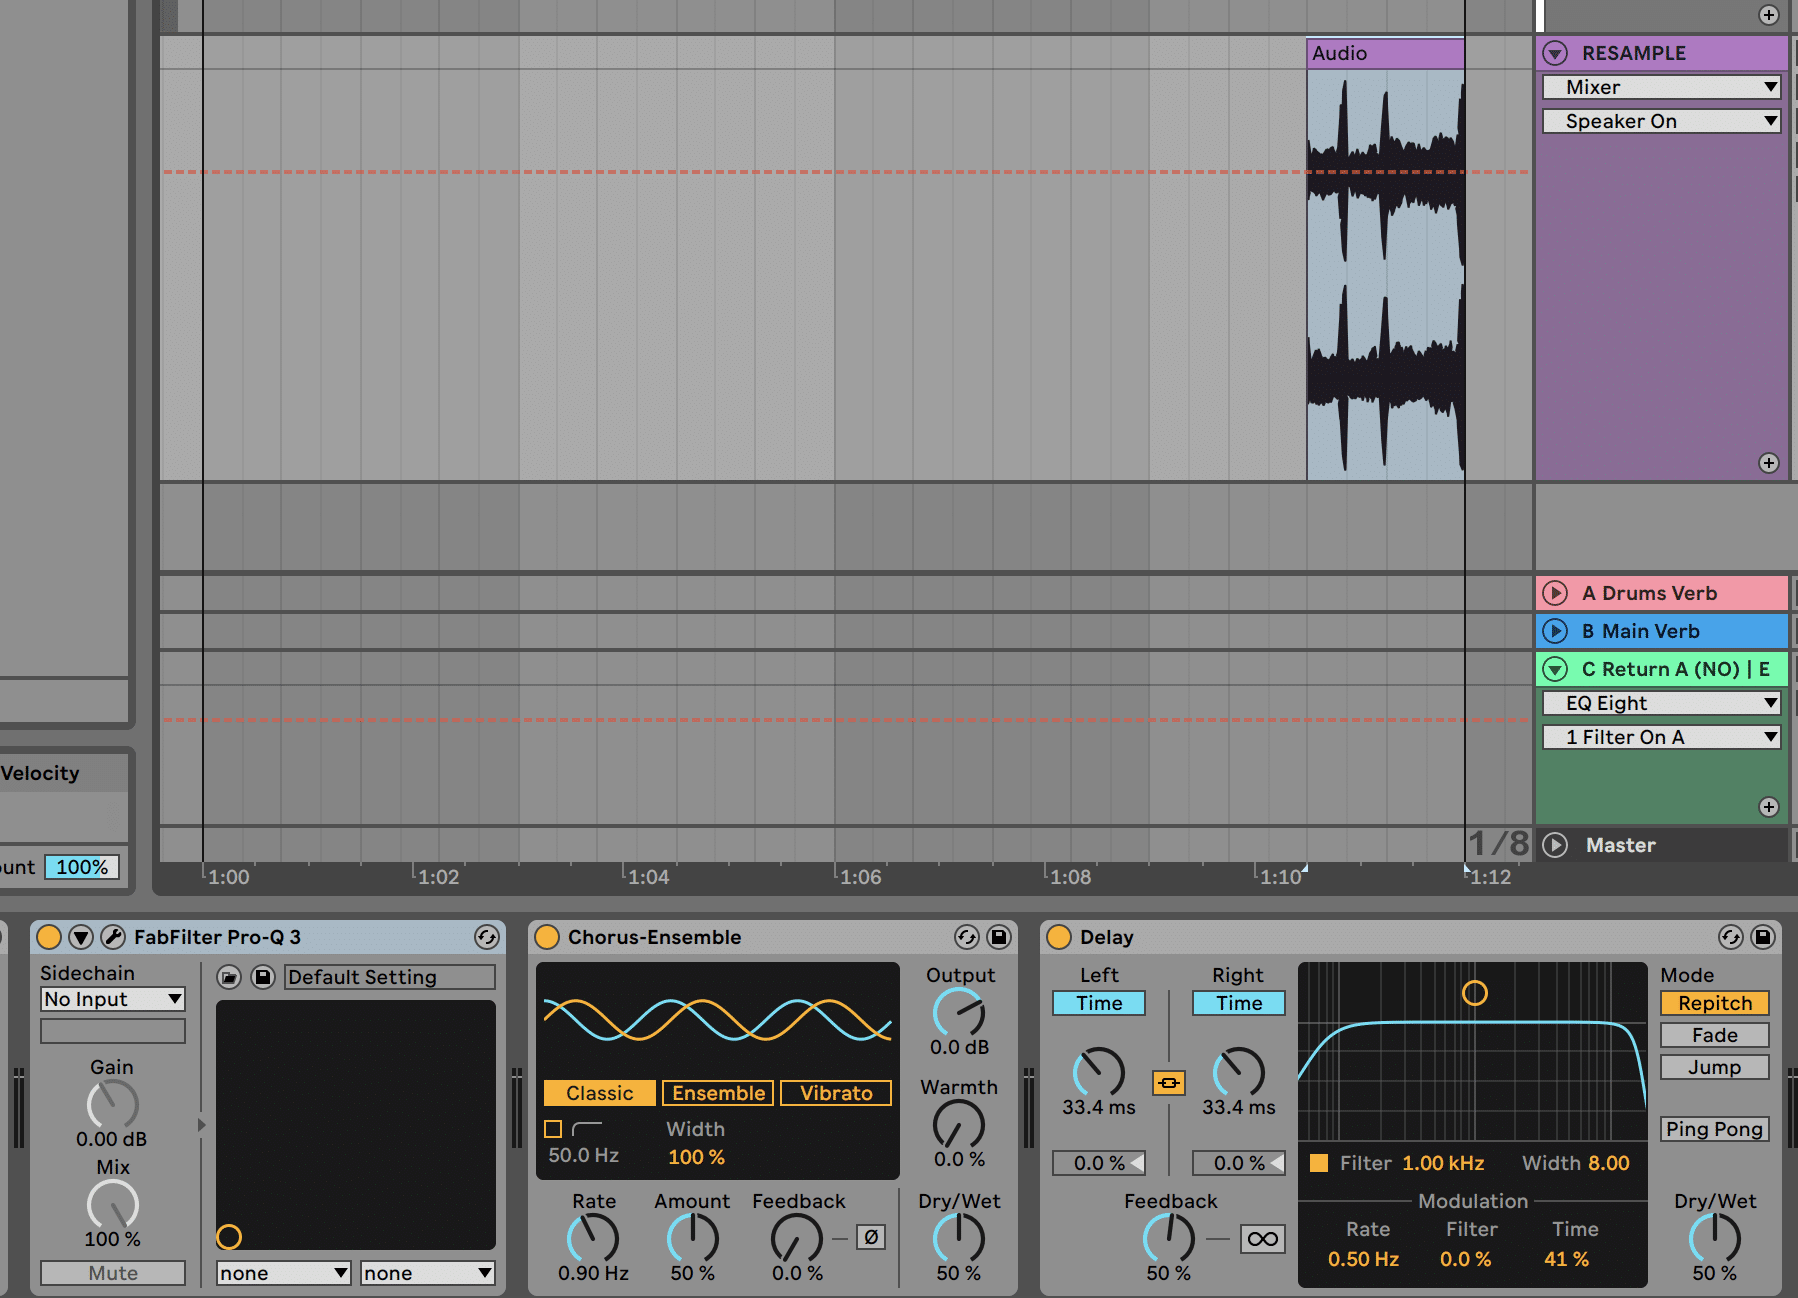
Once I’m happy, I’ll resample and reverse the bounced section of audio.
This time, I’m going to add delay, echo, and another dose of reverb. Now things are starting to sound very ethereal.
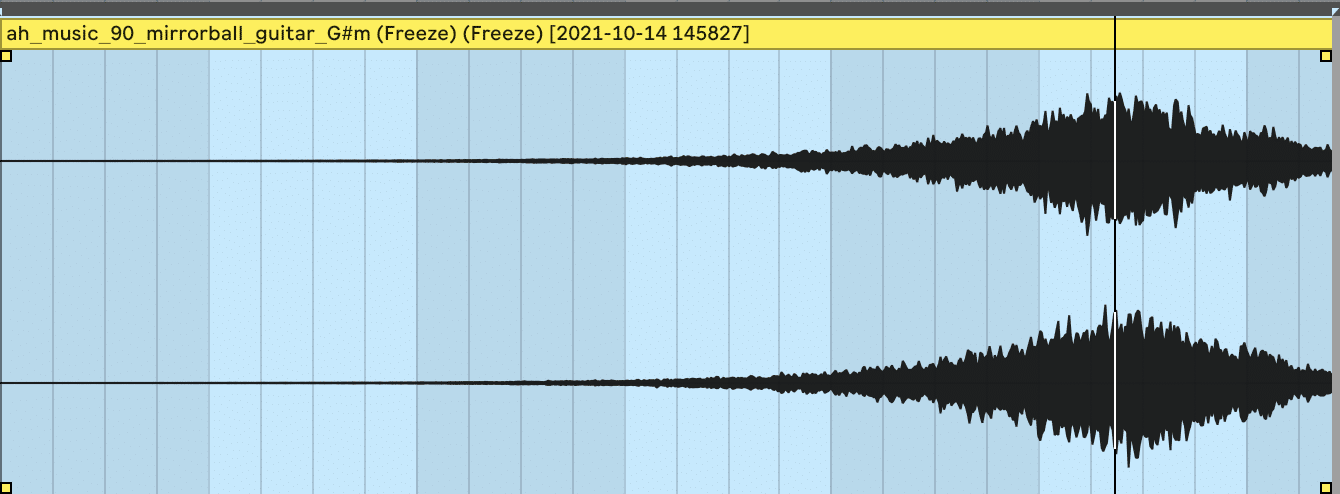
Once I’m happy, I’ll bounce and reverse it again. Now I can add even more delay, reverb, and other effects to furthermore spread it out.
You can see this back and forth ‘whirlpool’ process turns anything into a beautiful soundscape. At the end, you can even export it as a WAV to use later in other tracks.
Bonus Tip: Check out Paulstretch for getting those super long drone-type textures. It works a treat with the above tip.
Tip #6: Master Audio Resampling
One of the coolest things about resampling is anything can become audio.
Even your whole song.
This is where master resampling comes in. You can take your entire track and:
- reverse it
- process it
- pitch it down
- stretch it out
- repeat all of the above
I personally like to use this for fills at the end of sections to surprise listeners.
In this case, I’m going to resample this hip-hop track I’m working on and reverse it at the end of a 4 bar section.

Simply resample your whole master as usual, and take the snippet of audio at the beginning of the next bar. Even 2 beats could be long enough.

Reverse it and place it two beats before the start of that bar. You can take it further by processing it with other FX like chorus and delay to make it ‘jump out’.
Unlimited audio resampling possibilities! And lastly, let’s look at something a little out-of-the-box.
Tip #7: Record Your Speakers/Monitors…
…with your phone.
This sounds stupid at first, but you can actually get some really lovely results. The differences in frequencies and tones can add something special.
Many producers have done this for years to add extra texture to their basses, leads, and other sounds.
You’re not going to use your standard resampling workflow this time. Simply turn your studio monitors up to a reasonable volume, get your phone recording app open, and record the sound.

After this, drag it into your DAW and align it with the original sound. You may want to process it with EQ and other FX for both mixing and creative purposes.
Here’s how I did it with a lead sound:
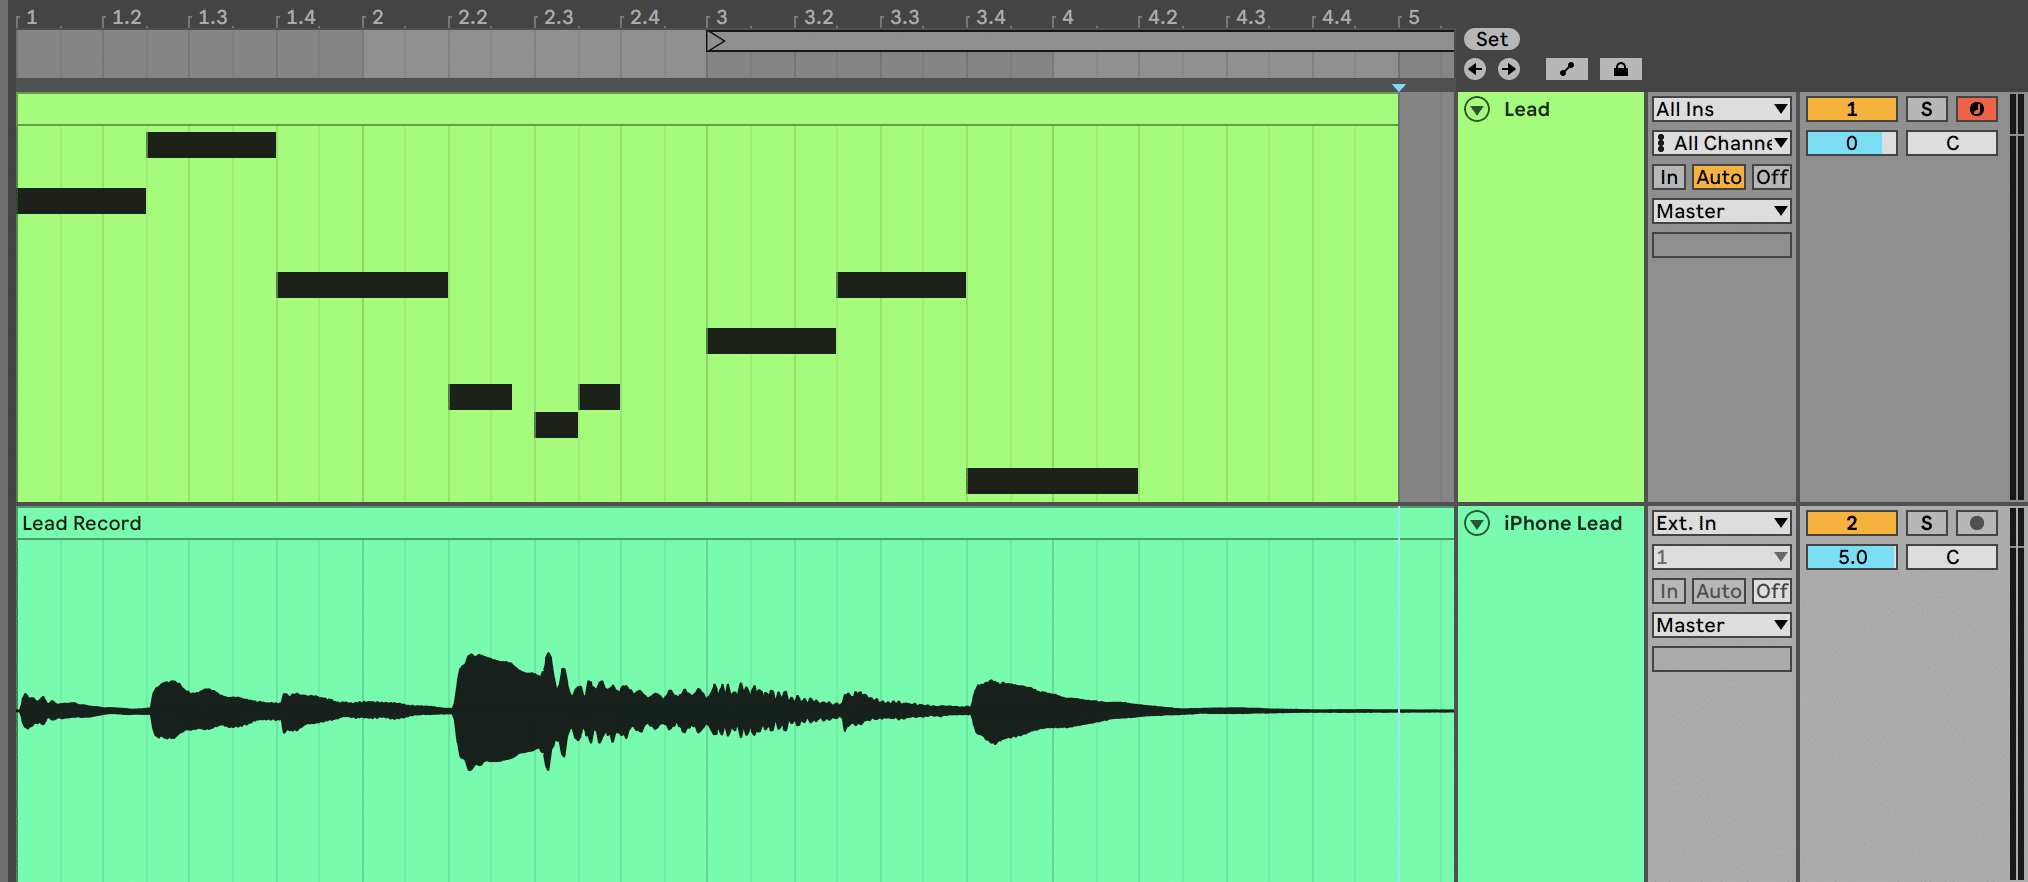
Before layering:
After layering:
You can hear how it adds a whole lot of texture! Resampling audio is literally endless.
Beyond Resampling Audio
These are just a few ways you can use resampling in your music. At the end of the day, it’s a tool in your producer toolkit that you can use at any point. A big part of resampling is having good material to work with.
That’s why we created the EDM Starter Kit – packed with samples that you can twist and mangle through resampling.
You’ll also get a bunch of other resources, including PDF guides and Serum presets. Grab it below! 👇
Missed anything in this guide? Drop me a line at [email protected].
