


So you want some tips & tricks for FL Studio? Have you learned the basics and don’t know where to go next?
Sometimes you just need a big list of creative tips to try out. Because as producers, we often don’t know what we don’t know.
There’s no catch to this article – no fancy business. Just a big bunch of FL Studio tips.
We’ve broken them down into a few sections for clarity:
- General
- Browser
- Channel Rack
- Piano Roll
- Playlist
- Mixer Tips.
Let’s delve into them 👇
General FL Studio Tips
These are tips that apply at a program-wide level, or are applicable to all of the different sections in FL Studio.
Tip 1: Detached

Sick of the different windows being hidden by other ones? Go up to the left corner and click on the menu > Detached. Now your window will always stay on top. (Note: You can detach all plugins by default by going to the General settings, navigating to the Misc. section and selecting Detach all plugins.
Tip 2: Save New Version
Press Shift + Cmd (Ctrl) + S to save a new version. This is helpful to try different things without losing the original version, so experiment away and try things you might not typically do.
Tip 3: Fine Adjustments
Use Cmd (Ctrl on Windows) to finetune any parameter when adjusting. Now you can get super precise with your controls and get the perfect mix.
Tip 4: FL Studio Tip Hint Panel

The Hint Panel in the top left is a great way to see what you’re doing. Simply hover over a control or feature and it will describe it for you. If you don’t understand anything, always give that a read first. It also tells you any shortcuts for the control you’re hovering over.
Tip 5: FL Studio Tip Hint Bar

You can take the previous tip one step further and activate the Hint Bar by right-clicking on the panel and selecting Hint bar. Now you have a movable transparent window which is a lot easier to see.
Tip 6: Tap Tempo
Right-click on the tempo to use the ‘Tap’ function. This way, you can tap the tempo in at the desired rate.
Tip 7: Spectrogram

Change the Oscilloscope up the top into a Spectrogram by right-clicking and selecting it. It’s a great way to see the entire range of frequencies your track is taking up, at a glance.
Tip 8: FL Studio Tip Time Counter
Change the Bar counter at the top into a Minute counter by right-clicking and selecting Minute : Second : Centisecond. Great way to check the duration of your track so far.
Tip 9: Time Elapsed in Project

Observe the time spent in a particular project by pressing F11 or by navigating to the Options Menu and selecting Project Info. It can be eye-opening to see how long you’ve worked on a project sometimes.
Tip 10: Master Pitch

Change the entire pitch of your track by changing the master pitch knob next to the master volume knob near the hint panel. Save yourself from going into every MIDI clip and adjusting the notes up or down any number of semitones.

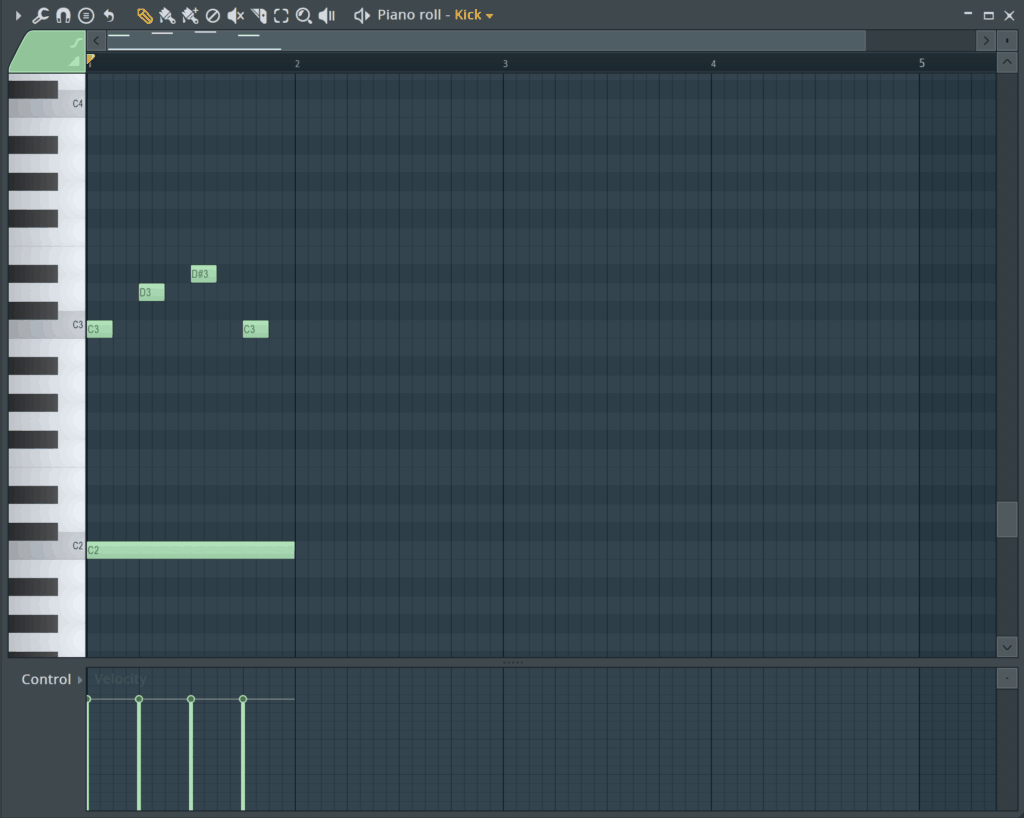
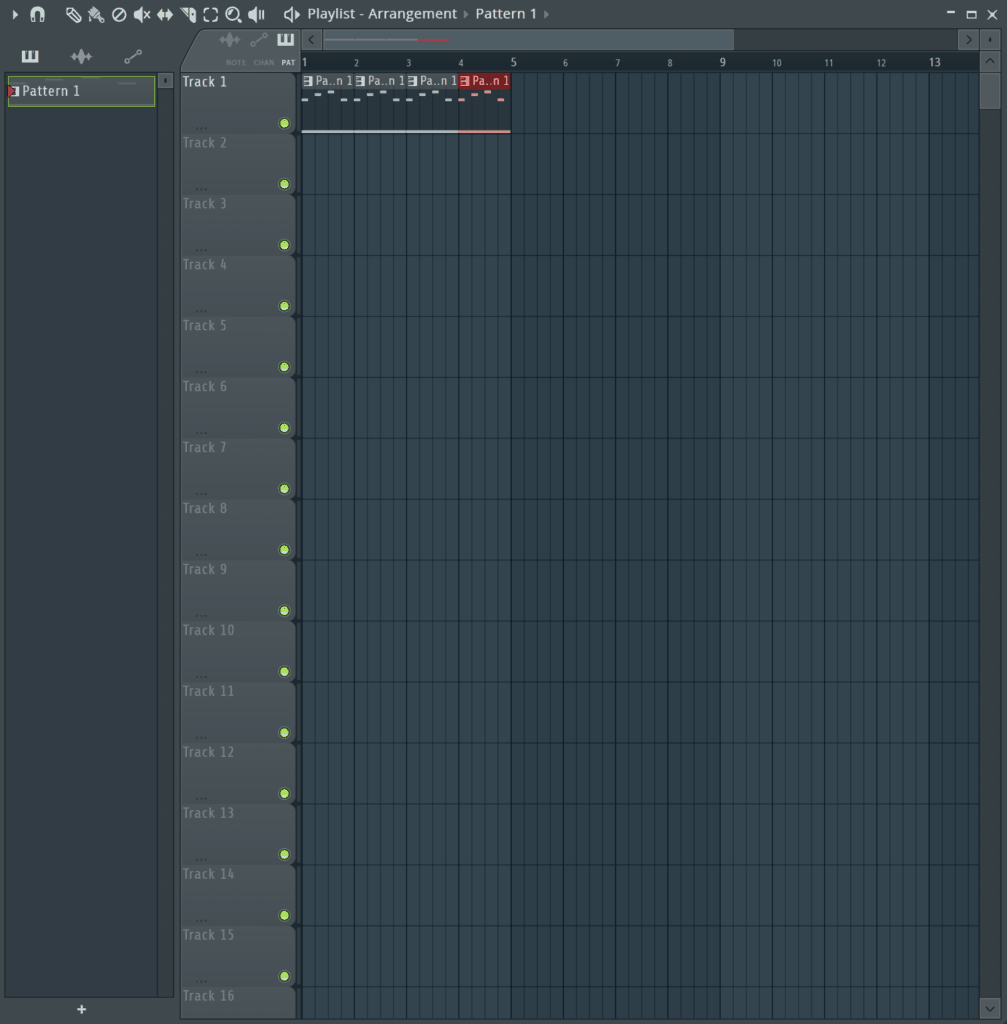
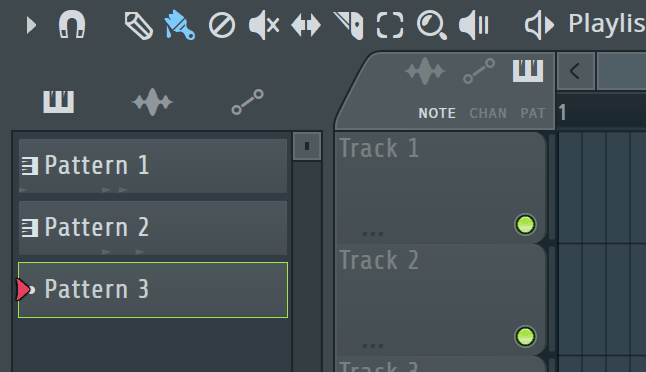
Tip 11: Split by Channel
You can split all the different instruments and sounds in the Channel Rack into their own patterns by clicking the pattern options and selecting Split by Channel.
Tip 12: FL Studio Tip Color/Icon
Add an icon and/or colour to any channel or track by right-clicking and selecting Change color or Change icon.
Tip 13: FL Studio Tip Background

Change the background image or colour by clicking on View > Background. This helps to give your workspace a fresh look when things are seeming stagnant.
Tip 14: Zoom
Right-click and drag up/down on the scrollbar to zoom in/out any of the windows. Simple but helpful.
Tip 15: FL Studio Tip Metronome Sound
Right-click on the Metronome to customise the metronome sound. You can choose between a hi-hat, a tick (default), a beep and a cowbell.
Tip 16: Plugin Picker

Press F8 to bring up the plugin picker. This is a great way to visualise what plugins you have and makes it easy to select what you want to use.
Tip 17: Function Buttons
Speaking of the F buttons, F5 brings up the Playlist, F6 brings up the Channel Rack/Step Sequencer, F7 brings up the Piano Roll, F8 brings up the Browser and F9 brings up the Mixer. These shortcuts will help you access the most-used sections of FL Studio quickly.

Tip 18: FL Studio Tip Automation Clips
Want to automate something? Right-click on a control anywhere in FL Studio and select Create automation clip. This will create a new automation clip in Playlist that you can adjust.
Tip 19: Third-Party Automation Clips
If you are trying to tweak a third-party plugin’s parameter, you’ll notice it doesn’t show up with the option to create a new clip when right-clicking. In this case, adjust the parameter and navigate to the main menu and select Tools > Last Tweaked > Create automation clip. This gets around the lack of functionality.
Tip 20: FL Studio Tip Computer Keyboard MIDI
Wish you had a MIDI keyboard? Now you do. Press Cmd + T and you can use the computer keyboard to jam notes over two octaves.
Z is C4, Q is C5.
Tip 21: Quick Rename

Shift-click to rename anything, whether it’s a mixer track, playlist track or channel. No more right-clicking.
Tip 22: Lock Active
When you solo something, everything gets muted. But what if there is something you want to remain on all the time, even when soloing something else? Shift-click on the green LED of any track to lock it. Now it will remain on until you manually disable it.
Tip 23: FL Studio Tip Stop Sound
Nothing’s worse than stopping your track playing and having a giant reverb tail follow it. To stop such occurrences, press Cmd (Ctrl) + H, and all the audio will stop.
Tip 24: Realign Windows

A quick Shift + Cmd (Ctrl) + H will arrange your windows back to the default position. This is great to clean up any mess you may have.
Tip 25: FL Studio Tip Song Position
If you want to quickly jump around you arrangement or pattern (depending on the playback mode), then use the song position slider in the top toolbar. Great for scanning through what you’re listening to.
Tip 26: Auto Scrolling
If you want the playhead to follow along with the song or pattern, click that arrow in the toolbar at the top to enable Auto Scrolling. Now the display with follow wherever the playhead goes.
Tip 27: Zipped Loop Package

Ever worked on a collab with your producer friends, but have experienced the insufferable headache of lost files?
What if I told you that you can send everything that you need in one folder? Head up to the main menu and press File > Export > Zipped Loop Package. Any files that aren’t included with FL, will now be included in a nice .zip file to send.
Note that this won’t save plugin instances – they will need to download or buy them separately.
Recommended: A Roundup of 50 Music Production Tips from Twitter
Browser FL Studio Tips
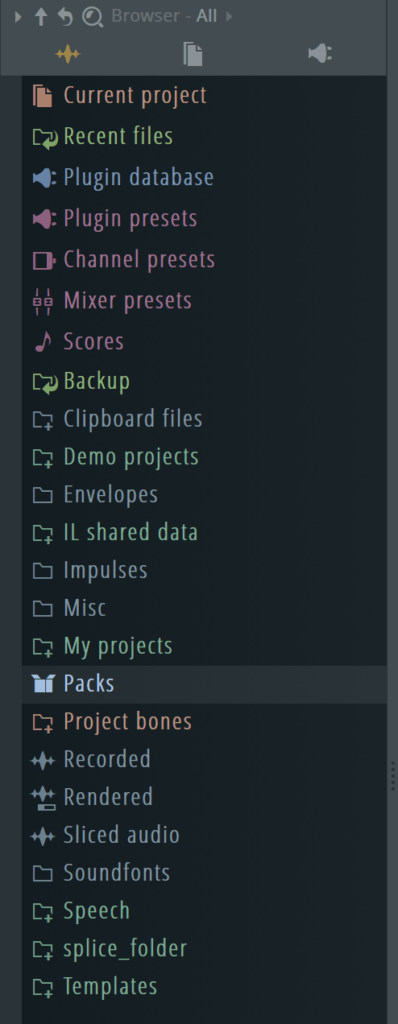
FL Studio’s Browser is extremely powerful. Here are a few pointers to speed up your workflow and encourage new ideas.
Tip 28: Expand/Collapse All
Right-click on the browser to expand all the folders or collapse all if there are some open. This can help to explore or clean up the browser.
Tip 29: Arrow Keys
Use the up and down arrow keys to navigate through sounds. Use the right arrow key to play the currently-selected sound back.
Tip 30: Import Methods
Right click on an audio file to open it straight into a Slicex, Fruity Granulizer, Sampler or Fruity Slicer. Clicking and dragging will create a sampler.
Tip 31: Browser Snapshots
Press a number from 1-9 to select a snapshot of the browser. Press the currently selected number again to save the current state of the browser to that snapshot. This allows for faster navigation of commonly-used areas in the browser.
Tip 32: FL Studio Tip Search
Press Cmd (Ctrl) + F to find a file in the browser. No more navigating for VEC Kick 005.

Tip 33: Hide Browser
Hide the browser by dragging the right side of the window all the way to the left. Pull it back out to the right to show it again.
Tip 34: Browser Docking
The browser can be moved around easily by clicking and dragging. In doing so, it will snap to the side of the screen you prefer it on.

Tip 35: Pattern/Song
Use L to quickly switch between Pattern and Song playback modes. Another one you’ll be using a lot in the future.
Tip 36: Undo History
Navigate to Current Project > History to see all of the actions performed in the project. Click on a previous one to automatically undo all actions between them.
Tip 37: FL Studio Tip Autosaved Backups
Last tip didn’t do the trick? Want to move back to a much older version of your track but forgot to save? Simply press Backup and select the relevant autosave of your project. All the mixing mistakes your made are suddenly gone.
Tip 38: Add New Folders
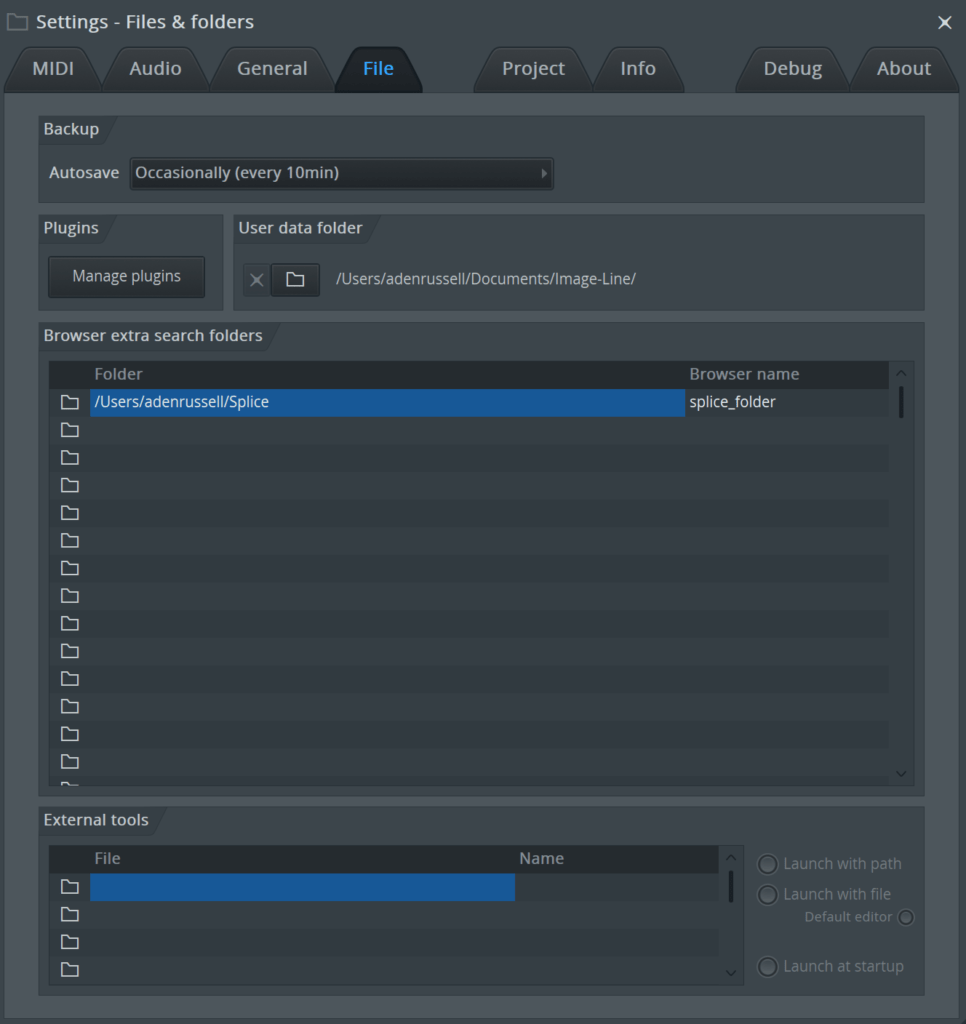
If you want to add some new sounds and samples in, you’ll want to navigate to the Options > File Settings menu. Here you can add new folders in the folder list, and they will subsequently show in the browser.
Tip 39: Add To Channel While Browsing
Simply hold shift to add the sample to the selected track in the Channel Rack while browsing. This functions like a ‘hot swap’ function and allows you to audition different samples in place of another.
Tip 40: FL Studio Tip Scores
You can add pre-set MIDI clips from the browser to any instrument on the Channel rack. They are under the ‘Scores’ folder, but you can also use third-party MIDI clips from online, or ones you have exported.
Tip 41: Plugin, Channel and Mixer Presets
Another greatly-utilitarian resource in FL’s browser is the aforementioned presets. There are 3 respective folders towards the top, each with some great default options to play around with.
Channel Rack FL Studio Tips
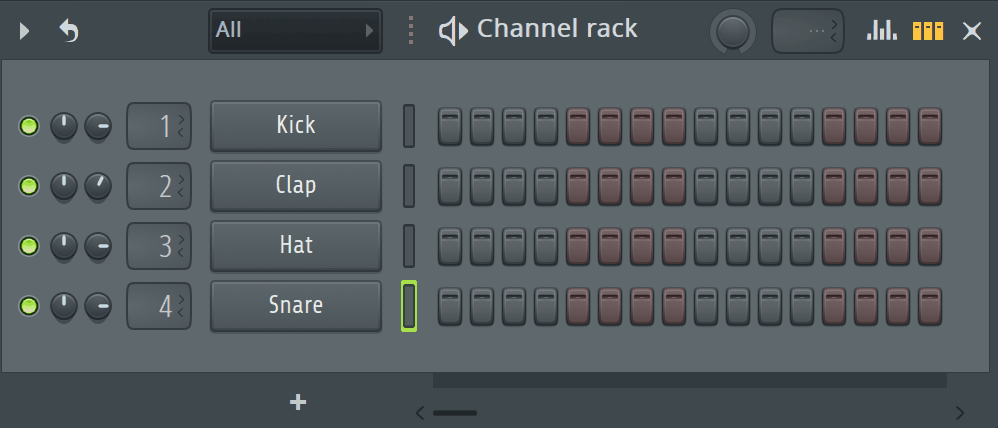
For a lot of producers, most creative work happens in the Channel Rack. It’s the cornerstone of FL Studio. So here are some useful tricks you can use in your next production session.
Tip 42: Purge Unused Audio Clips
Got some unused audio clips you removed from the arrangement? Click Tools > Macros > Purge unused audio clips. This will automatically delete all clips from the channel rack that weren’t being used and will clear up space.
Tip 43: FL Studio Tip Fill Steps
Right click on a channel and select Fill each 2, 4 or 8 steps to automatically fill those rhythmic intervals without clicking and moving the mouse.
Tip 44: Zip/Unzip a Channel
Press Alt + Z to zip a channel. This hides it so the name isn’t shown. To unzip channels, press Alt + U.

Tip 45: Cut Itself
If you want notes to stop playing when another note is playing in the step sequencer, right click on the channel and select ‘Cut itself’. This can help to clean up sounds that might be overlapping and creating mud in your tracks.
Tip 46: Save Channel State
Save a channel’s state, whether a native or third-party plugin, by navigating to the menu in the top left of the window and selecting ‘Save channel state as’. This saves presets for your instruments and effects right within FL Studio, and puts them in the browser.
Tip 47: FL Studio Tip Reverse
In the sampler, you can reverse sounds by navigating to the Precomputed effects section and by enabling Reverse. This can achieve some interesting sounds depending on the source material.
Tip 48: Time Stretching
Also in the sampler, you can experiment with time stretching by adjusting the mode, pitch shift and time stretch controls. This is a creative way to mangle audio right within the sampler instead of loading up an Edison instance.
Tip 49: Graph Editor

Use the Graph Editor by clicking on the graph icon in the top right of the Channel Rack. Here you can adjust velocity, pitch, pan, note values and much more right from the step sequencer – without having to open the Piano Roll.
Tip 50: Main Swing
You can easily add an amount of swing to your patterns by dialing in the swing knob. This adds more of a groovy feel to the rhythm and works great in genres like house, garage and hip-hop.
Tip 51: Reorder Channels
Use Alt + Up/Down to move the selected channel up or down in the order. A good use of this is to move less important elements to the bottom if they are taking up space.
Tip 52: Lock to Keyboard
Sometimes you just want a particular sound to be always playable on your keyboard, regardless of what is selected. Maybe a piano to check the key of things, or simply to jam over the top of something.
Regardless, you can lock a certain channel to the keyboard by right clicking and selecting Recieve notes from > Typing keyboard. The computer keyboard will always play that track, until you go back to the menu and select unlock. Really neat.
Tip 53: FL Studio Tip Sampler Envelopes

I’ll be honest, I learned this tip way too late.
When you load up a sample into a sampler channel, up the top there is an envelope icon. Here, you can activate the envelope for a variety of parameters: Volume, Panning, Pitch and Filter/Mod.
Tip 54: Next/Previous Pattern
Want to move between patterns using just the keyboard. Simply press Shift + Cmd (Ctrl) + Up/Down to navigate between them. If there is no next pattern, it will create a new one automatically.
Tip 55: Quick Render
If you’ve got a pattern, and you just want to whole thing to be bounced to an audio file, head up to the main menu and click Patterns > Quick render as audio file. This will bounce it into the Audio section of the Channel rack, and you can paste it straight into the Playlist.
Tip 56: Fruity Dance
If you need a bit of entertainment in the studio, load up a Fruity Dance and you’ll see a little avatar dance to your music as you create it. Yeah, it doesn’t directly help you make music, but who cares, right?
Tip 57: Using Layer
If you want to trigger multiple sounds from the same pattern, load up a Layer instrument.
Once you’ve done that, select the two channels you want to layer and hit Set children. Now any notes you add to that track will trigger both instruments. Easy.
Tip 58: Fruity Granulizer
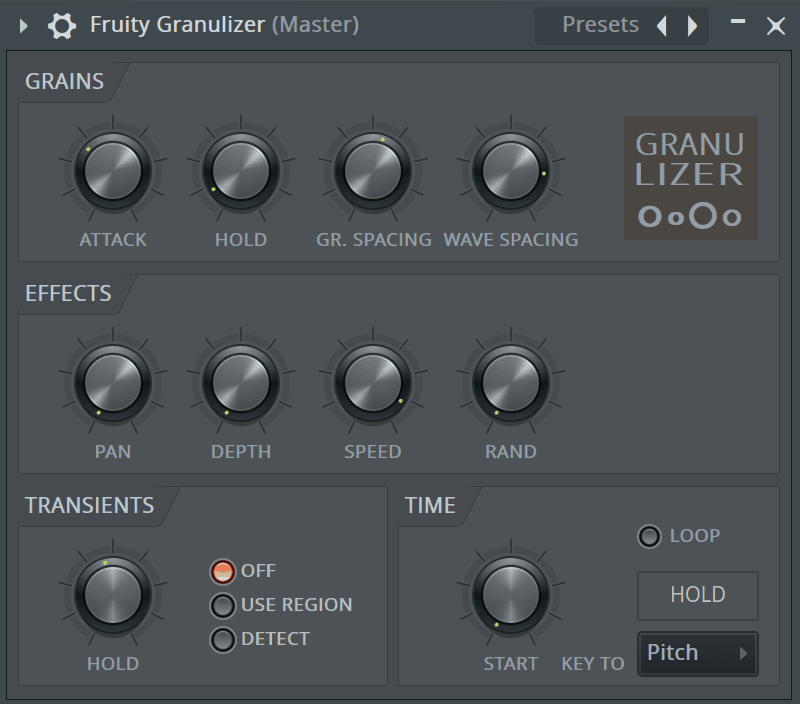
I’m gonna mention Granulizer because it’s just awesome. You can get some really unique sounds from this thing, no matter what genre you make. Just load up an audio sample, tweak away and listen to the results. You’ll see what I mean.
Piano Roll FL Studio Tips
As part of the Channel Rack, the Piano Roll is a very important tool. It’s where chords are crafted, and where melodies are invented. It could be where you write the hook for your next big track – who knows?
So it’s important you know what you’re doing here, so you don’t get caught up and lose any good ideas. Here are some FL Studio tips to help you understand it more.
Tip 59: FL Studio Tip Riff Machine
Stuck for creative ideas? Press Alt + E to generate cool rhythmic patterns and new chord progressions using the Riff Machine. This is pretty unique features that most other DAWs don’t have, and it gives you another option for working with chords and melodies in a generative way.
Tip 60: Randomize
In the same menu is the Randomize feature which generates melodies – quick and dirty.
Tip 61: Grid Color
Don’t like that bland, grey grid color? You can select any colour by going to the Piano Roll menu, selecting View > Grid Colour or by pressing Cmd (Ctrl) + Alt + G. Now your grid can be blue, purple or any color.
Tip 62: FL Studio Tip Playback Tool

If you want to hear what notes are going on at any given time, use the Playback tool by selecting the Speaker/Pause icon or by pressing ‘Y’. You’ll be able to scrub through your MIDI and hear what notes are happening when.
Tip 63: Note Scaling
If you select all the notes using Cmd (Ctrl) + A, a scroll icon will appear to the right of the selected notes. Move this around to stretch the timing of notes. By offsetting the timing in a poorly-warped sort of way, you can add a unique human feel to your sounds.
Tip 64: Stamps
The Stamp list in the menu is a great way to quickly drag in full chords without having to tediously draw in every note each time. They’re all listed there – major, minor, add6, sus2 and 4 etc. Massive time saver.
Tip 65: Quick Delete
If you have the Draw tool selected, you can delete notes by right-clicking on them – without having to select the Delete tool.
Tip 66: FL Studio Tip Auto Smoothing
Added some modulation to your pattern in the Piano Roll, but the automation lines are all jagged? Enable Auto Smoothing in the Piano Roll menu and your automation will become smooth and curvy, rather than blocky.
Tip 67: Note Fine Adjustment
Simply hold Shift + Scroll to move the note in line with the mouse cursor, left or right. Doing so can achieve a custom swing or human feel to the notes.
Tip 68: Scale Highlighting
Not the best with music theory and songwriting? Use the scale highlighting in the menu. Click Helpers > Scale Highlighting and choose the root note and the scale type. The background will light up the notes in that scale. Usually Major or Minor Natural (Aeolian) are best for most music.

Tip 69: Octave Jump
Sometimes the notes you’ve played or drawn in just don’t sound good in that range and you need to change them. With notes selected, press Cmd (Ctrl) + Up/Down to move the notes a whole octave up or down.
Tip 70: Rotate Notes
If you’ve got some notes looped in the Channel Rack, and want to offset them all but want them to wrap around the loop, select the notes and press Shift + Cmd (Ctrl) + Left/Right. This will move the notes, but they will appear at the start of the pattern once they pass the end.
You can also do this direct in the Channel rack by selecting that channel.
Tip 71: Import/Export MIDI
If you want to save some MIDI you’ve written, you can hit the menu and go File > Export as MIDI file, or Import MIDI file if you want to load one up. As mentioned earlier, you can also drag it in from the Browser.
Tip 72: FL Studio Tip Discard Lengths
With any note(s) selected, press Shift + D to truncate their lengths to the grid size.
Tip 73: Note Properties

One thing I love about FL Studio is how technical you can really get. If you want to see the specific properties of each note, double click on it and it will bring up a window with all the controls on it, including length, colour, velocity and much more.
Tip 74: Dump Score Log
Jammed some sick riffs but forgot what you played? Then simply head up to the main menu and press Tools > Dump score log and choose from either the last 2, 5, 10, 20 or 30 minutes. It will place it right into the selected channel.
Playlist FL Studio Tips
Bringing your sounds and patterns into the context of a full track. That’s where things go from an idea to a proper tune.
So here are some useful FL Studio tips you can start making full songs, faster and more effectively.
Tip 75: Markers
Press Alt + T in order to add a marker to the arrangement. You can set a name for it and drag it to the desired location. This can help denote certain sections of your track and help structure things.

Tip 76: Marker Actions
You can take the previous tip further by right-clicking on the marker and applying an action to it, such as a time signature change, a song start point or a loop/record point.
Tip 77: Slip Tool
If you want to add some timing differences to your patterns, turn on the Slip tool by pressing S or by holding Shift. Then, drag across a pattern to move its contents left or right.
Tip 78: FL Studio Tip Looping
Double click and drag in the timeline ruler up the top to select a segment of time to loop. When pressing Play next, it will loop just the selected section. Double click elsewhere to cancel the loop.
Tip 79: Select All Similar Clips

You can select all instances of a pattern in the Playlist by selecting the little piano icon of the pattern in the top left and selecting Select all similar clips. Now you’re free to do with them what you want, all at the same time.
Tip 80: Make Unique
Make unique creates a new version of an existing clip in the arrangement. Once again, click on the piano icon in the top left of the clip and select Make unique. Now you’ll have a new version that you can, well, make unique.
Tip 81: Merge Patterns
You can quickly merge the patterns on a playlist track into a new playlist by right-clicking on the track and selecting Merge pattern clips. Now you have a new clip you can further edit in the Channel rack.
Tip 82: Direct Instrument Insertion
You can add a new instrument directly into the arrangement by right-clicking on the track and selecting Track mode > Instrument Track and adding a new instrument.
Tip 83: FL Studio Tip Picker
If you see to the left of the arrangement, there is a list of the patterns that you can drag in. This is a great way to visualise the patterns and add them intuitively.
You can switch between patterns, automation and audio clips by navigating the icons above the Picker. You can also toggle the whole Picker on and off by pressing Alt + P.
Tip 84: Track Resizing
A simple but effective tip – drag the lines between the tracks to resize each one. Hide the less important ones, emphasize the main ones.
Tip 85: Chop
If you have drums or transient-heavy material in an audio clip, clicking on the top left and selecting Chop will bring up a variety of options to slice the material into different segments.
The different functions perform differently depending on the material, so play around. It’s especially good in genres like drum and bass and breaks, where chopping loops is integral to the sound.
Mixer FL Studio Tips
Mixing – the final stage of all good productions. Because it helps to make or break a track, you need to know how to use this thing.
Here are some of my favorite FL Studio tips for it.
Tip 86: Linking a Channel
Got a channel selected and want to link it to a mixer channel? Press Cmd (Ctrl) + L to link it to the selected mixer channel instantly, naming it accordingly.
Tip 87: Bulk Navigation
Press Down on your keyboard to navigate through 4 channels at a time on the mixer. Just to speed things up.
Tip 88: FL Studio Tip Waveforms

Want to see waveforms for each track rather than the levels? Press Alt + W on your keyboard, or select it from the Mixer menu under View > Waveforms. You can also select this at the top of the Mixer – there’s a little waveform icon.
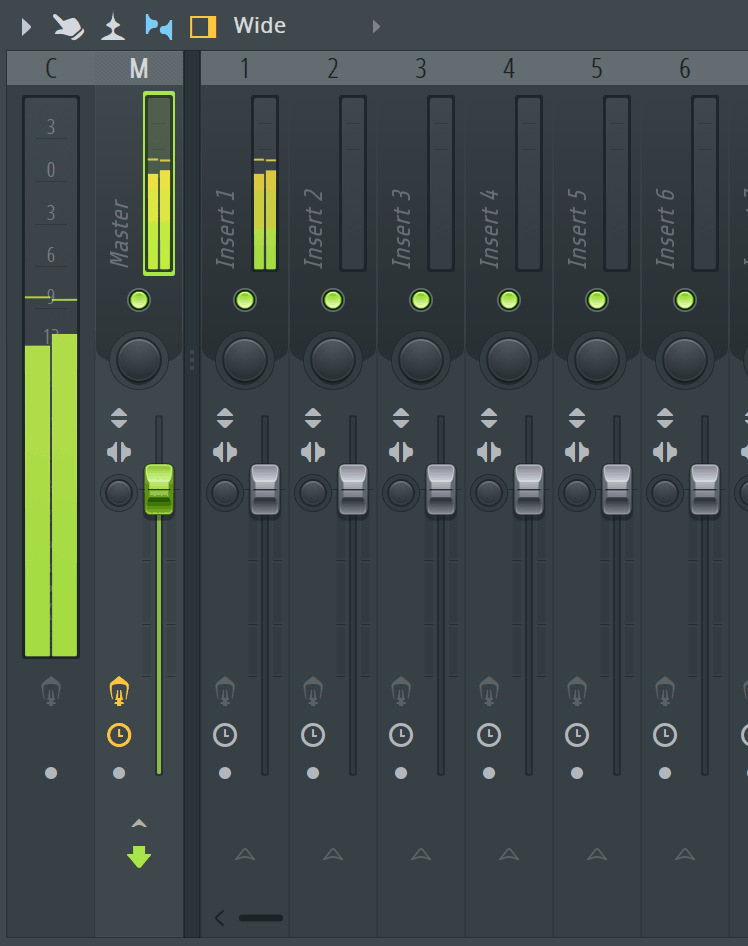
Tip 89: Mixer Layout Options
Did you know that there are 8 options for the mixer layout? To see them all, select the Mixer layout option at the top of the Mixer (where it says ‘Wide) and experiment with the options – see what works best for you.
Tip 90: Built-in EQ
This one is often an overlooked feature of FL Studio’s mixer. Under the FX inserts for each track, there is a three-band EQ for basic adjustments. This is a great tool for on the fly adjustments and low-CPU tweaking.
Tip 91: Docking Tracks
You can dock important tracks in the Mixer to the left or right by right-clicking on the track in question and selecting Dock to > Left/Right. Great way to visualise what’s important.
Tip 92: FL Studio Tip Separators
On the theme of better visualisation, if you want to add separators between tracks to visualise certain groups, you can right-click on a track and select Separator. Now a thick bar helps to indicate which tracks are related to each other (e.g. drums, synths or FX).
Tip 93: Arranging Mixer Tracks
Use Alt + Left/Right to move mixer tracks around.
Tip 94: FL Studio Tip Quick Edison Loading

To swiftly add Edison to any track, right-click and choose either Open audio editor or Open audio logger. The former opens a default Edison, the latter opens one that starts recording straight away.
Tip 95: Fruity Peak Controller
The Peak Controller is a favourite of many FL veterans. You can map it to the volume of a mixer track and use it to sidechain other elements.
If you want a full tutorial on it, check this out.
Tip 96: FL Studio Tip Gross Beat
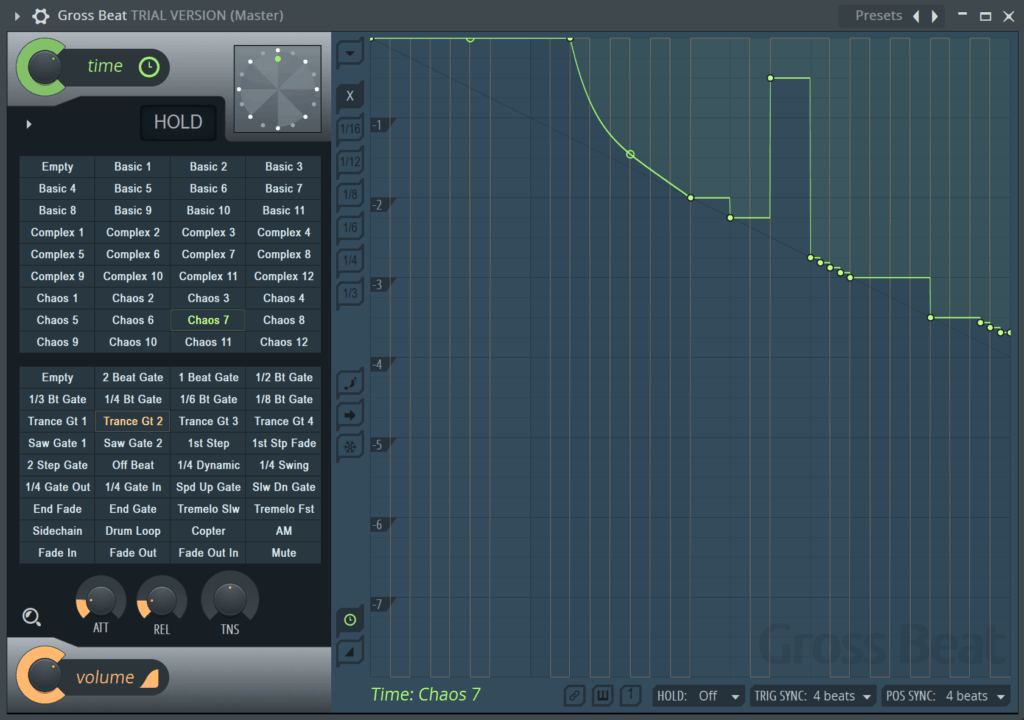
On the theme of sidechain and volume adjustments, Gross Beat is an excellent tool. You can use it to modulate both the volume and pitch (time) over a certain time frame, like 1 bar.
Gross Beat is a truly insane plugin. So if you want to dive in deeper, we’ve got a full, in-depth tutorial here.
Tip 97: Use Soundgoodizer
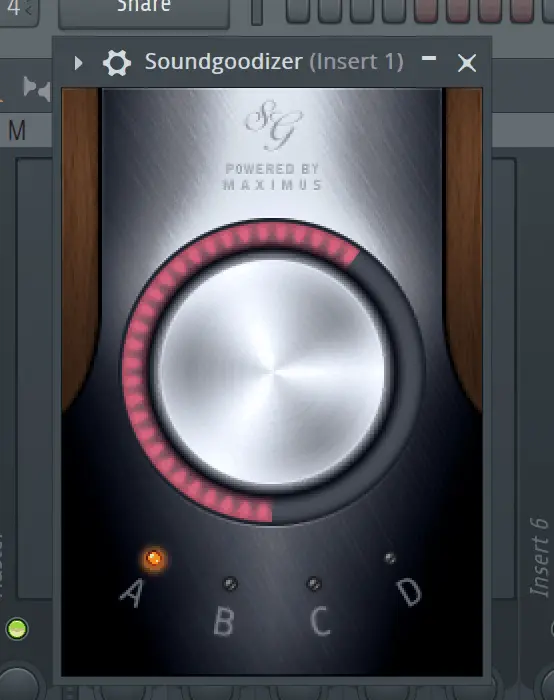
Look, I’ll probably cop some hate for this one. But sometimes, it’s exactly what you need. As I mentioned in my plugins article, it can be a great tool.
If you don’t know what I’m talking about, it’s a plugin included with FL Studio that applies some multiband compression presets to a sound to help it sound ‘fuller’. Simply load it into a free FX slot, choose from the 4 options, and crank the knob.
Tip 98: Mix Level
If you have an effect loaded into any slot on the channel, you’ll notice a knob next to the name. This knob acts as a dry/wet control for the particular plugin, allowing you to blend the original (previous) signal with the processed one.
Be warned that depending on the plugin, adjusting this knob can actually introduce phase issues, so make sure to listen before using and setting it.
Tip 99: FL Studio Tip Signal Flow
Beyond FL Studio, Signal Flow is an important topic in music production in general, and it is often overlooked by beginners.
Signal Flow refers to the order of processing devices on a sound. So in FL Studio’s case, it refers to the order of the FX slots.
Thankfully, Image-Line have made it easy to reorder FX. Simply hover and scroll over the FX slot and it will move up and down. It’s the easy.
The Final FL Studio Tip
I bet you’re wondering what we saved for #100. Well, here it is.
Tip 100: Nail The Basics
All of the above FL Studio tips are great, but you might be wondering how they fit into the overall picture of music production.
But to be honest, they won’t help you make good music if you haven’t nailed the basics. How would you do that?
By following a structured guide.
That’s why we have put out a FREE video training for producers to master the fundamentals in less than a month 👇
And that’s it! Let me know at [email protected] if I missed anything.
