


The piano roll is where all the magic happens in Ableton Live.
Melodies are crafted, chords are forged and basslines are written.
But there’s a lot about the piano roll that’s left in the dark. Like this entire section here:
So here are some of my favourite tips to helping you become a piano roll master in Live.
Most of these you can do in all versions of Ableton Live 10, but some require at least Standard or Suite. A number of them will also work in Live 9.
Note: you can watch the video tutorial, read the full article, or both – completely up to you!
Tip 1: Use Draw Mode
Drawing notes offers a much faster workflow than having to double-click to insert them.

Press ‘B’ on your keyboard to activate this (making sure that your computer MIDI keyboard is disabled) to sketch notes out faster, draw velocity hits faster and customize automation faster.
Tip 2: Piano Roll MIDI Editor Preview
Sometimes you want to listen to notes as you write them, sometimes you don’t.
By default, this feature is turned off but click on the blue headphones icon in the top-left of the MIDI Editor.
Now whenever you select, draw or move a note, you will hear its pitch being played, allowing you to make better-sounding decisions.
Tip 3: Move Notes Up/Down an Octave
When a chord progression or melody needs to change octaves, pressing down or up 12 times can seem laborious.
Hold Shift + Up/Down while selecting the notes to move them an entire octave at once.
A great time-saver.
Recommended: Songwriting for Producers
Tip 4: Duplicate Notes
Pressing Cmd+D (Ctrl+D) allows you to duplicate notes in time. Make sure that you double-check the selection area to see exactly how much you are duplicating.
Tip 5: Force Legato
With the relevant notes selected, pressing the Legato button on the Notes panel in the piano roll allows you to make all the notes legato.
In other words, it fills in all the gaps between notes, which can be a big time saver if you’re wanting to extend them all.
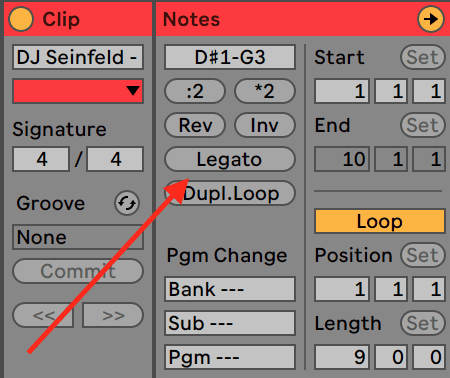
Tip 6: Duplicate Loop
If you’re wanting to add subtle variations to a loop of sorts, ‘Duplicate Loop’ is a great way to work.
Simply press the ‘Dupl. Loop’ button and watch the MIDI clip double in size. Now you can edit the second version to add differences to that part of the MIDI, instead of just looping the same thing.
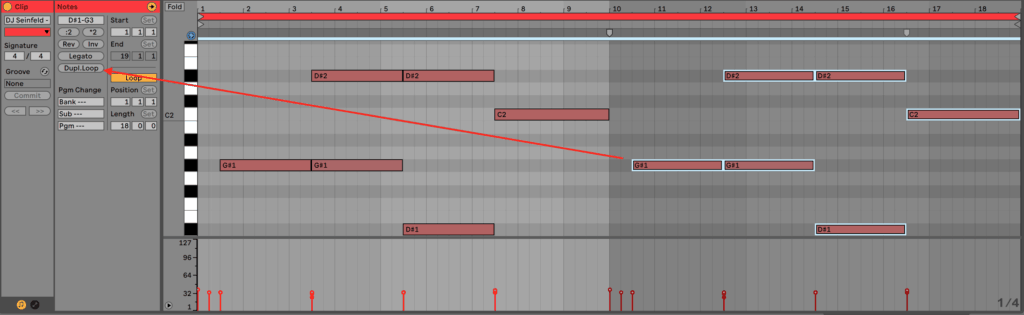
Tip 7: MIDI Stretch Marker
The MIDI stretch marker is an underrated tool in Live and allows you to ‘scale’ the timing of the notes.
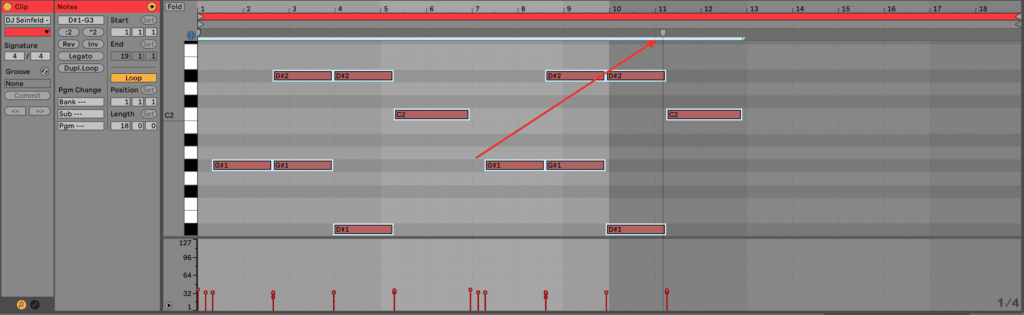
This may mess up any quantized timing but can add the human feel of someone slowly going out of time with the beat, or you can use it to double/half the length of the phrase.
Think of it like slowing up or down the MIDI, like you would with audio.
Definitely play around with it, especially in conjunction with other instruments – you can get some fun rhythms.
Tip 8: Half Tempo/Double Tempo
Speaking of doubling and halving, there is a quicker way to do this using the ‘*2’ and ‘:2’ buttons above the same area.
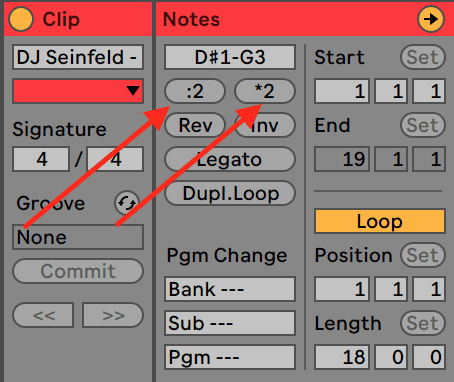
This allows you to use the same melodic idea or chord progression, but with a different feel.
Sometimes it just needs to be slower or faster.
Tip 9: Crop Clip
This tip works particularly well if you’ve recorded a bunch of MIDI and only want to use part of it.
Simply select the notes you want to keep, right-click and select ‘Crop Clip’ from the menu.
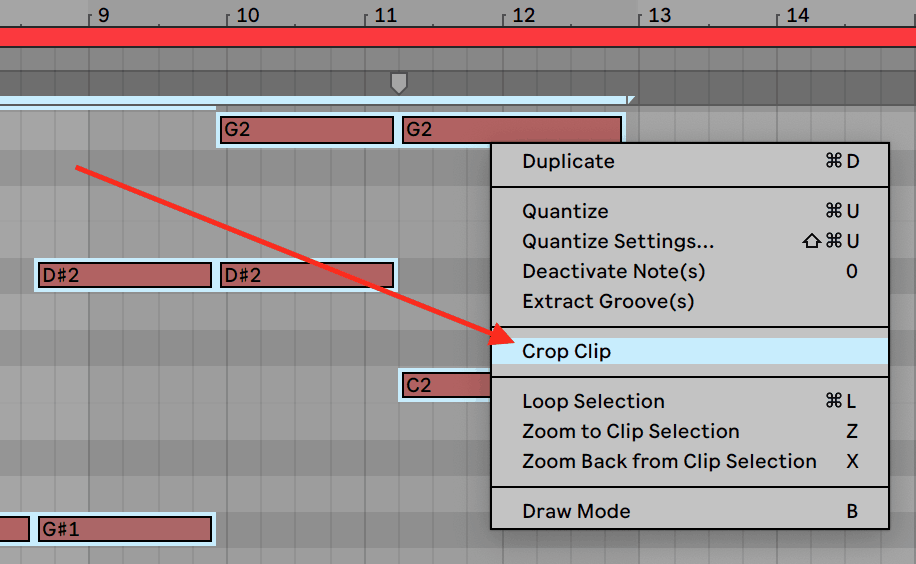
Then it will cut out the unselected or blank part of a MIDI clip.

Tip 10: Reverse and Invert Notes
Another underrated MIDI tool is the Reverse tool and the Invert tool.
Both are found in the same area is the ‘:2’ and ‘*2’ controls, as pictured below.
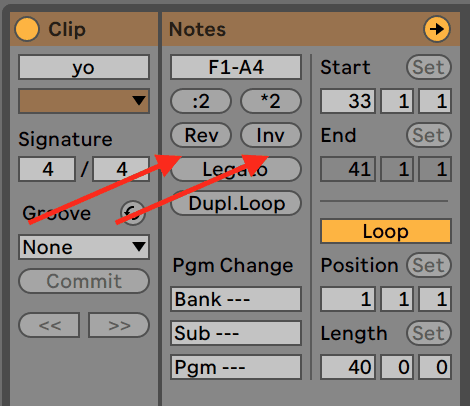
Both are fairly self-explanatory – reverse simply reverses the order of the played notes, keeping the timing of each note intact.


Invert swaps the pitch of each note for the relative opposite pitch, based on what’s selected. The timing of each of those notes is still maintained, but it may change the scale of the notes

Both of these can yield surprising results and can help to flip an otherwise stale idea into something fresh.
Tip 11: Quantize Settings
Many people know you can press Cmd+U or Ctrl+U to quantize your notes to the grid, which is helpful if you’re playing them in.

But Shift+Cmd/Ctrl+U allows you to bring up the quantize settings dialogue box, giving you the flexibility to choose the grid division, the amount of quantization and whether the start and end of notes should be quantized to your desired amount.
These options allow you to maintain the human feel of notes while not having them sound too sloppy, especially if you’ve played them in with deliberate swing and groove timings.
Recommended: How To Use Ableton Live: The Producer’s Guide
Tip 12: Deactivate Notes
Much like with audio and MIDI clips, you can deactivate certain notes in a clip.

Why would you not just delete them? Well, deactivating a note still keeps it in the position, but doesn’t play it when the note is triggered.
This is great for experimenting with a melody or chord progression to see which notes will and will not work.
Tip 13: Select All Notes on Specific Piano Roll Key
By pressing a desired note on the piano roll, you can select all the corresponding notes within a MIDI clip.

If you’re working with a drum rack, this can be great to audition different samples in the rack because you can easily select and move all of those notes.
Personally, I use this all the time, and although FL Studio’s piano roll is generally more advanced, I appreciate the simplicity of this tip.
Recommended: Ableton vs FL Studio?
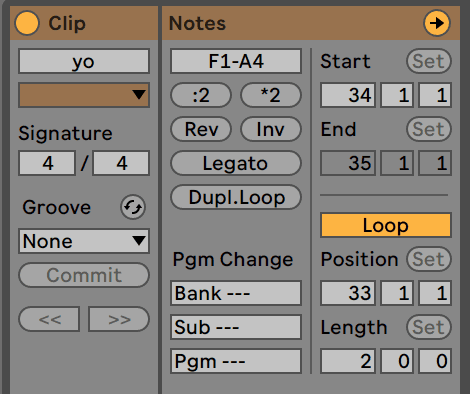
Tip 14: Adjust Loop Points and Start Time
If you’ve got a MIDI clip, sometimes you might want to switch it up and loop part, or only play a section of it at the start.
The Position and Length sections are often overlooked as creative tools for mangling MIDI (and audio as well).
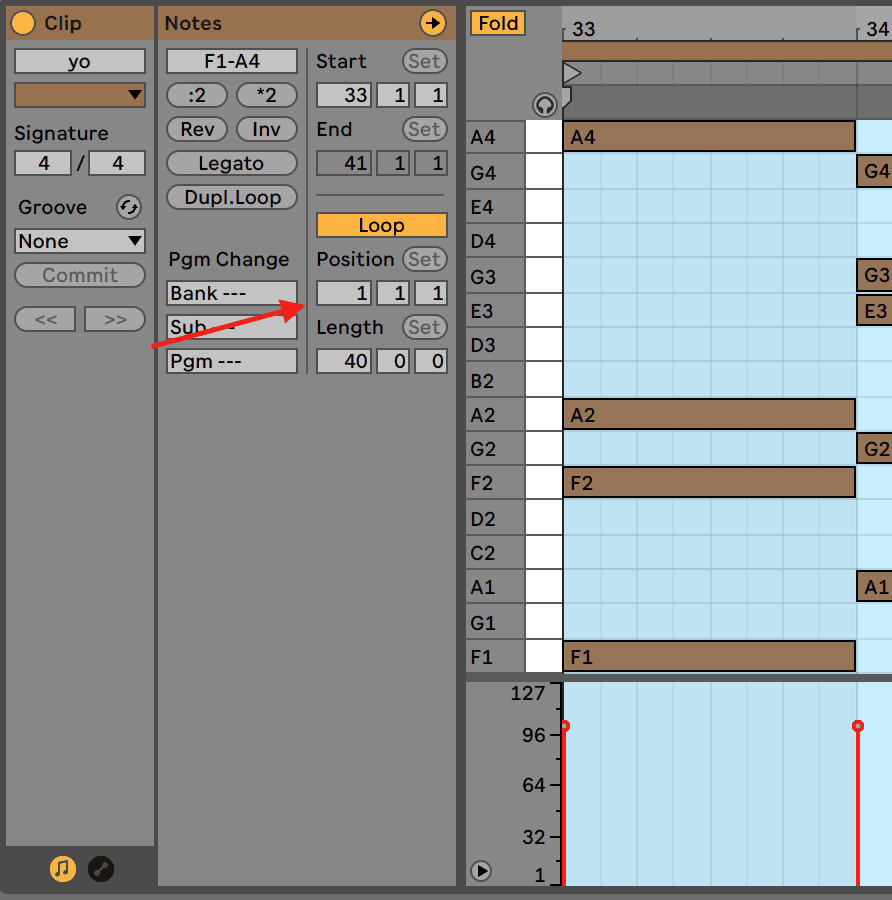
Simply by turning on loop and adjusting these parameters, you can loop your clip in both expected and unexpected ways.
You can also use the markers above the notes in the scrub area.

Tip 15: Program Change
This is particularly useful if you’re using an external instrument, like an analogue synth or drum machine.
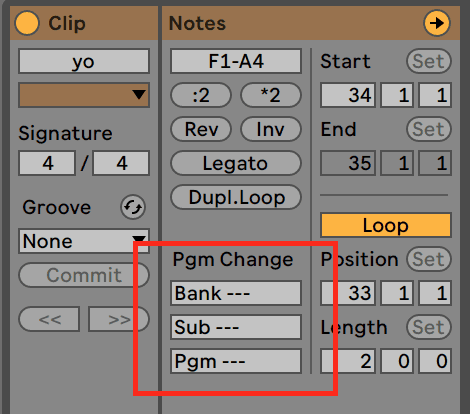
Adjusting these parameters will allow you to change between different sounds on your synthesizer through MIDI, or even to change between completely different synths!
Note that this doesn’t work the same for all devices, so make sure to see if your synth is compatible.
Recommended: Free Piano VSTs and Plugins
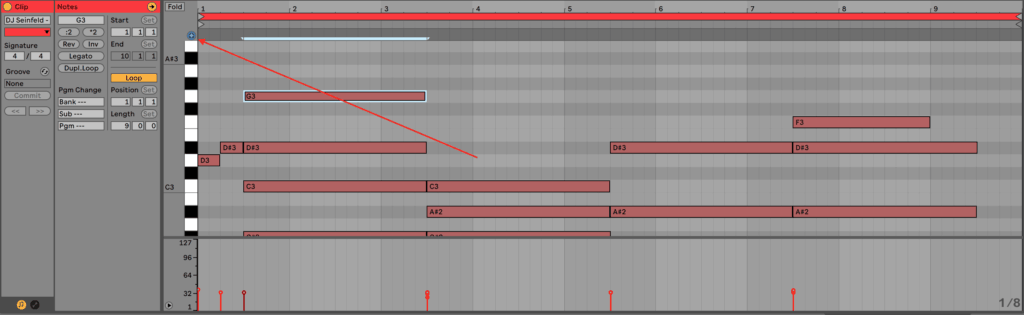
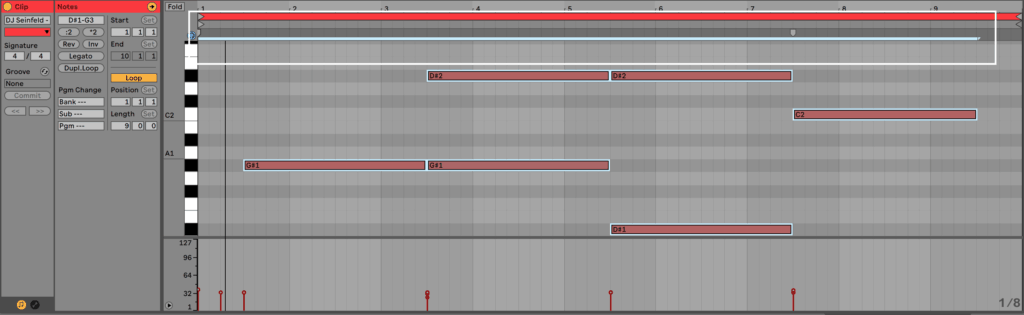
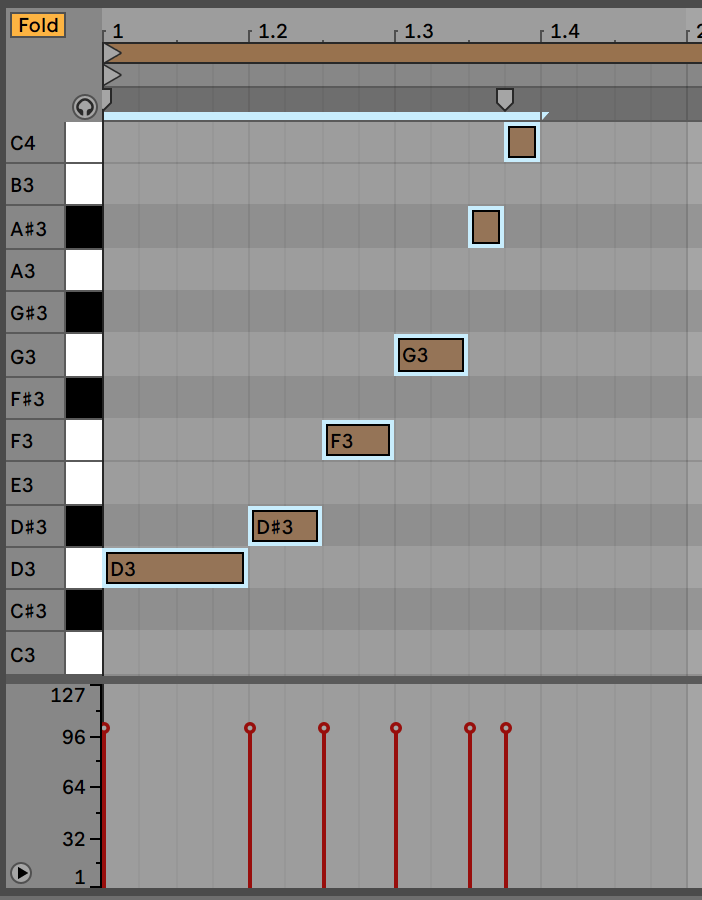
Tip 16: Fold the Piano Roll
Another great tip for drum rack users, ‘Fold’ allows you to hide unused notes on the piano roll.
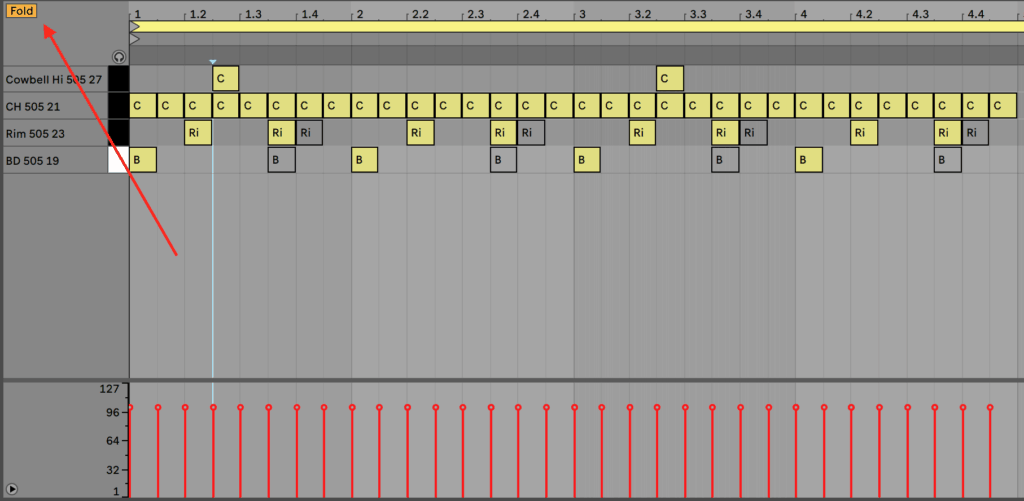
Most producers don’t use an entire piano’s worth of samples in a piano roll, so this feature helps to minimise the space taken up by the notes, especially when drum programming.
Another great use for this is to draw some notes in before the start of a clip (before 1.1.1) that belong to a desired scale or key.
Tip 17: Modulation & Envelopes
You can already record automation into Live, but most people skip over the ‘Show Modulation’ parameter.

What this does is allow you to add modulation and envelopes to a clip itself, instead of over the whole track.

Doing these means you embed the modulation into that clip, making it part of the pattern. It also means you don’t have to worry about copying and pasting modulation over the course of the track.
Part of the fun with this is when you record it with something like a MIDI keyboard or controller.
Tip 18: Record MIDI Effects
If you’ve used any MIDI effects on your notes, sometimes it can help to visually see what you are working with, like with audio.


Above is the original MIDI, the added effect and an instance of Live’s Analog synth.
To record the new MIDI, simply add a new, empty MIDI track and set the input to the original track.

Once this is done, arm the new track and record it, letting it play through the MIDI. Once done, you should get a new clip with the MIDI effect applied:

You can drag this new clip back onto your original track – just make sure to delete the original MIDI effects, otherwise, you’ll get double the processing (hey, it might actually sound good!).
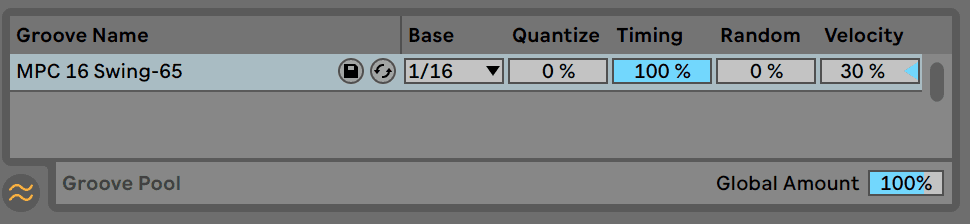
Tip 19: Grooves & Timing Offsets
Achieving a human feel in the DAW can often feel like black magic, as it’s hard working with quantized notes and robotic-sounding synths.

One way to help add back the feel is to use grooves.
You can do this using the default swing and groove presets in Live, located in Packs > Core Library > Swing and Groove.
Simply drag any of the presets onto a MIDI clip or warped audio clip to add some groove.
You can then adjust global parameters in the groove pool below the browser – you can set random timing, quantize the notes before, change the strength of the timing and more.
Icon Collective has a great article about humanizing MIDI, especially for drums, if you want to dive more into that.
Recommended: 6 Ways To Humanize Your Music In Ableton Live
Need More Tips?
If this has not been enough tips, then make sure to grab our free one-sheet PDF with all these tips + more! 👇
Or, you can check out 100 other tips for Ableton Live in general.
Also, make sure to say hi at [email protected] if you have any questions or suggestions.
