Convolution reverb is a topic I rarely see discussed on YouTube and blogs.
Maybe you’ve never heard the term before. Or you’ve seen it in passing, but are not quite sure what it is? For me, convolution reverb is to key to ultra-realistic reverbs.
In a nutshell, convolution reverbs apply the characteristics of reals spaces to your sounds.
They replicate the reverb obtained from a specific recording, in a specific place.
In this guide, we’ll cover:
- what convolution reverb actually is 💡
- how convolution reverb works ⚙
- the best convolution reverb plugins (all free!) 🔥
- some bonus free content 🤫
So without further ado, let’s dive in! 👇
New to music production? 🧑💻
Watch our Free Masterclass on how to learn electronic music production the smart way (without months of confusion & frustration) 👇
Table of contents
A Quick Refresher: What Is Reverb?
Before we go forward, let’s lay some groundwork.
Reverb is the abbreviation of “reverberation“. It’s what you get when a sound persists after the original sound has been produced.
I think that intuitively, you all knew that already. But now you have a neat definition to hand out.
We’ve all experienced reverb in real life. Ever move into a new apartment that was unfurnished? Or shouted your name in a tunnel when you were a kid?

What happens is sound is reflected off multiple surfaces. Reflections then build up and reach your ears after the initial sound was emitted.
In the good ol’ analog days, reverb was actually recorded in real life. Chambers and rooms were designed to provide a specific reverb when you recorded in them:

Nowadays, plugins artificially create a reverb with a multitude of customizable parameters:

But what if there was a way to replicate a very specific reverb? Say, a cathedral you visited in Italy? What if you could apply the reverb from that cathedral to any sound?
Enter the world of convolution reverbs…
Looking for an in-depth walk-through on reverbs and the best free plugins? Check out our latest guide here!
So… What Is Convolution Reverb?
Convolution reverb differs from classic (or algorithmic) reverbs by its use of samples.
These samples are called “impulse responses“, or IRs.
According to Wikipedia, an impulse response is “the reaction of any dynamic system in response to some external change”:

In short, it’s a fancy way of saying “you do something, and there’s a reaction”. Applied to music, this would be a noise, and its reverberation.
Essentially, IRs enable the acoustic characteristics of a physical location to be captured.
This is what convolution reverb is all about. Instead of tweaking the room space, distance, decay rate, etc… You might load up an IR called “Nottingham Forest in winter”. Or “Albert Hall – from stage”. You get the idea.
Here are some examples:


The plugin I am using here is Fruity Convolver. But more on that later…
When Should You Use Convolution Reverb?
The defining characteristic of a convolution reverb is its realism. That is why one of its key applications is in ADR.
ADR stands for “additional dialog recording”.
It’s the process where actors need to re-record lines of dialogue, usually in the studio. Sound designers will use a convolution reverb to replicate the space of the scene.

This also works for video games by the way. Is a character supposed to be in the Sistine Chapel? Convolution reverb will be cheaper than flying voice actors to the Vatican!
However, this is the EDMProd blog after all, not the ADRProd blog. So let’s go over some examples that apply to music production!
New to music production? 🧑💻
Watch our Free Masterclass on how to learn electronic music production the smart way (without months of confusion & frustration) 👇
Bring Your Drums to Life
Hammering the point home, the key feature of a convolution reverb is its realism.
One trick to bring your drums to life is to use convolution reverb.
Let’s face it – our drum loops often sound a bit stale or unrealistic. There are many reasons for this:
- too much quantization
- creating samples that a real drummer couldn’t physically play
- using the wrong reverb settings, creating an unrealistic sense of space
This is where the convolution reverb comes in. Load it on your Drum Bus to give your loop a sense of space.
In this example I have a little loop with no processing on the drums:
You can definitely hear that the drums sound a bit… dry.
So let’s add some convolution reverb to them! I am using Fruity Convolver, with the preset “Narrow Stairs”:

This is the result:
Much better!
Give Space to “Real” Instruments
Convolution reverb works also great on any “real” instrument. This will give them their own actual space.
Guitars, pianos, flutes, etc. are all great candidates.
I personally love to use a convolution reverb on acoustic guitars. I find it works especially well if I’m going for a small, intimate sound:
However, beware of using too many different reverbs!
Convolution reverbs emulate real spaces. The last thing you want is each instrument playing in a totally different room!
In this example, I am using the same IR on the guitar, piano to glue them together:
Twist and Distort Sounds
Up until now, I’ve repeated that convolution reverbs replicate realistic places.
But that’s not entirely true.
As we saw earlier, a convolution reverb uses IRs to generate the reverberation. These IRs are simply WAV files used to model the reverb.
This means that, practically, you can load up any sample you want!

The sample doesn’t have to be a specific reverb space. It can be anything!
Let’s give it a try.
First, let’s record a sample. I’ve used Analog Dreams, a Kontakt library here:
Alright cool. Now let’s load up that sample into Fruity Convolver. This is what it looks like:

Next, I am going to load a drum loop, and slowly turn up the WET knob:
Pretty cool!
Here’s another example:
The possibilities are limitless.
Personally, I find this technique works really well to create amazing atmospheres.
Here is the process I follow:
- Find a cool sample that I want to base my atmosphere on
- Load that sample in a convolver reverb unit
- Load up a drum sample, playing a groove similar to my track
- Apply the reverb to the drum loop
- A bit of post-processing to wrap things up, and voila!
Here’s one last example using this technique:
I like this sound design technique because it gives the atmosphere a rhythmic structure.
Looking for more ways to create unique pads? Check out our latest video:
The 5 Best FREE Convolution Reverb Plugins
Next, let’s look at some of the best convolution reverb plugins out there.
I talked a lot about Fruity Convolver, so let’s start there.
Fruity Convolver (free)
FL Studio’s convolution reverb unit is a hidden gem. The level of fine-tuning you get is surprisingly high for a stock plugin:

Among its key features are:
- Dry and Wet knobs
- A wet “separation” knob, for a wider or narrower stereo image
- Stretch will change the length & pitch of the impulse
- Self-convolve will convolve the IR with itself before being convolved with the input. Basically, you’re adding another layer of reverb
But that’s not all! You also get a full EQ section:

Here, you can EQ the impulse itself. The result will then be a change the EQ of the convolved part of the output.
You can then balance between the original and EQ’ed signal with the EQ knob.
And of course, you can load up any IR of your choice into Fruity Convolver.
Ableton Live Convolution Reverb (free)
Ableton Live’s stock convolution reverb offers many of the same features:

The EQ settings are more limited, with just 3 bands to play with. However, you do get attack and decay settings to adjust the envelope.
You also have the option to load two different IRs (A and B).
This way, you can easily A/B test and see which one fits best.
If you have the Pro version, you will also have access to a few more tabs. Notably:
- The Pos tab lets you move the reverb through the stereo field. You can move from left to right, but also from front to back. This can give the impression of an up-close or deep reverb
- The Mod tab will add an LFO modulation. This will give a slight wobble to the reverb.
Logic Pro Space Designer (free)
Space Designer is Logic Pro’s stock convolution reverb:

One of the coolest features of Space Designer is its onboard IR synthesis. Basically, you can create completely new IRs.
This will produce truly unique and unexpected effects.
Other settings include:
- ADSR envelope adjustments
- IR filtering
- Output EQ
- stereo/surround balance controls
- a “Reverse” function to reverse your IR
Convology XT by Impulse Record (free)
Convology XT comes with 70 high-quality impulse responses:

Most of these IRs are captured from vintage hardware such as spring reverbs. For a free plugin, you get a surprising amount of control, including:
- full ADSR controls
- pre-delay time setting
- LFO modulation
- Reverse IR function
- Time-stretching for long, haunting atmospheres.
You can also load any IR of your choice in WAV format.
It also provides zero latency, which is not common among free convolution reverb plugins.
Download Convology XT by Impulse Record here
Halls Of Fame 3 Free by Best Service (Free)
This is a free version of the full Halls of Fame Complete Edition:

Inside, you get 26 IRs of exceptional quality. These capture the characteristics of legendary hardware reverb units such as the AKG BX20 or the LEX300.
Among the controls at your disposal, you have:
- 3-band EQ
- 3-band damping
- ADSR control
- Reverse function
However, one of the downsides is that you cannot load any external IR.
Still, it’s one worth grabbing for free.
Download Halls Of Fame 3 Free by Best Service here
The 5 Best PAID Convolution Reverb Plugins
Right, we’ve looked at the best free convolution reverb units out there. But what if Santa just came by, and you have a bit of extra cash on hand?
Izotope Trash 2 with convolution reverb
I know, Trash 2 is not a reverb plugin, it’s a distortion/saturation plugin. However, did you know it also accepts impulse responses? This means it can almost mimic the effect of a convolution reverb. Let’s have a look.

At the bottom, you will see the Convolve unit. This is where you can load impulse reponses.
However, the convolution unit in Trash2 doesn’t sound like reverb in the traditional sense.
Here, the IRs are really short, creating more of an ambience than an actual reverb. Check out this dry piano loop:
Now let’s try out some of Trash2 convolution presets:
You can hear how this convolution reverb adds a lot of body and width to the sound. You can choose between a number of IRs, or load your own. There’s also a really cool option to switch between types of microphones, from dynamic to condenser to ribbon:

Check out Izotop Trash 2 here (USD 199)
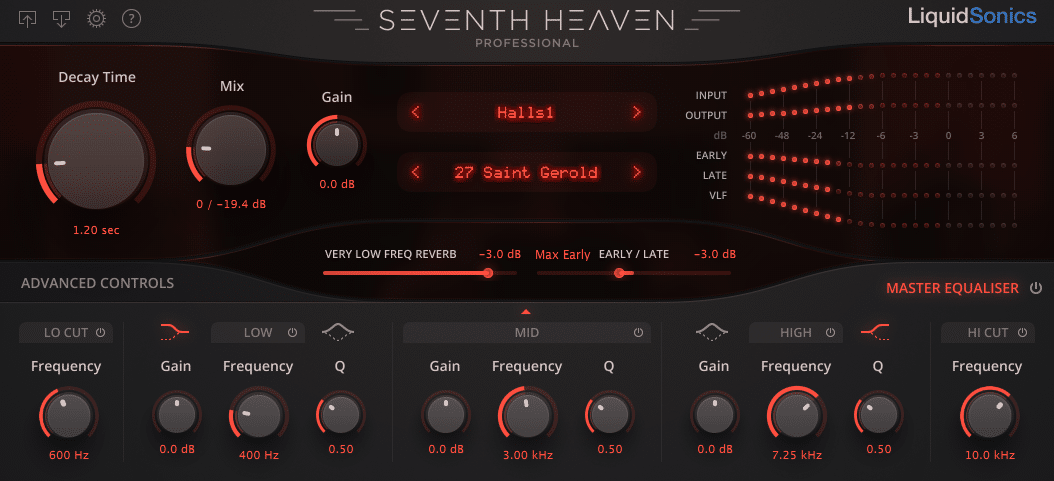
Seventh Heaven by LiquidSonics
Next up is Seventh Heaven:

This convolution reverb is an emulation of the legendary Bricasti M7.
What is unique about this convolution reverb is that it combines both the realism of a convolution reverb, and the flexibility of an algorithmic reverb.
For example, you can tweak things like:
- a 5-band post-EQ
- Pre-delay and delay time and level
- Auto-ducking, so the reverb doesn’t get in the way of the source sound
- Frequency dependent decay time
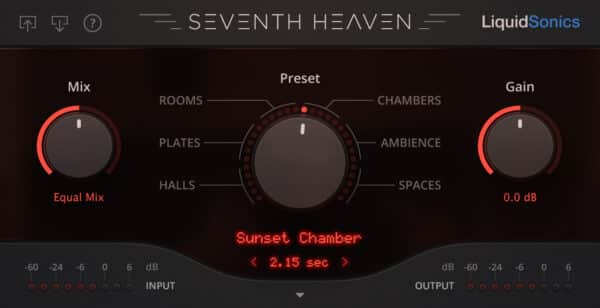
Seventh Heaven is available in 2 different versions:
- Simplified version at USD 69
- Professional version at USD 299
While the pro version comes with all the bells and whistles, the simplified version offers a range of its best presets:

Practically, you can choose between 30 different presets grouped by type of reverb: room, plate, hall etc. You can still tweak things like EQ, although you only have 2 bands to play with. And the delay options are more stripped-down.
If you’re looking for the best convolution reverb for realistic spaces and cinematic production, this is the one for you.
Check out Seventh Heaven here (USD 69 or USD 299)
kHs Convolver
Finally, let’s take a look at Convolver by Kilohearts:

If you’re looking for a cheaper option, check out Convolver by Kilohearts. Kilohearts is a company we’ve covered before with our guide about Phase Plant.
Convolver is a straight-forward convolution reverb with some neat little features. To start, it comes with a huge range of IRs, from realistic to completely experimental.
A really cool feature is the ability to manipulate the IR by adding fades and even reversing it.
Let me show you. Here’s a dry drum loop:
Now I’m going to load an IR, and reverse it:

Here’s what it sounds like with the mix turned to just 8%:
You can even set up this effect in a parallel channel and use sidechain compression to make it duck under the main beat!
Finally, if you really want to nerd out, you’ve got a sample editor. This is where you can meticulously edit the IR you loaded:

Check out kHs Convolver here (USD 39)
Some Free Bonus Content 🤫
Maybe you already have a convolution reverb plugin.
In that case, how would like some free impulse response folders instead?
Most convolution reverb plugins will let you load any IR. This makes them extremely flexible reverb options.
Luckily, there are plenty of free libraries with hundreds of IRs. Here are some of the most popular ones:
- EchoThief – features over 100 real spaces in North America (including the skateparks, stairwells, and the Batman cave!)
- Lexicon 480L – features dozens of actual presets from the legendary reverb unit
- Bricasti M7 – features 136 presets from the M7, a classic reverb used by none other the John Mayer
- Waves IR Convolution Reverb Library – a massive 4.8Gb of IRs! Possibly the last IR library you’ll ever need.
So Should I Abandon “Normal” Reverbs?
We talked a lot here about the advantages of convolution reverb.
But does this mean you should never use your beloved Valhalla VintageVerb again?
Not exactly. Convolution reverbs are great at creating realistic spaces. But sometimes, realism isn’t always what you’re looking for.
Looking for a very distinctive reverb that will add interest to a sound? A classic algorithmic reverb will work better:

Convolution reverb is also a lot more CPU-intensive.
This is because it has to generate a reverb based on a sample.
So there’s definitely a place for both classic and convolution reverb. Different situations will call for one or the other.
And remember that there are no strict rules. If you’re unsure, pick whatever sounds best to your ears!
New to music production? 🧑💻
Watch our Free Masterclass on how to learn electronic music production the smart way (without months of confusion & frustration) 👇
Last Words on Convolution Reverb
That’s it for this one!
I hope you were convinced by the amazing possibilities of convolution reverb. Whether for realistic spaces or weird sounds, convolution reverb should be part of your arsenal.
Did I miss out on anything? Let me know over at [email protected]

