Compressor vs limiter can be tough to grasp for beginner producers. And for good reason.
Unlike delays and reverbs, changes in dynamics are sometimes really hard to notice.
But in the world of dynamics, compressors and limiters play a central role. Although similar, there are some key differences between them. And mastering them will bring your mixes to the next level. That is what we’ll explore in this guide!
Together we will look at:
- What compressors and limiters are
- What sets them apart
- Practical cases to use one or the other
- The best plugins that combine both!
So let’s dive in! 👇
Is compression confusing you? 🤷
Get our one-page cheat sheet containing everything to help you understand ratio, threshold, attack, release, and all of the compression parameters with simplicity.
Table of contents
What is a Compressor?
Firstly, let’s look at what a compressor is.
The goal of a compressor is to reduce the signal’s dynamic range.
Dynamic range is the difference between the loudest and the quietest part of a signal:

Some signals will have a high dynamic range. Others will have a low one.
Note: dynamic range can also refer to a full track, not just a single signal.
Compressors are generally used on signals with a high dynamic range. The goal here is to even out the overall level.
Think of a vocal performance.
The verse might be quiet and intimate. And then the chorus hits and blows the roof off!
This is where a compressor would step in:
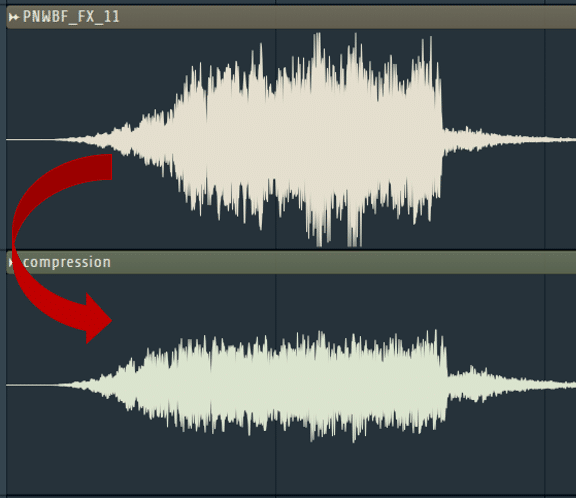
After compressing, the loud parts are quieter and vice-versa.
Parameters of a Compressor
Now that we know what a compressor does, let’s see how it does it.
Every compressor will have at least the five following parameters:
- Threshold
- Ratio
- Attack time
- Release Time
- Gain
Some compressor plugins will also have settings such as “knee” or “lookahead”. But let’s cover the 5 basic parameters first:
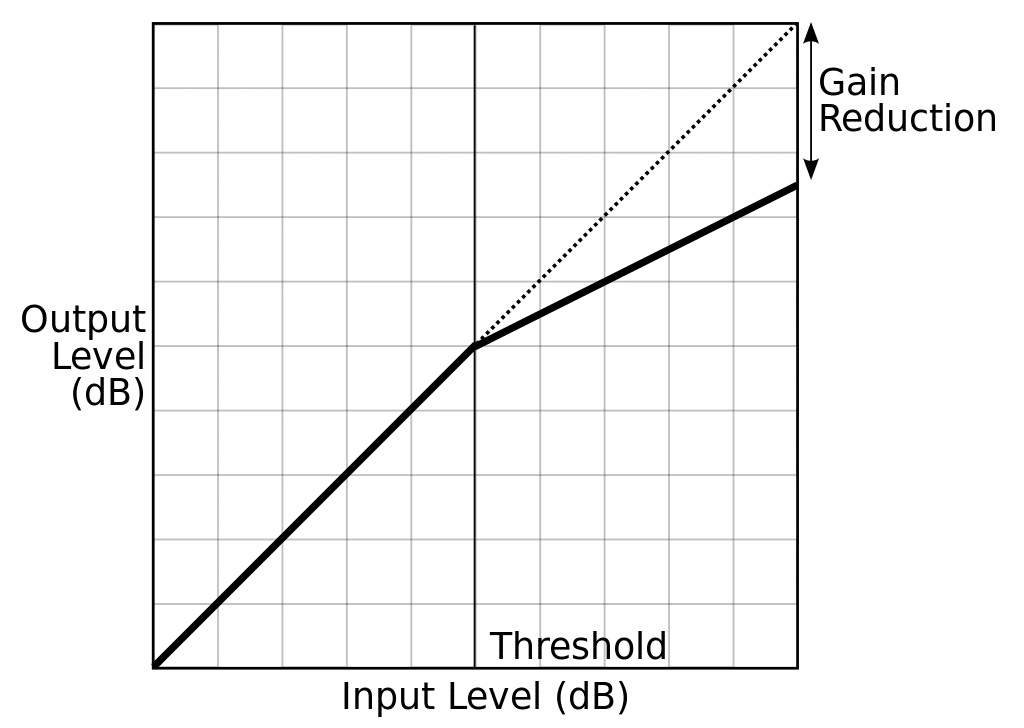
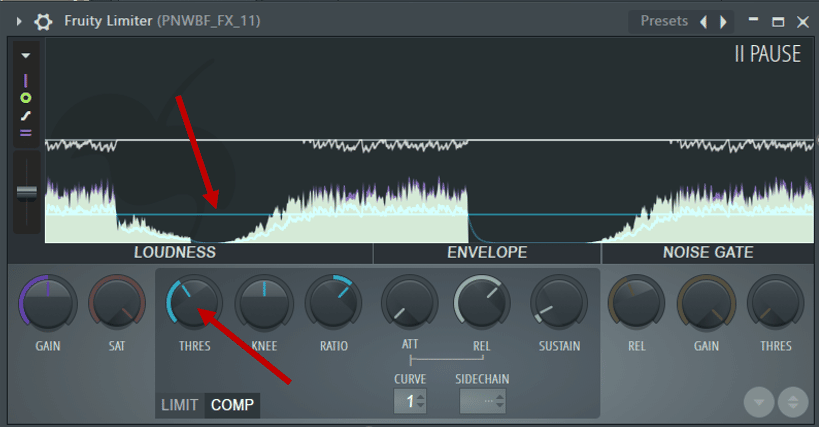
The threshold is the dB level at which the compressor is activated.
A threshold of -15dB means anything below that will not be affected. When the signal goes beyond -15dB, the signal will be compressed:
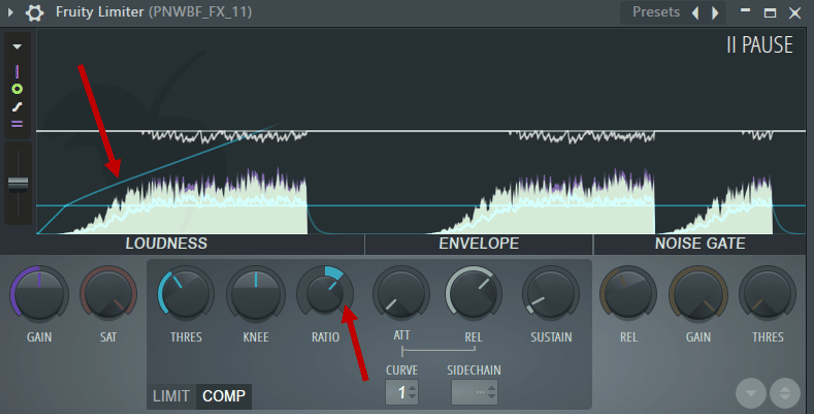
The ratio sets how much the signal is compressed.
The ratio is expressed as a relationship between input and output:
- 2:1 –> 2dB of increase in input results in an output increase of 1dB
- 5:1 –> 5dB of increase in input results in an output increase of 1dB
- etc.
Whereas the threshold is “when” you compress, the ratio is “how much”:
Staying with the same analogy, attack and release set “how quickly” you compress.
These are set in milliseconds. By adjusting the attack, you decide how quickly your compressor reduces the input.
On the other hand, the release time will dictate how quickly the sound returns to its original level.
Finally, the gain will boost the overall level post-compression.
This may also be called “output” or “makeup gain”. Basically, the goal is to “make up” for the volume lost by compression:

Compressors can be used subtly to smooth out the peaks of a sound. Or they can be used more aggressively to alter the envelope of a sound.
Looking to learn more about compression? Check out our guides on sidechain compression, multiband compression, and parallel compression!
What is a Limiter?
Now that we know what a compressor is, let’s look at limiters.
Limiters are very similar to compressors in that they act on the dynamic range.
The goal here is also to control how high a signal’s level can go. However, instead of reducing the level, a limiter will “limit” it.
Above this limit called the “ceiling”, the level will be capped entirely:
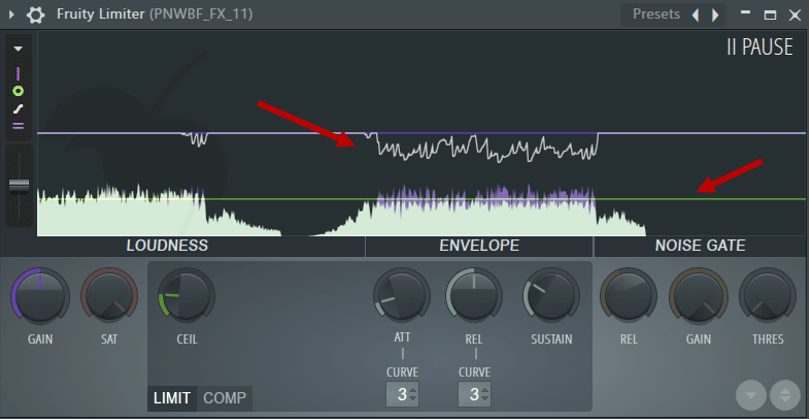
No matter how high the input signal goes, the output will always be limited to the ceiling level.
By the way, if you’re looking for a more in-depth guide on limiters, we have you covered 😉
Parameters of a Limiter
By nature, limiters have fewer parameters than compressors. With limiters, there is no ratio to adjust. Your main parameters are:
- Ceiling
- Attack time
- Release time
- Gain
So, coming back to our initial question: what sets compressors and limiters apart?
Compressor vs Limiter: What Sets Them Apart? 🤔
You’ve probably guessed by now the difference between compressors and limiters.
Limiters are simply compressors with an “infinity” ratio.
This infinity ratio is often written as ∞:1. This means that you would need to increase the input by “infinity” dB to have an increase in output of 1 dB.
Practically, compressors with a ratio above 10:1 are often considered limiters:
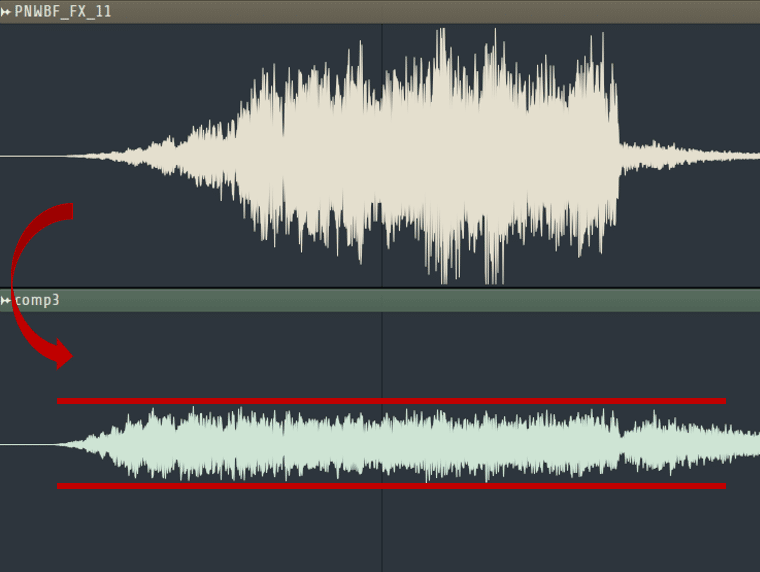
In this example, I am using the following settings on a compressor:
- Ratio: 30:1
- Threshold: -30dB
- Gain: 10dB
Essentially, with such a high ratio, my compressor is acting like a limiter.
However, limiters have the advantage of clearly setting a dB ceiling.
Compressors and limiters also have different sonic characteristics. A limiter will tend to have faster attack and release times. This results in a more transparent sound when raising the gain.
But what also sets compressors and limiters apart is their use cases.
Is compression confusing you? 🤷
Get our one-page cheat sheet containing everything to help you understand ratio, threshold, attack, release, and all of the compression parameters with simplicity.
When Do I Use a Compressor vs Limiter?
We’ve established that the ratio is the main difference between compressor vs limiter.
When deciding between a compressor or a limiter, the key question is how much “ratio” you need. For example:
- If you need to slightly tame the peaks of a vocal, use a compressor.
- If you need to control the overall output of your mix, use a limiter.
Although there are no strict rules, here are some general guidelines.
Vocals
If you work with vocals, you will certainly need a compressor. This is to control the dynamics of the performance. Vocal takes always have some quiet sections that you want to boost. And they also have some loud ones that need taming!

Bass
In most EDM genres, the bass is the foundation of your track. If your bass is too weak, your track falls apart.
This is why it’s really important to have a consistent level for your bass.
Depending on your EQ settings, some notes might play louder than others:

In this example, I am playing every note at the same velocity. Despite this, the levels fluctuate wildly. Using a compressor will help even out the bass level.
Bus Tracks
Compressors are also often used on bus tracks.
Bus tracks are where you gather several tracks that you want to process together. For example, you might have several layers in your synth lead. Processing them as one with delay, reverb, etc. will enhance the cohesion.
The same goes for compression. Use a glue compressor on a bus track to “glue” sounds together.
Here, you generally want to go with “soft” compression (2:1 or lower).
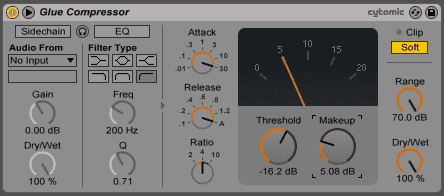
If you want to dive deeper into glue compression, check out our video from Aden here:
Mix Bus
Limiters on the other hand are generally reserved for the mix bus. The goal here is to increase the overall level of your track. And you want to do this without clipping or distortion!
If you’re mastering your own track, then a limiter is an essential part of your Master FX chain.
However, be careful not to overdo it. If your limiter is working too hard, the dynamics of your track will be destroyed. It’s also a sign that something is wrong with your mixdown.
Not sure what mix bus processing is all about? Check out our latest article here!
Compressor vs Limiter: Case by case!
My motto with music is that “there are no rules, only guidelines”.

Although less common, here are some other cases where you might use limiting:
- Vocals. In the case of a vocal performance with a wide dynamic range, limiting can catch peaks of loud notes
- Drums. If you have a drum loop where the snare is constantly banging 5 dB above the rest, a limiter might be handy.
In the end, it all depends on what you’re going for.
Genres such as trap or dubtsep are “in-your-face” genres, where everything is upfront. In these cases, using a limiter on individual tracks can be useful. Genres such as Lofi or Jazz for example don’t need such heavy compression.
Can Compressor Plugins Also Be Limiters?
Because compressor vs limiter are so similar, plugins can sometimes act as both. Let’s look at two examples from our favorite DAWs: FL Studio and Ableton Live.
Fruity Limiter
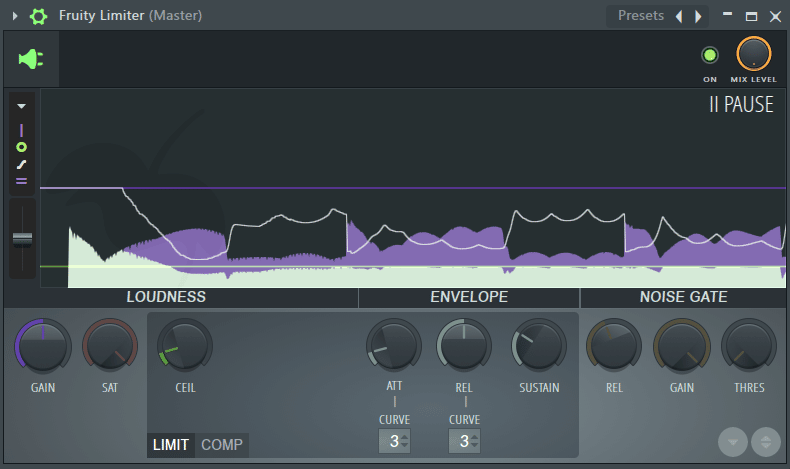
If you’re using FL Studio like I am, Fruity Limiter is a great place to start. One of its best aspects is that it does both compression and limiting:
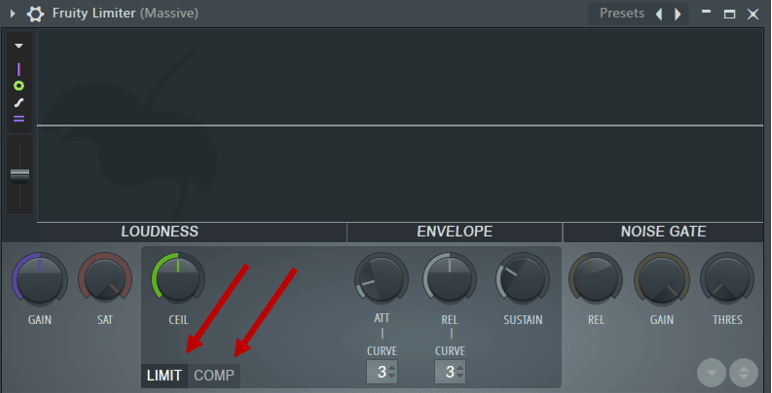
This means you can always load it on a single track or bus. You can then decide later if you need to compress or limit the sound.
If you’re new to limiting, the visual aid is especially handy. It shows you exactly how you are impacting your signal:
Ableton Live Compressor
Similarly to Fruity Limiter, Ableton’s stock plugin can act as both a compressor and a limiter:
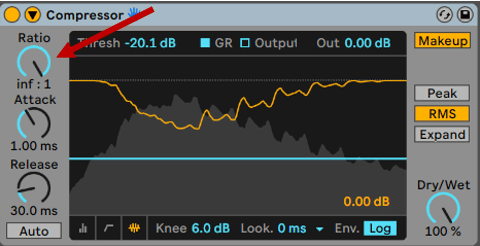
Here you can see that I’ve pushed the ratio to ∞:1. This essentially transforms the compressor into a limiter.
One great feature here is the automatic makeup gain.
By enabling “Makeup”, you automatically compensate the output volume. This lets you clearly hear the impact of the compression.
Is compression confusing you? 🤷
Get our one-page cheat sheet containing everything to help you understand ratio, threshold, attack, release, and all of the compression parameters with simplicity.
That’s It For Now!
That’s a wrap for this one. Hope you enjoyed this guide and learned some new tricks to apply to your music!
Did I miss out on anything? Any topics you’d like us to cover? Drop me a line at [email protected]

