So you want to learn how to make techno? I don’t blame you – there’s something special about that hypnotic sound that has defined electronic music for years.
Maybe you’ve tried but you’re stuck. You don’t have the right sounds, nothing fits together and everything you make sounds like a washy mess of audio.
Don’t fear – in this guide, we’ll cover 11 of the most important techniques you need to know when it comes to making techno. Here’s a rundown:
- Pick the right style
- Thumping kicks
- It’s all in the rhythm
- Top-end percussion
- Dark sounds + reverb
- Go nuts with the post-processing
- Hypnotic, driving basslines
- Building energy & tension
- Ambience and atmosphere
- Keep it evolving (every 8 bars)
- The professional polish
These beginner tips work in any DAW (Ableton Live, FL Studio, Logic Pro X), so let’s take a look! 👇
Get the headstart you need in music production with our EDM Starter Kit 🎛️
Get our collection of high-quality presets, samples and PDF guides – suitable for all genres of electronic music 👇
#1: Pick the right style
Techno originally started in Detroit during the 1970s with producers like Juan Atkins, Kevin Saunderson, and Derrick May. They pioneered the original raw, captivating techno sound.
But like many other subgenres of electronic music, techno has become so big over the years that many subgenres have been created.
You’ve got:
- Minimal Techno
- Raw/Deep Techno
- Peak-time Techno
- Melodic Techno
- Industrial Techno
- Hardcore Techno/Hard Techno
As you can see, there’s a lot. But most techno fits into one of two categories: Raw/Deep Techno or Peak-time Techno.
At least, that’s how Beatport sees it.
Raw/Deep Techno
This is characteristic of the original, minimal sound of techno that came out of Detroit in the early days. It retains the hypnotic feel, characterized by simple yet effective loops, a grungier aesthetic, and an arguably ‘darker’ sound.
Many people would characterize this type of techno as ‘underproduced’, but it’s just part of the aesthetic this breed of producers is going for.
In this style, you’d be opting for elements like:
- Original 909 drum samples
- Acid basslines
- Analog synths with lots of weird modulation and FX processing
- Longer, repetitious arrangements with lots of slow movement over time
- Slightly faster BPMS (130-140)
Here’s an example of this style:
Peak-time Techno
By contrast, peak-time techno has a more modern influence and is inspired by melodic phrases and unique sound design.
This new sound has been pioneered by producers like UMEK, Adam Beyer, and Charlotte de Witte.
The main elements of this sound are:
- Punchy and modern percussion
- Use of digital synths and multiple layers
- Big builds in the breakdown, fuelled by FX sweeps
- More obvious variation in the arrangement
- Slower BPMS (120-135)
Other styles
There are other types of techno like dub techno which is less club-oriented and more for listening, and melodic techno which is inspired by progressive and melodic house music.
While we could dive into all of these, for this article we’ll just cover the aforementioned styles. We might do these at some other point (if you’d like to see these, email me).
Recommended: How To Make House Music
#2: Thumping kicks
The central theme of techno is the kick drum – even more so than house music.
This is because while house music focuses on swing and groove, techno is all about those straight, driving rhythms.
House also tends to feature a clap on the 2 and 4, whereas techno forgoes this in favor of highlighting the kick.
If you’re going for the raw techno sound, a boomy, 808, or 909 style kick would work well here. This creates that ‘wash’ of low end that rumbles throughout the club:
909 Kick (135BPM):
However, if you’re going for the modern peak-time techno style, a shorter kick with a lot of punch is probably your best bet. A lot of low-end is still key, but these kicks have a much tighter sound.
Modern Techno Kick (132BPM):
For this guide, I’ll opt for the peak-time techno kick.
Once you’ve chosen a sample, you’ll want to program a simple 4-on-the-floor kick pattern like so.
This is the foundation of techno right here – everything else will surround this core theme.
You want the kick to keep this pattern up for the majority of your track, besides in the breakdown.
However, you can still spice things up with a number of:
- programming extra kicks between them
- removing the kick completely towards the end of a section
- using reverse kicks
Here’s what I came up with using these tips:
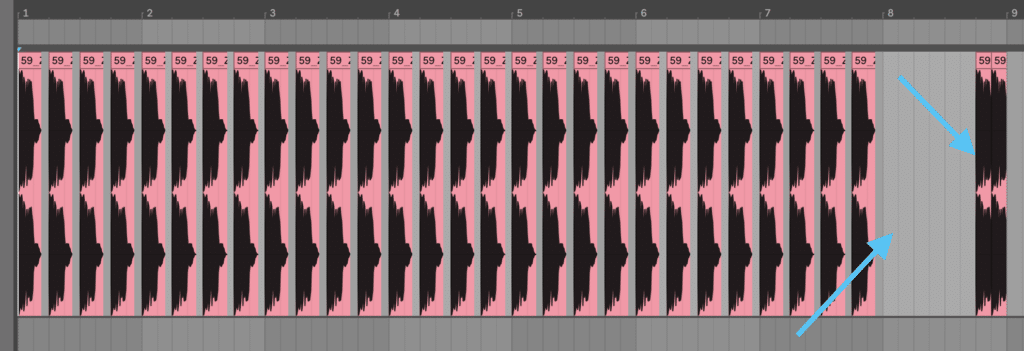
I haven’t used a reverse kick here, but I’m going to do something cool later on instead.
For now, let’s move on to the other drum sounds!
#3: It’s all in the rhythm
Once you’ve got a kick down, you can program extra percussion hits like claps and snares around the kick.
As I mentioned, you don’t have to stick to the standard 2 and 4 like in house music.
You can use claps and snares as an energy-building tactic and be more creative with the rhythm.
Here are a few ways you can do this:
Syncopated Percussion
Syncopation is where you program a drum sound to ‘feel’ like it’s playing at a different tempo to the rest of the track.
This is a great attention-grabbing technique, and many techno producers use this to switch up different sections.
It’s most common to use snares to do this, but you can feel free to find toms or any other perc sound. Here’s the snare I’m using:
I added a high-pass filter to the original sample to make sure the kick has space in the low end. This is a good practice for certain samples.
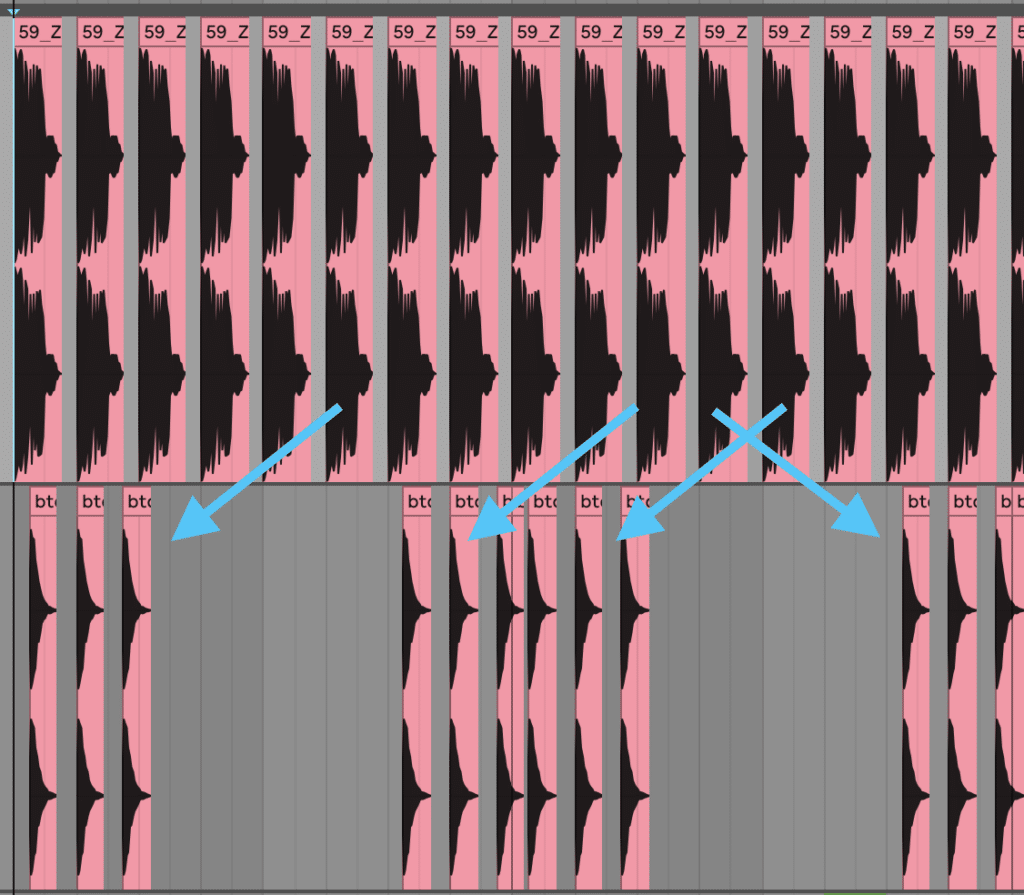
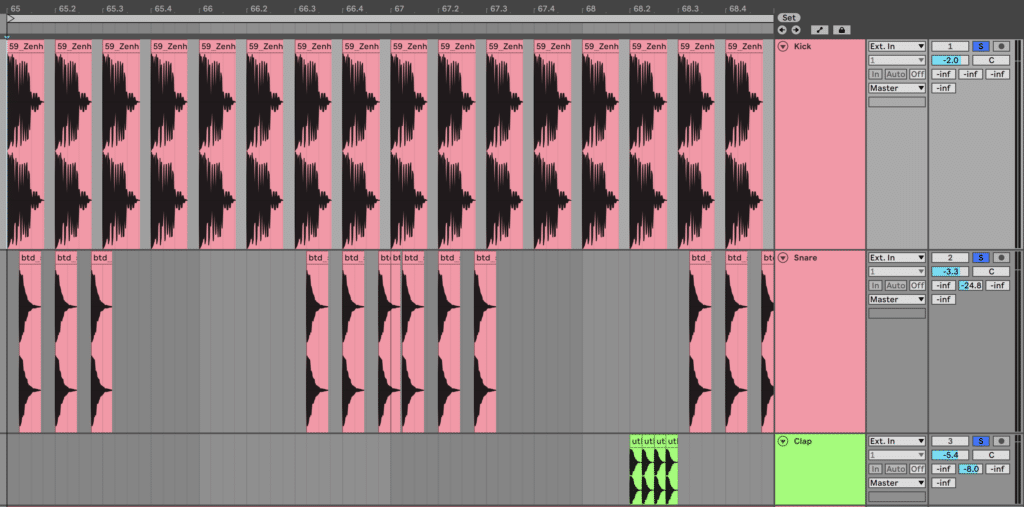
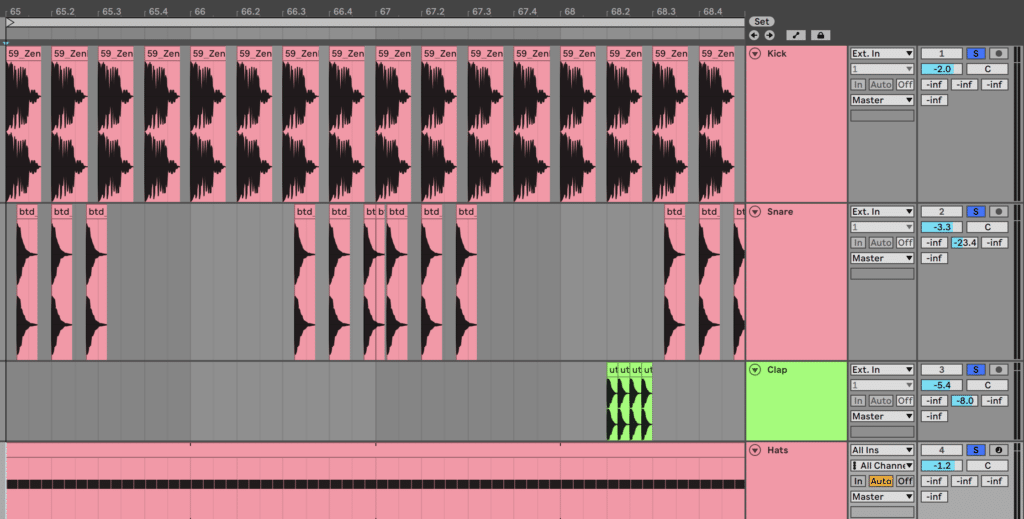
I’m going to add an offbeat syncopated snare around 1.1-1.2, and then again at 2.3-2.4. I’ll repeat this pattern every 2 bars.
You can see the two syncopated rhythms blend into one another at the end of every 2 bars.
Rolls
A great way to add energy in techno, especially after a huge build, is to abuse the claps through what I like to call rolls.
You just line them up every 1/16th note for a while and let them fire like a machine gun.
But I find this works better with claps than snares, so let’s find a good clap sample:
I may use them more liberally later in the track, but for now, I’m going to use them every 4 bars at 4.2.
This creates an extra little bit of tension and acts as a ‘call and response’ with the snare:
This sounds especially cool when you give them a bit of reverb. And speaking of reverb…
Reverb Hits
Because techno is all about filling in space around the kick with percussion and sound, reverb can be used to fill those gaps.
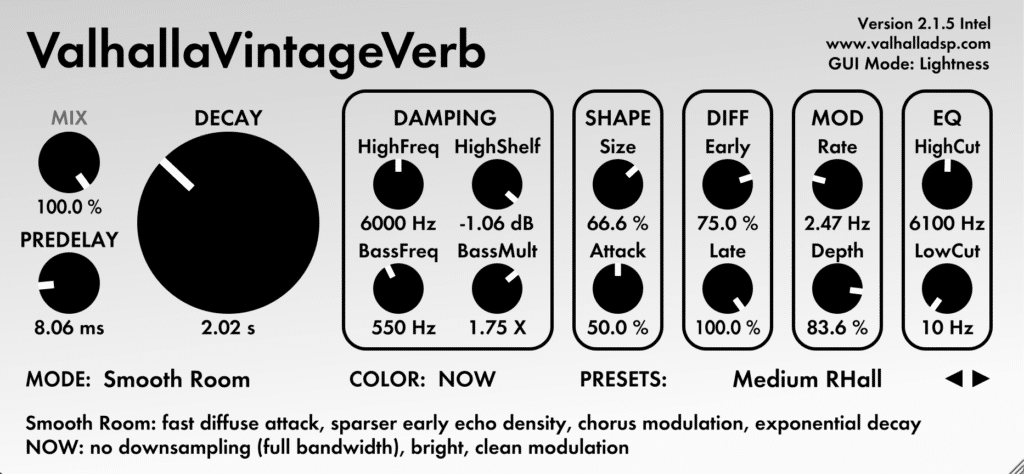
The easiest way to do this is to set up a reverb send with a 1-2s decay time and send certain hits to it. I’m going to use Valhalla Vintage Verb, but you can use any plugin or stock device.
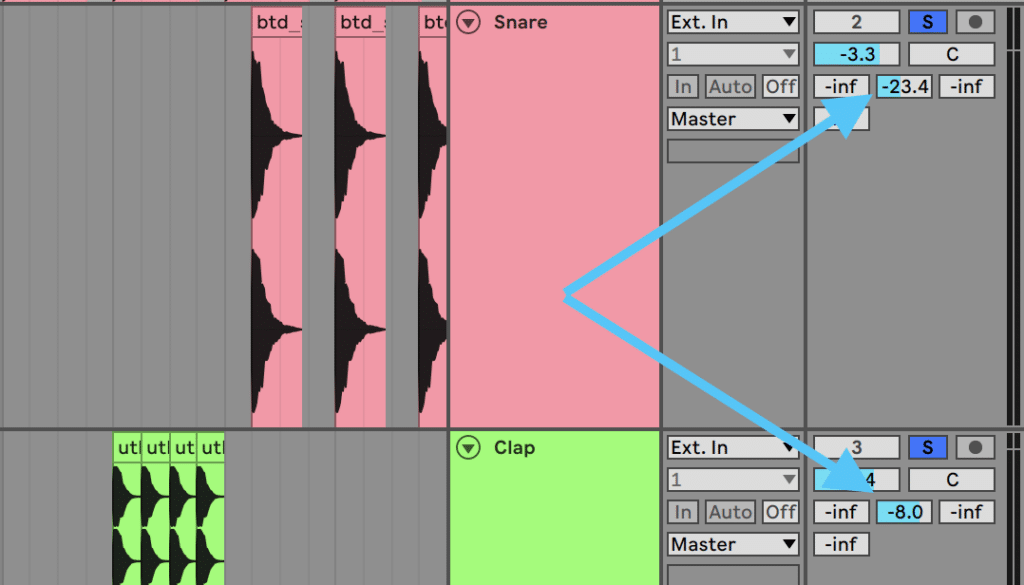
I’m going to send my claps to it, as well as my snares (a little bit less).
Notice how it fills out the space more:
Once you get your main percussion hits down, you can turn to the top-end percussion to create energy.
#4: Top-end energy (cymbals)
Because techno is heavily focussed on the kick, you want to compensate with lots of energy in the tops, using hats and rides.
Once again, the 909 drum machine sounds a great starting point here, but you can go further with more modern varieties of techno.
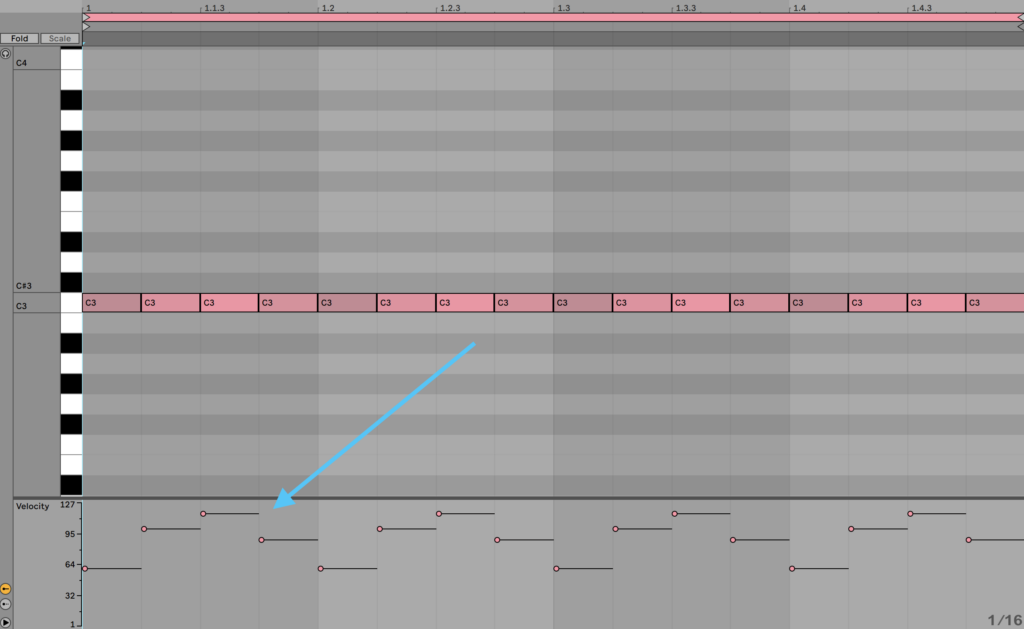
You’ll want to start with consistent 1/8th and 1/16th rhythms. Here is a standard 1/16th hat over what we’ve been making so far:
This is solid, but it’s a little stale. Let’s add some velocity changes to make the hats ‘dance’ a bit.
Now we’re starting to get that ‘driving feel’ that techno is known for.
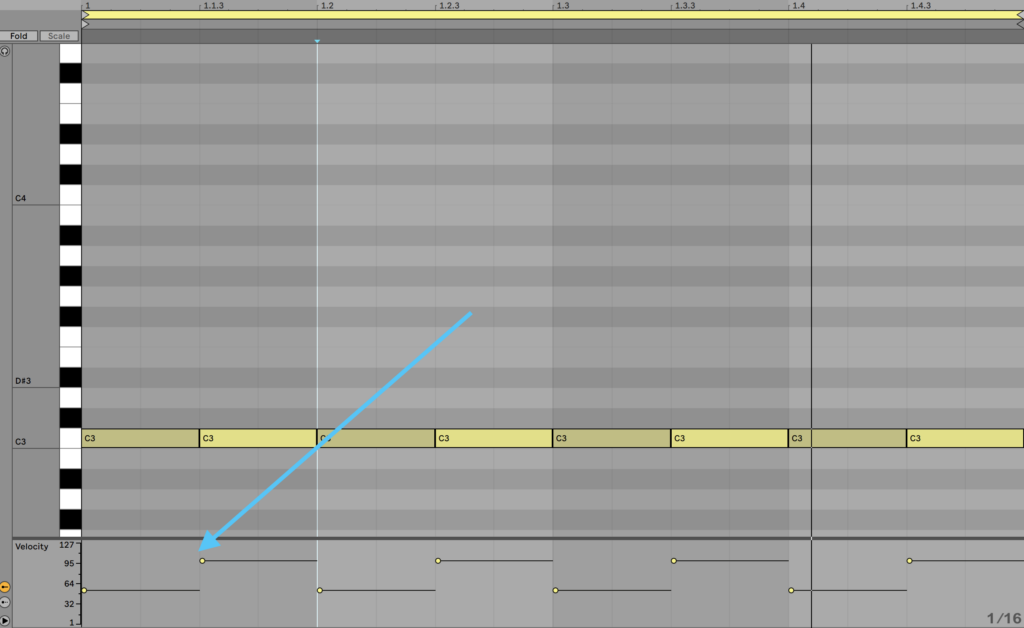
But we can create even more energy by layering in some rides.
I’m going to use a 909-like ride sample on every 1/8th note, with a few velocity changes on every 1st and 3rd it so it ‘ducks’ with the kick.
Now we’re talking.
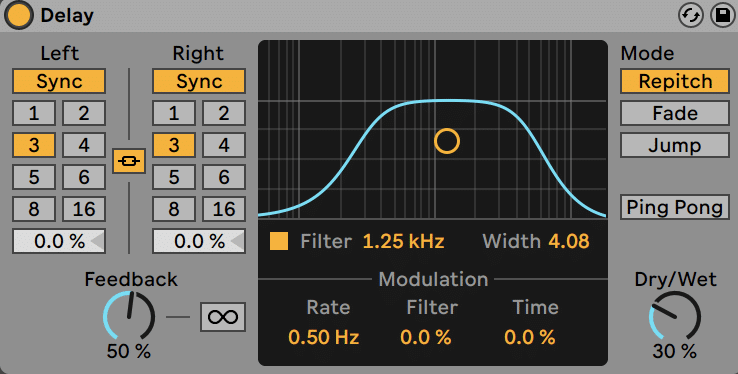
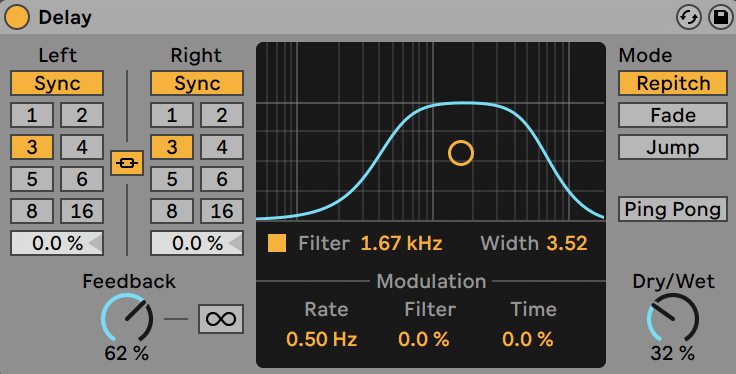
Bonus tip: a fun way to make hats more ‘hypnotic’ is to use timed delays, creating a rhythmic sense of space. Let’s add a 3/16 delay to the rides:
Get the headstart you need in music production with our EDM Starter Kit 🎛️
Get our collection of high-quality presets, samples and PDF guides – suitable for all genres of electronic music 👇
#5: Dark sounds with reverb
One of the main features of techno is its focus on atonal and dark-sounding melodies. Part of the fun is that you don’t even have to stick to a traditional scale if you don’t want to.
The ‘hook’ in techno tends to be an array of sounds that are arranged to create a phrase. These are usually processed with reverb to put them in a space.
You can hear this in the following track, between the vocal cuts and the acid bass stabs:
In this case, I’m going to pick 2 sounds: a bell and a vocal snippet. Between these two, I’ll be able to come up with something interesting.
Here’s the bell sample I’m using:
and the vocal snippet:
I’ll load both of them into a sampler each, and use the following techniques to come up with something interesting:
- pitching samples up and down
- changing the sample start time
- alternating notes and pitches
- trying different positions in the arrangement
There’s no right or wrong way to do this here. Here’s what I came up with:
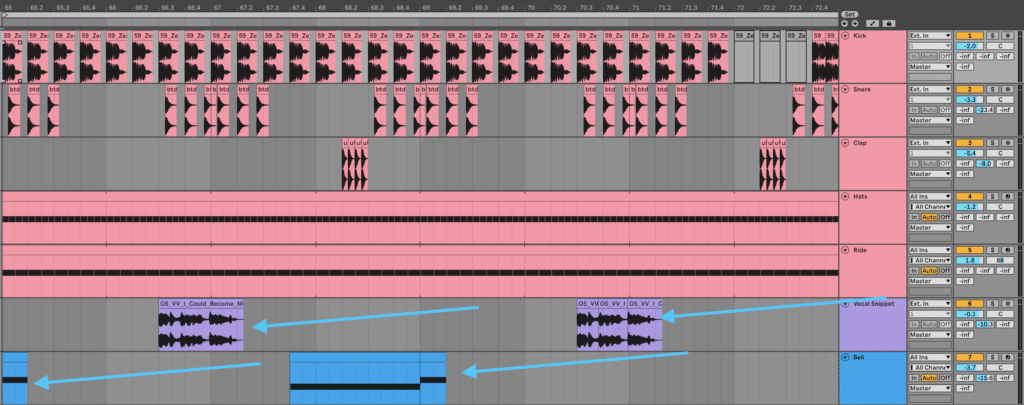
I think these are both sounding good, and I have put them through the same reverb as before.
But we can do more with a bit of post-processing.
#6: Go nuts with the post-processing
Techno is all about that other-worldly sound, so you can do some creative processing to get things sounding really strange, even beyond reverb.
Delay
Delay is one of my favorite effects to use in techno because it’s rhythmic and creates a ‘cavernous’ feeling.
If you’re going for that old-school sound, you can use something like a tape echo in lieu of a digital delay effect.
I chose to use delay on my vocal with a 3/16th delay time, giving it a nice sense of space:
Amp Simulation and Distortion
Amp simulations are great for getting unique, gritty textures out of any sound. However, you’ll want to be careful to drive things too hard too early.
In this case, I wanted to dirty up the bell sound to make it sound like something unrecognizable.
So I used the ‘Clean’ preset for Ableton Live’s Amp device from the default library and tweaked the drive to taste.
Combined with that reverb and pitch alternation, we have ourselves a spooky, crunchy bell-like texture.
EQ
Typically EQ is used as a mixing tool, but it can make for a good creative one too.
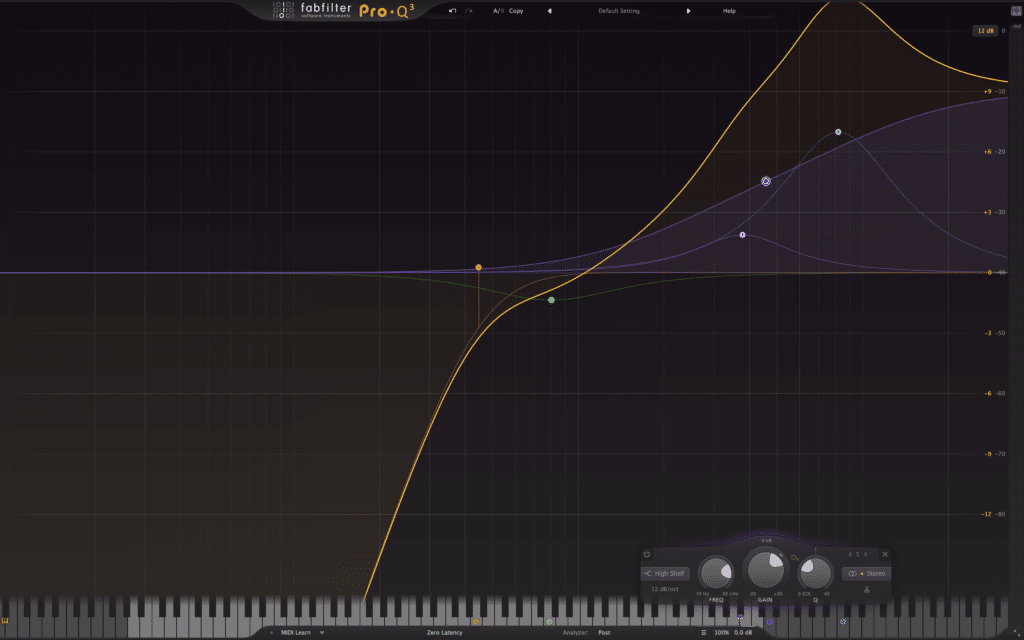
Because the vocal sample is quite lo-fi, attempting to ‘fix’ it by adding back in the high-end brought about some cool noisiness to the original sound.
Here’s the curve I made using FabFilter Pro-Q 3. Note that this looks really complicated, but it was literally just me throwing random boosts and cuts in there:
We can also apply these sorts of processing techniques to the rest of our track as we go.
#7: Hypnotic bass line
In techno, the bassline plays a relatively consistent role, filling in the low end with a driving, arpeggiated rhythm.
For this reason, using arpeggiators is common in techno, especially with the classic sound of the TB-303 bassline synth.
In the track I’m making, I’m going to use a more modern sound from Ableton Live’s Wavetable synth – the ‘Neo Post Acid’ preset.
Again, you can really get away with whatever notes you like in techno – as long as it feels right to you and is hitting the right note range.
Between E0 and E1 works for me in most cases, as this is usually reproduced by a subwoofer in a club.
In techno, certain bass patches do sound better when they leave space for the low-end of the kick and play in the higher ranges.
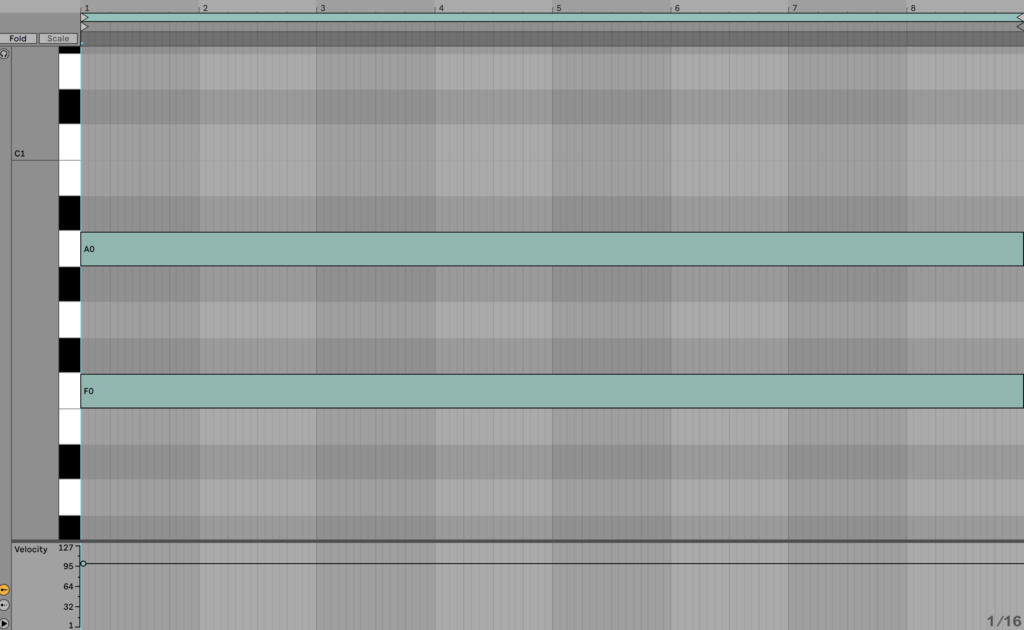
Here are the two notes I’m using – F0 and A0:
This has a nice kind of sub-bass feel. Now it’s time to use an arpeggiator.
Most DAWs come with either an arpeggiator device (Ableton Live, Logic Pro X) or an arpeggiation function (FL Studio Piano Roll menu).
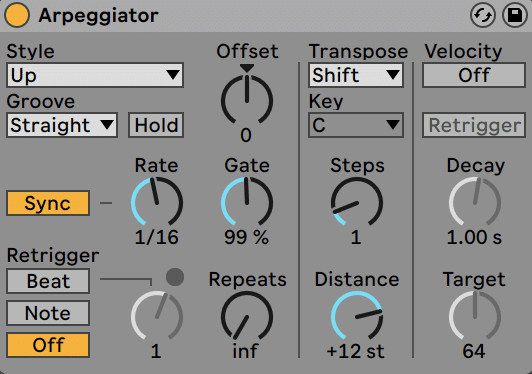
As I’m in Ableton, I’ll use its built-in device. I’m going to set the rhythm to 1/16, the gate to 99% (full-length notes), and the ‘Steps’ to 1, so it jumps the octave every 2nd repeat.
Feel free to tweak the preset to taste – I personally liked to have the LFOs synced to a straight rhythm (1/4th or 1/8th) rather than a syncopated one (e.g. 3/16th).
I also like to play with the filter cutoff to get some nice motion and energy over time. I’ve modulated it with the LFO as well and driven it quite heavily.
Lastly, I tweaked the wavetable position a little to get a slightly different tone out of the bass.
Whatever you end up coming with, make sure you sidechain the bass to your kick drum, as the sub-frequencies will be getting quite filled up now, and you don’t want too many frequency clashes.
If you want to take your arpeggiators to another level, check out this video from Luca on our YouTube channel:
#8: Building energy and tension
By now you’ll probably have a solid 8-bar loop, but now it’s time to break out of that and build some tension. Because techno is all about the long game.
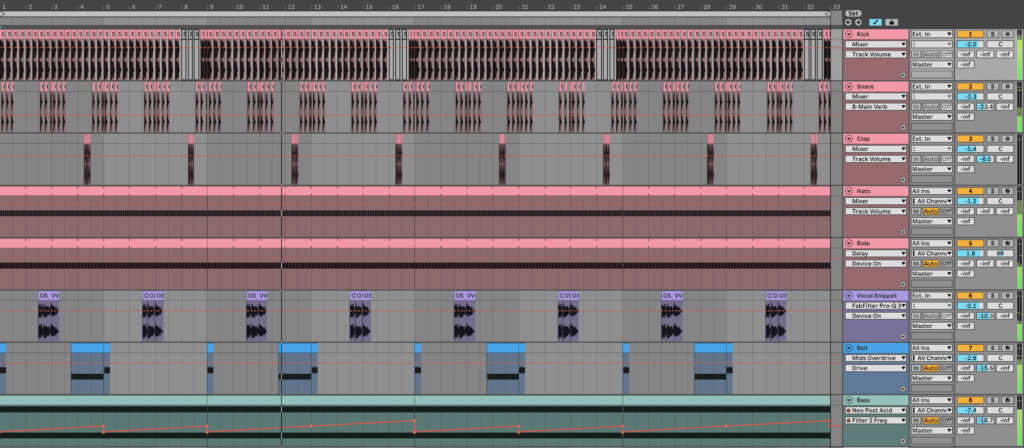
Duplicate your 8 bar loop at least 4 times, so you have 32 or more bars to work with.
Now we can add in additional sounds like FX, sweeps, and impacts. These will help to bring up the energy levels in certain sections.
Long Impact
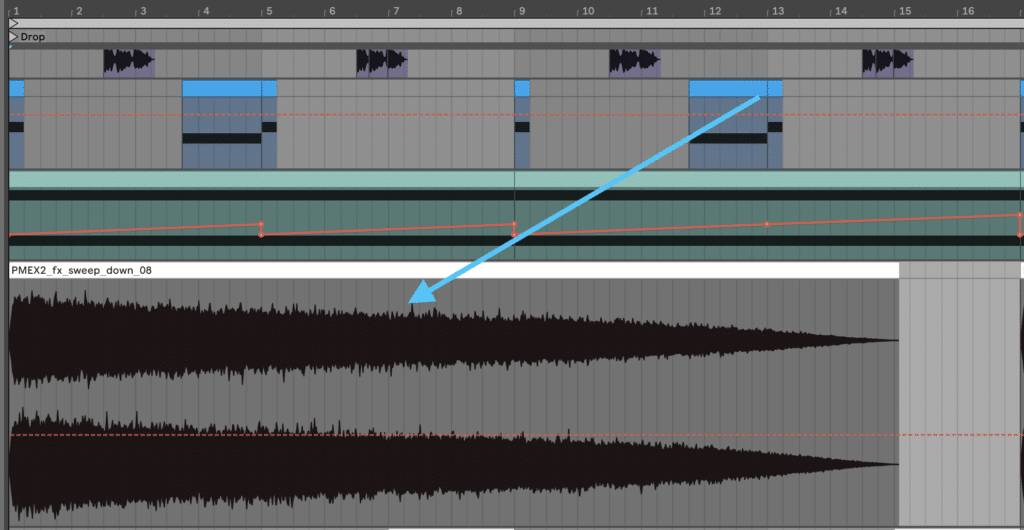
I’m going to start by bringing in a long noise impact.
This type of sound indicates the start of a new section and keeps up the energy.
This particular sample lasts nearly 16 bars, but yours may be shorter. This will just keep things interesting as the loop evolves.
I’m just going to place it on the first beat of every 16 bar phrase. Sometimes offsetting the rhythm by a beat or two before or after the 1 can work as well.
Metallic Sweeps
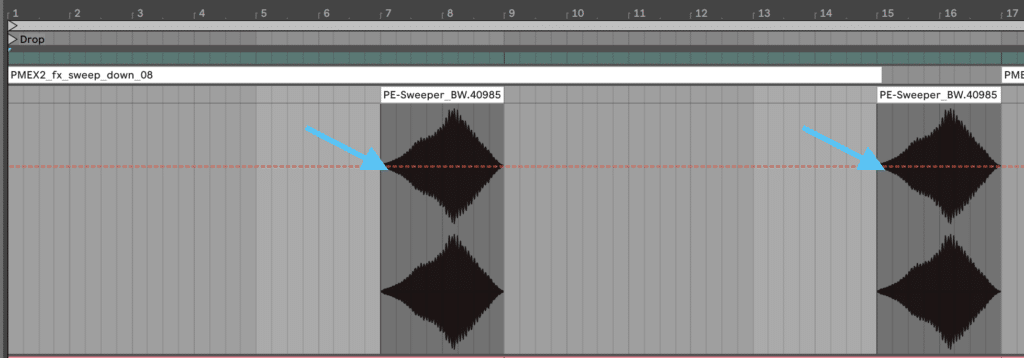
Metallic textures work well in techno because the tones can be quite jarring without fitting to a normal key.
I like to add some sort of subtle sweep every 8 bars, which creates anticipation for the next section.
You can use noise sweeps as well to layer them up if you like.
Get the headstart you need in music production with our EDM Starter Kit 🎛️
Get our collection of high-quality presets, samples and PDF guides – suitable for all genres of electronic music 👇
#9: Ambience and atmosphere
Part of the sound of techno is the atmospheric elements that swirl around in the background, putting the entire track in a different place.
Reverse Kick & Reverb
One of my favorite types of atmosphere for techno is taking the kick and turning that into a swelling bed of sound.
This creates that low-end boom, and in some techno tracks, it even replaces a normal bassline.
In this case, ours will be more subtle. Here’s my process for doing this:
- Copy the kick channel
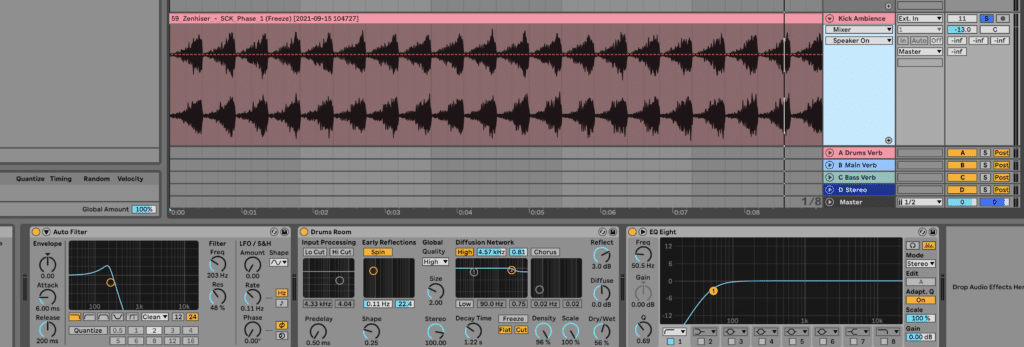
- Add a >1s reverb at 100% wet – make sure it has plenty of low end
- Bounce an 8 bar section to audio
- Reverse the 8 bars so the reverb sweeps into the kick
- Use a low pass filter to take all the mids and highs out
- Lower the volume so it doesn’t take over the mix
Here’s how mine turned out!
and with the original kick:
Field Recordings
Using reverb and delay on field recordings takes natural sounds and completely twists and mangles them.
Finding a 1 bar, 2 bar or 4 bar loop within these longer recordings often emphasizes the rhythmic nature of the track.
A few good candidates are samples of:
- birds chirping
- industral soundscapes (metallic)
- city recordings
Take this one step further by time-stretching and pitching these recordings to give them an eerie vibe.
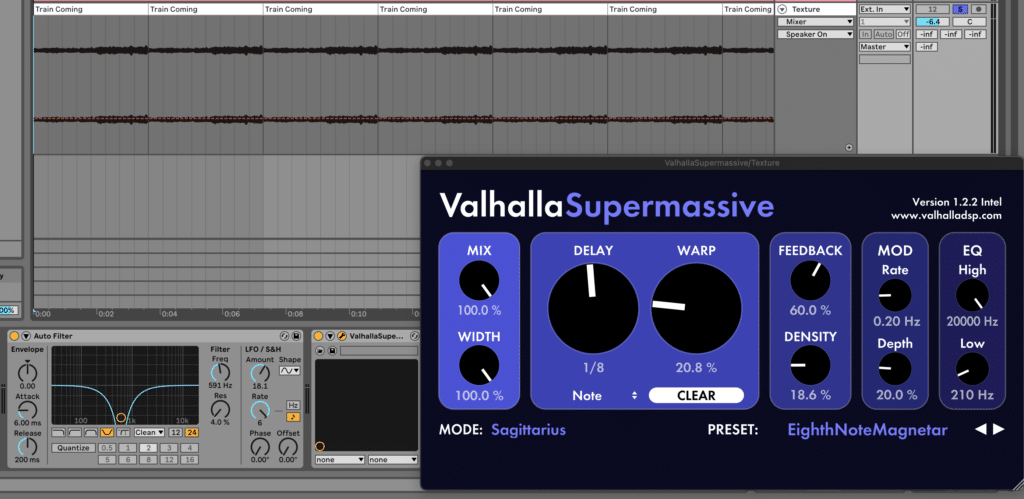
I personally used a train field recording, looped it every 2 bars, and reversed every 2nd one so it ‘sucked back’ into itself.
I finished this off with some notch filtering and reverb effects from Valhalla Supermassive:
#10: Keep things evolving (every 8 bars)
Not only is tension and energy about making slow changes over time, but it’s also about adding subtle bits of variation every 8 bars or so.
This can be as simple as:
- Adding or subtracting a percussion layer
- Changing up the percussion rhythm
- Bringing in a new synth line
- Removing an entire instrument (e.g. all drums)
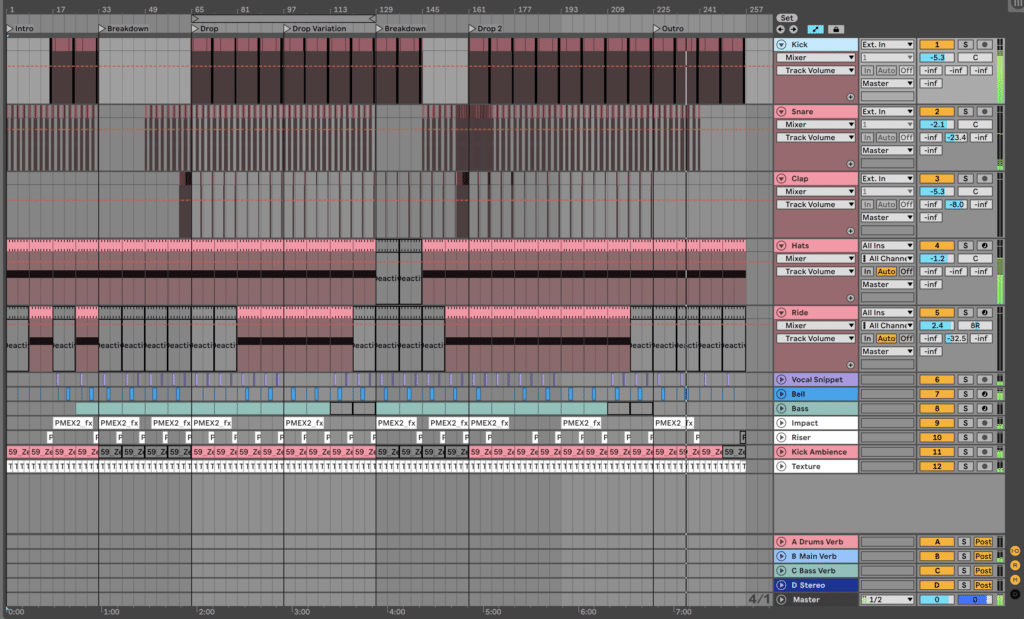
At this point, you’re going to be structuring your track and considering the overall movement of energy from intro to outro.
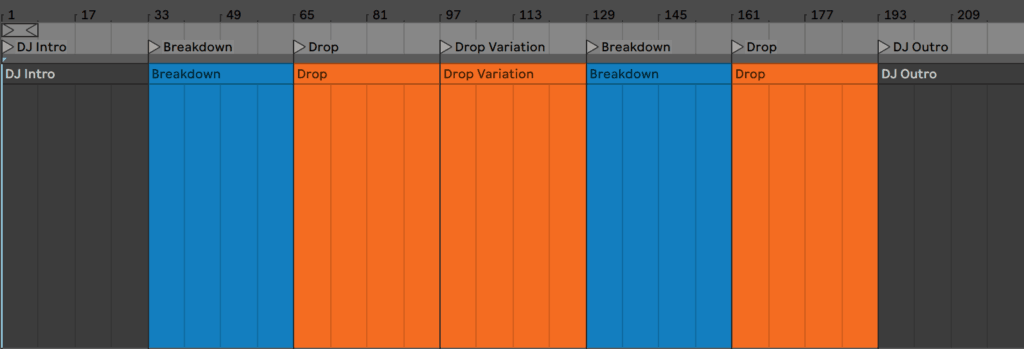
Here’s a standard structure for techno and house:
DJ Intro (16-32 Bars) – Breakdown (16-32 Bars) – Drop (16-32 Bars) – Drop Variation (16-32 Bars) – Breakdown (16-32 Bars) – Drop (16-32 Bars) – Outro (16-32 Bars)
Sections can be as short as 8 bars, but typically last 16-32 (2-4 repeats of 8 bars).
Here’s a quick breakdown of each section:
DJ Intro/Outro
Having some form of drums during the DJ intro and outro is important so DJs can mix it in a club. However, this doesn’t mean you still can’t get creative.
- Use all the drums except the kick drum – you can bring this in during the second 8 bars or save it for the drop
- Focus on just hats and tops during these sections, as they can create a lot of tension
- Tease the main hook before it comes in – use filtering, volume automation and other FX to bring it in slowly
- Use FX towards the end as the track approaches the breakdown to build energy
- Don’t just copy-paste the intro to the outro – make some interesting changes so that there are at least some differences
Here’s a good example of a peak-time techno track from UMEK and Cosmic Boys that does this very well:
Breakdown
In this section, it’s important you bring most elements out completely, especially the drums. Removing all drums creates the most contrast, however, some producers opt to keep a hat or ride going.
This is where you will introduce your main hook in some form. You can choose to leave a bit of silence before to give the breakdown maximum impact.
You can hear this in Charlotte de Witte & Enrico Sangiuliano’s remix of The Age Of Love (around 0:35 in this video):
In the last 8 bars of the breakdown, it will start to build energy towards the drop. Once again, bring in FX risers and other sounds to build it up. You can use claps, snares, and percussion with a rapid increase in speed to furthermore create that sense of energy.
Looking for the ultimate list of every single remix competition? We’ve got you covered here 🔥
Drop
The drop is the point of maximum energy in your track, and it’s typically where the kick and bass slam back in with full force.
You can hear a techno drop in this example here from Cosmic Boys (2:14):
You don’t have to include every element at this point, as normally the drop variation will build on the first part of the drop.
Drop Variation
As we’ve covered, techno is all about the long game. So the drop energy stays consistent for a majority of the track.
Often the energy increases during this section and then starts to decrease towards the end, which is why some drop variation sections can go for 32 bars (and sometimes longer).
There’s no right or wrong here – just make subtle changes based on where you want the track to go.
#11: The professional polish
Once you’ve crafted your track, added all the elements, and are happy with the general production, it’s time to turn to the last 10%.
These are areas such as:
- tightening up transitions
- removing unnecessary elements
- final synth and effect tweaks
- a full mixdown
- volume
- EQ
- a master (optional)
I’m not going to bore you with the 10, 20, 50, or 100 tweaks I could make to my track.
Here’s what I do what you to learn: that these small changes add up.
An EQ boost here, a volume change there, and removing a clap somewhere all contribute to creating the ideal end result.
A word of warning though: you can very easily get stuck here. Once you’ve been tweaking for too long, call the track finished, export it and call it a day.
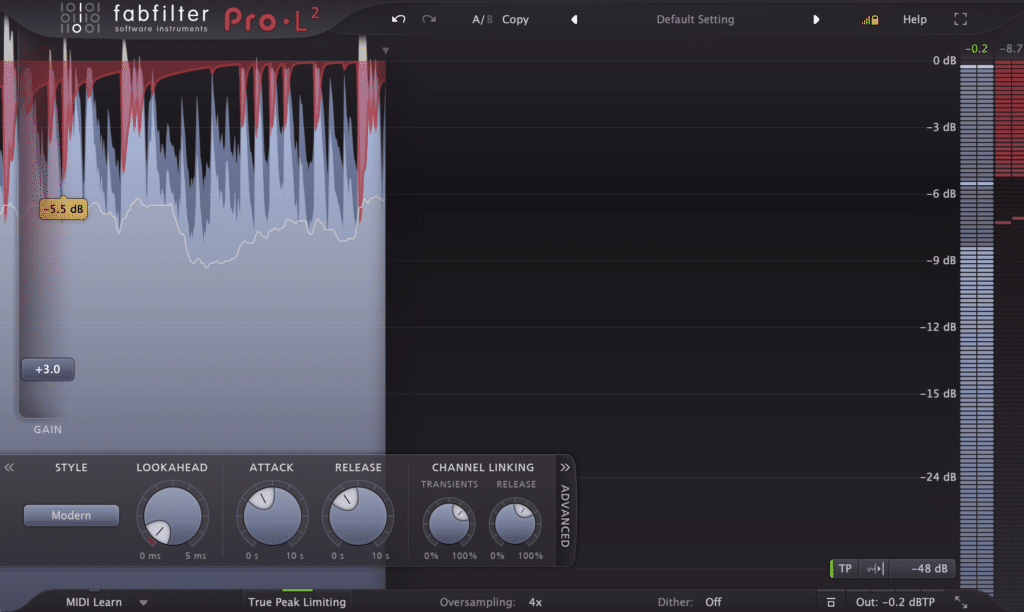
Whether or not you’re mastering your own work, test it out with a limiter to see how it sounds with a decent amount of loudness. I personally use FabFilter Pro-L 2 for this:
All that being said, here’s the final result!
In Closing
I hope you’ve learned a lot about how to make techno. If you apply these tips, I have confidence that you’ll be able to create great music.
But maybe you’ve gone through all of these tips and still feel a little stuck. Some stuff might have just gone over your head.
If this sounds like you, we have a free video training for producers just like you. You’ll learn:
- How to re-shape your mindset towards music production
- A roadmap for learning everything you need to know
- The #1 way producers build solid foundational skills
Sign up here 👇
New to music production? 🧑💻
Watch our Free Masterclass on how to learn electronic music production the smart way (without months of confusion & frustration) 👇

